How to install lawn edging: metal & plastic garden border edges guide
Lee Burkhill: Award Winning Designer & BBC 1's Garden Rescue Presenters Official Blog
Intermediate level
Lawn edging is one of the easiest ways to reduce garden maintenance Without it, you're left having to edge the lawn every month or so as the grass encroaches into your flower beds. By fitting lawn edging, you can save yourself all this lawn maintenance hassel.
Lawn edging and flower border edge strips are really effective at keeping your garden, flower beds, and lawn looking sharp all year round. In fact, it’s one of my garden design secret weapons! I use lawn and border edging in most of my designs to help reduce garden maintenance and give you more time to simply enjoy your garden!
These clean edges prevent grass from growing into your flower beds and completely eliminate the need for a half-moon edger, saving huge amounts of time when maintaining your lawn or flower beds.
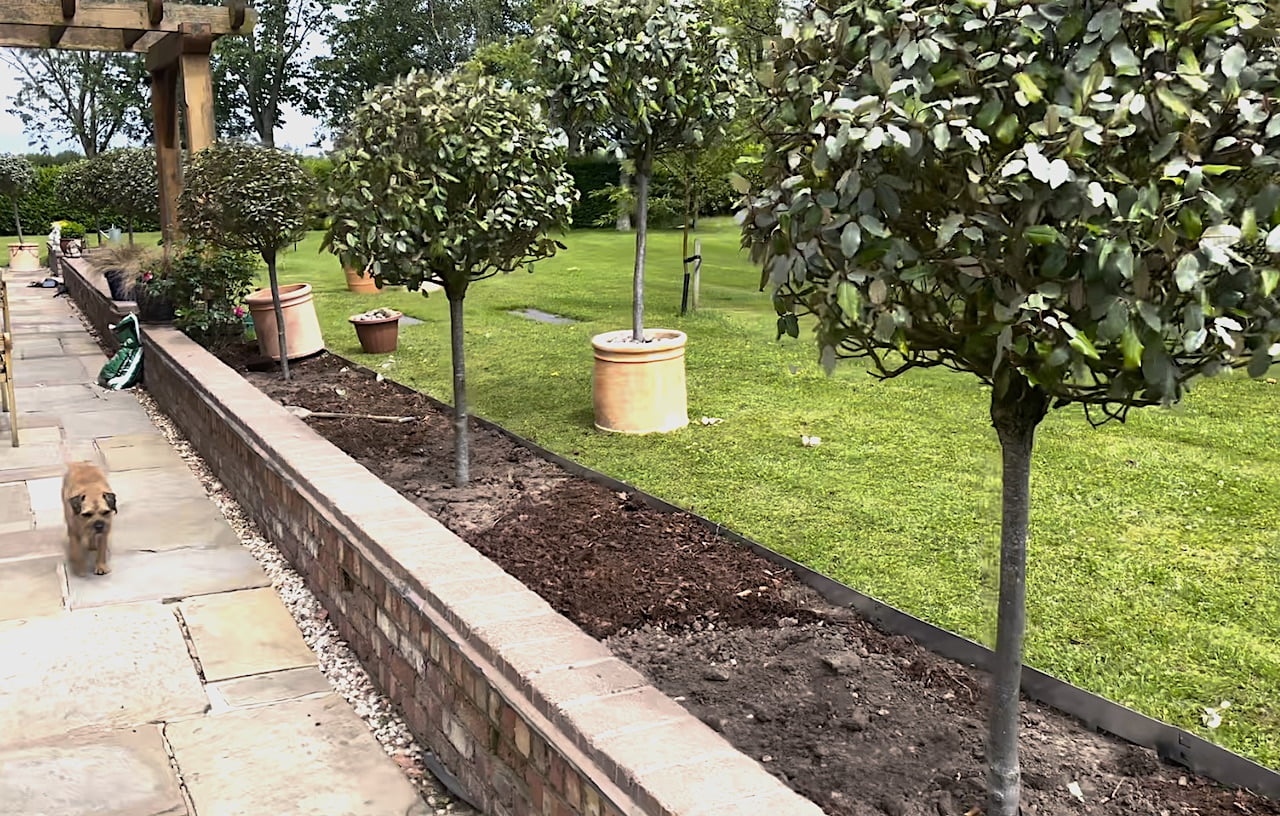
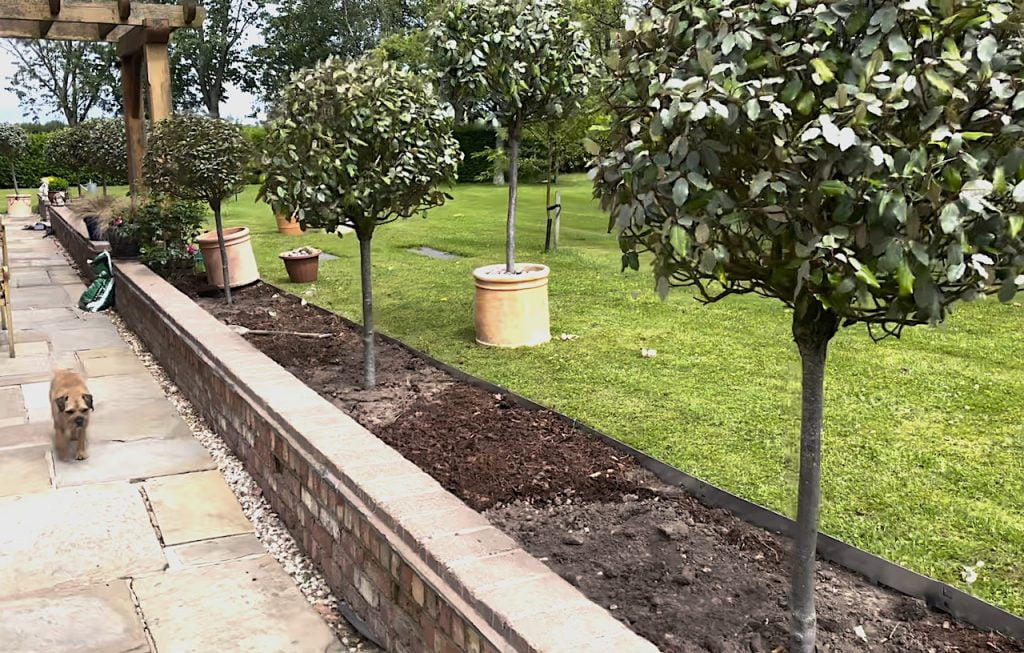
Lawn edging is a strip of metal, plastic or other weatherproof material, such as bricks, that is used to provide a barrier between your lawn and any flower beds.
It helps define the edge and reduce the amount of time spent with a half-moon edger, cutting clean turn lines each year. This is because the lawn edging prevents grass from growing into your flower bed,s which in turn reduces weeding or grass removal!
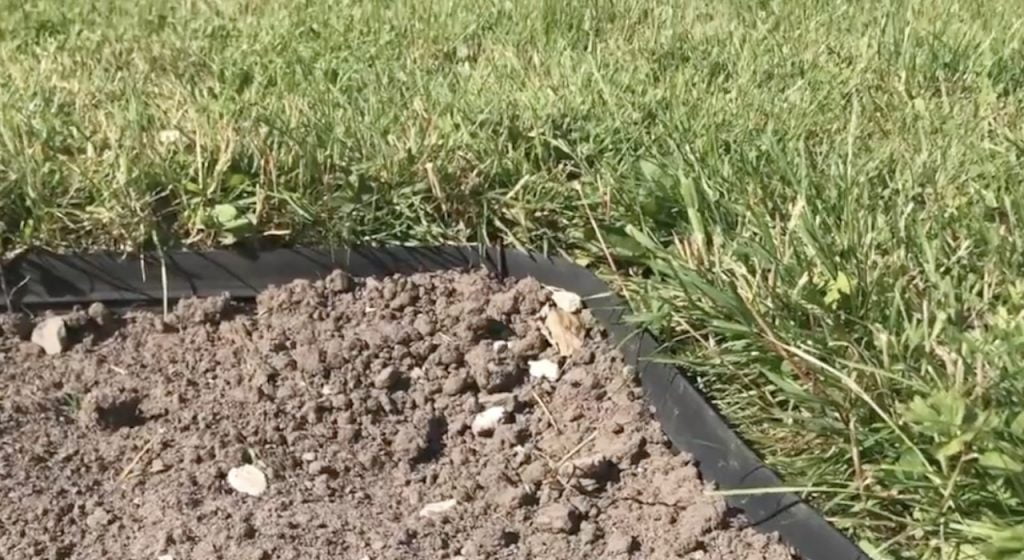
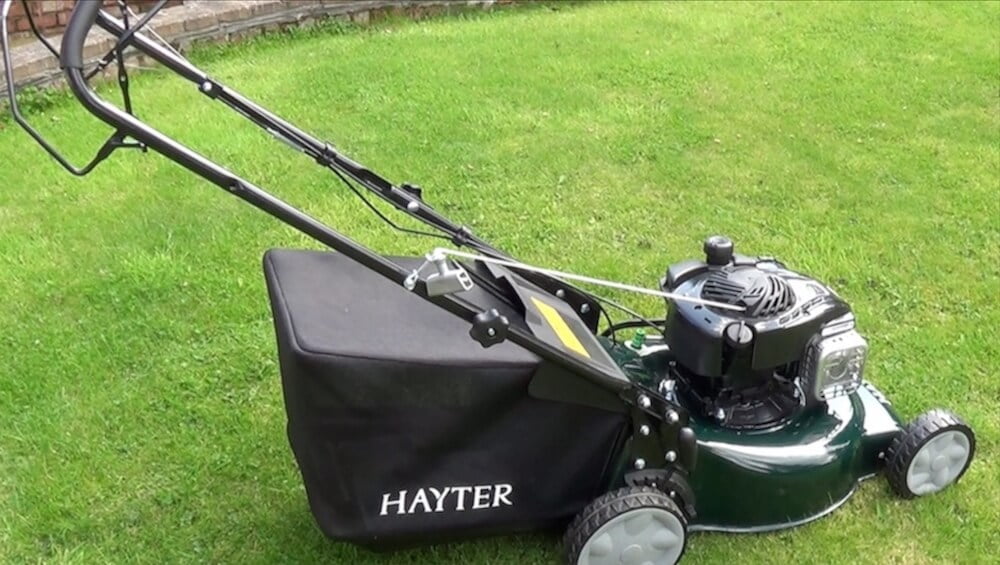
Ideally, lawn edging is low enough to be mowed over but high enough to stop grass from growing over it. This is why most lawn edging sticks up 3mm above the soil level. Given most lawns are mowed with a few centimetres of clearance, the strip doesn’t catch on the mower.
Lawn edging can also be used as a design aesthetic to provide a striking contrast between the lawn and the flower bed. In particular, corTen steel (which turns bright orange in the rain) or coloured edging strips can really offset against the bright green lawn.
How to stop grass growing into flower beds
Lawn edges, such as metal or plastic edging strips, prevent the need to manually ‘edge’ your flower beds and lawns with a half-moon edger. Without this strip twice a year, you’ll be cutting the entire edge of your lawn with edging shears or a half-moon edger. It’s boring, thankless, and a waste of time in your gardening year!
What’s the best way to keep a clean lawn edge?
The best option for clean lawn edges is to use edging strips that sink into the soil. They provide a barrier from grass and weeds growing into your flower beds and help keep your lawn’s shape crisp all year round, even in winter!
Tools needed to fit lawn edging
Fitting lawn or flower bed edging is super simple. Any gardener, no matter what your experience, can fit it without the need for a contractor or specialist. All you need is a bit of time and a dry sunny day in your garden with the correct tools.
The following tools are required for this easy garden task when fitting lawn edging:
Fitting lawn edging is relatively easy and doesn’t require a degree in DIY or landscaping. The process is the same for both metal and plastic edging.
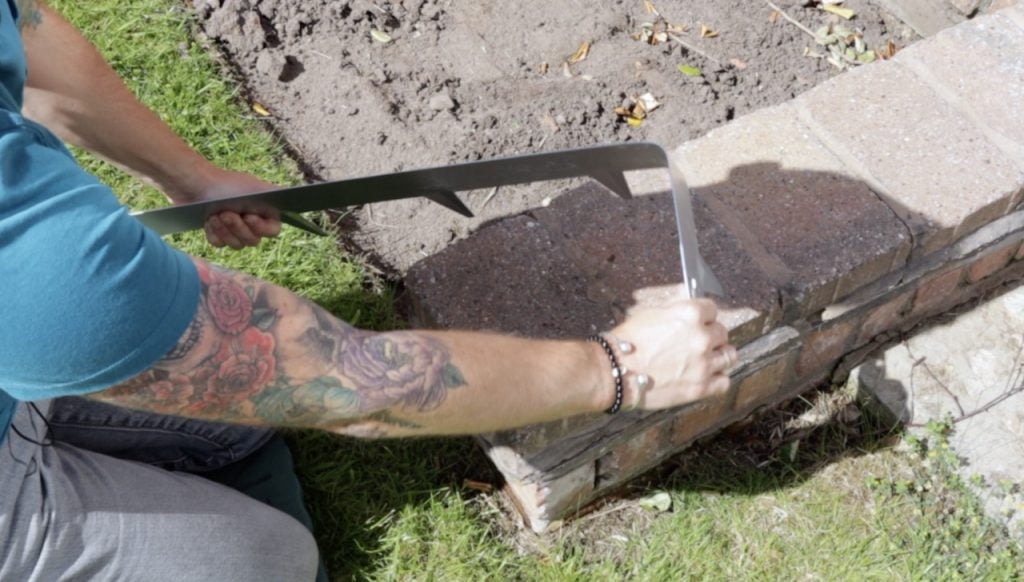
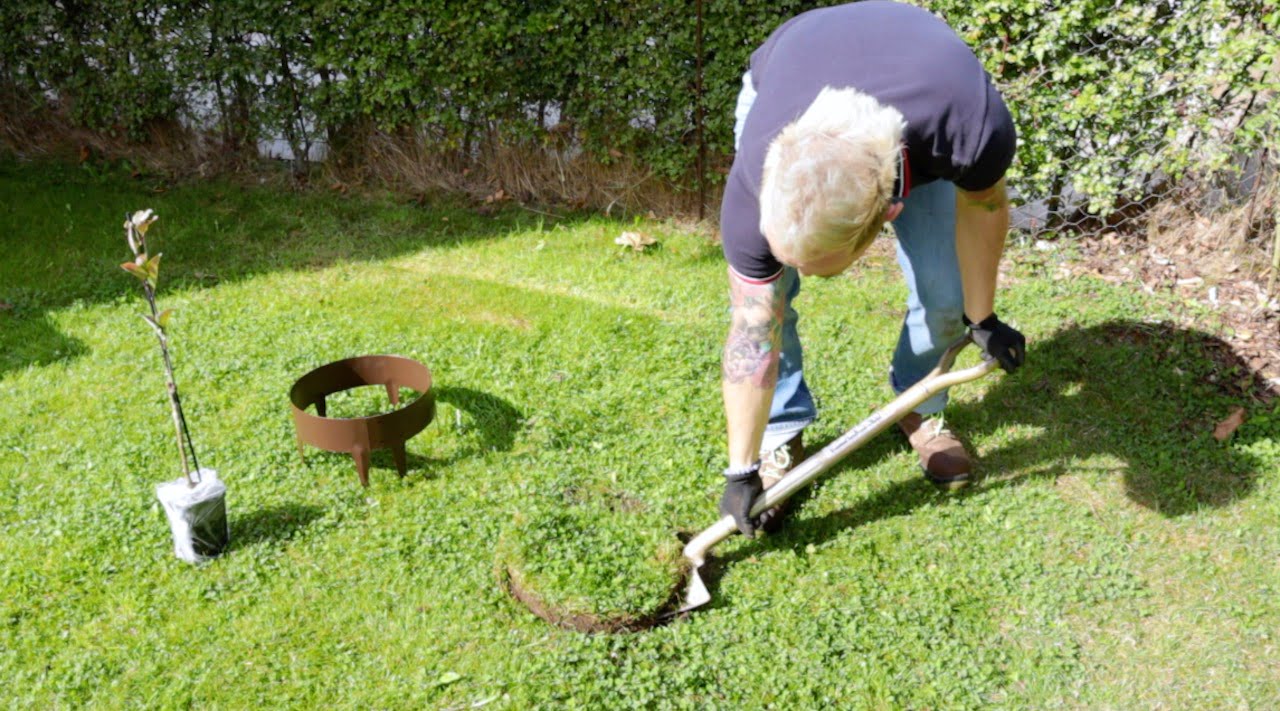
Step 1: Cut a neat edge between the flower bed and lawn
This helps define the space and gives you a clean line to start with. Use a sharp spade or half-moon edger to create your newly defined lawn.
Any turf that’s dug up can be easily composted by turning it upside down and leaving it for 6 -9 months. Usually, the back of a shed or border is an ideal place to do this. This allows the turf to rot down, leaving beautiful loamy soil.
Step 2: Work out how much edging you need
Using a tape measure, work out how many meters of edging you need. Remember that corners look better if made from one continuous piece that has a join on a bend or corner.
Lay out your edging.
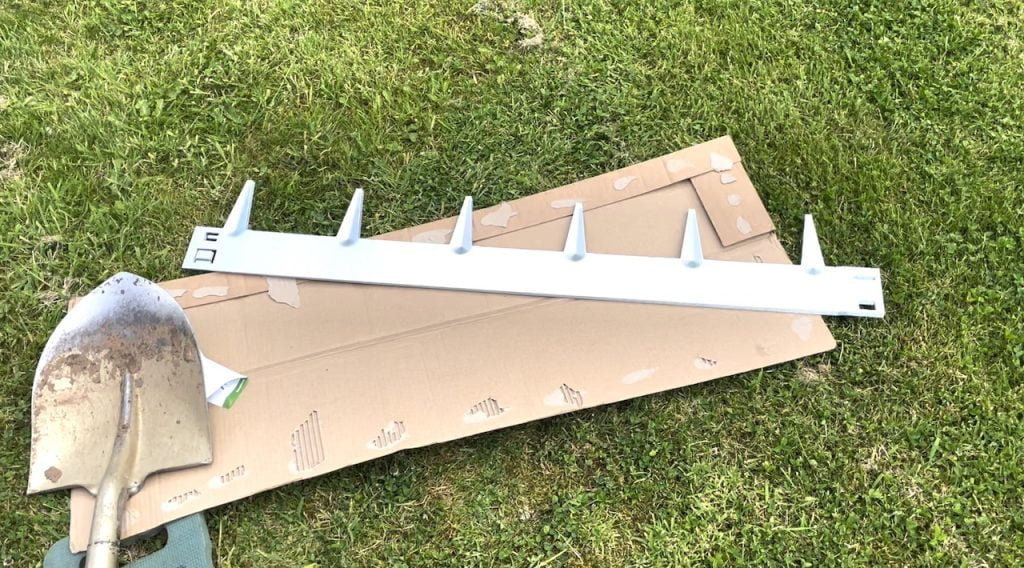
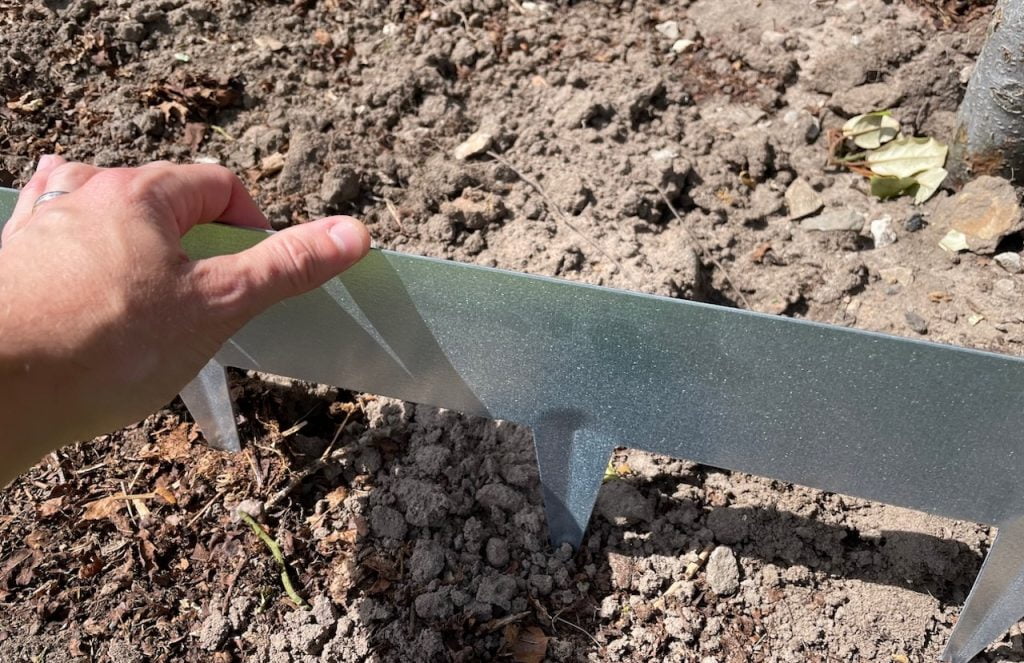
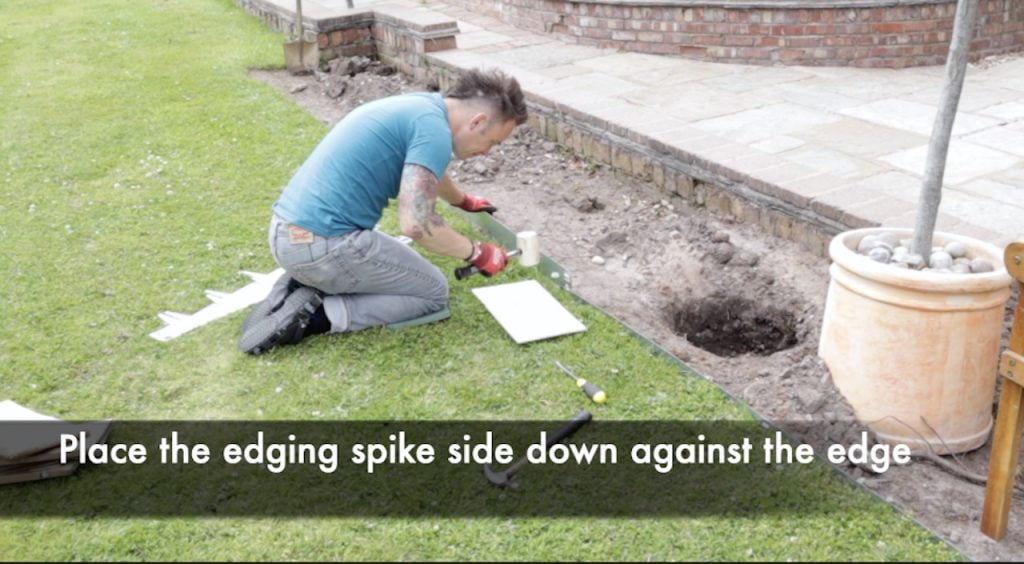
Step 3: Push the metal spikes into position
You want to position the edging right up against the turf with the spikes facing downwards. These will be the anchors for the strip to stabilise it in the soil.
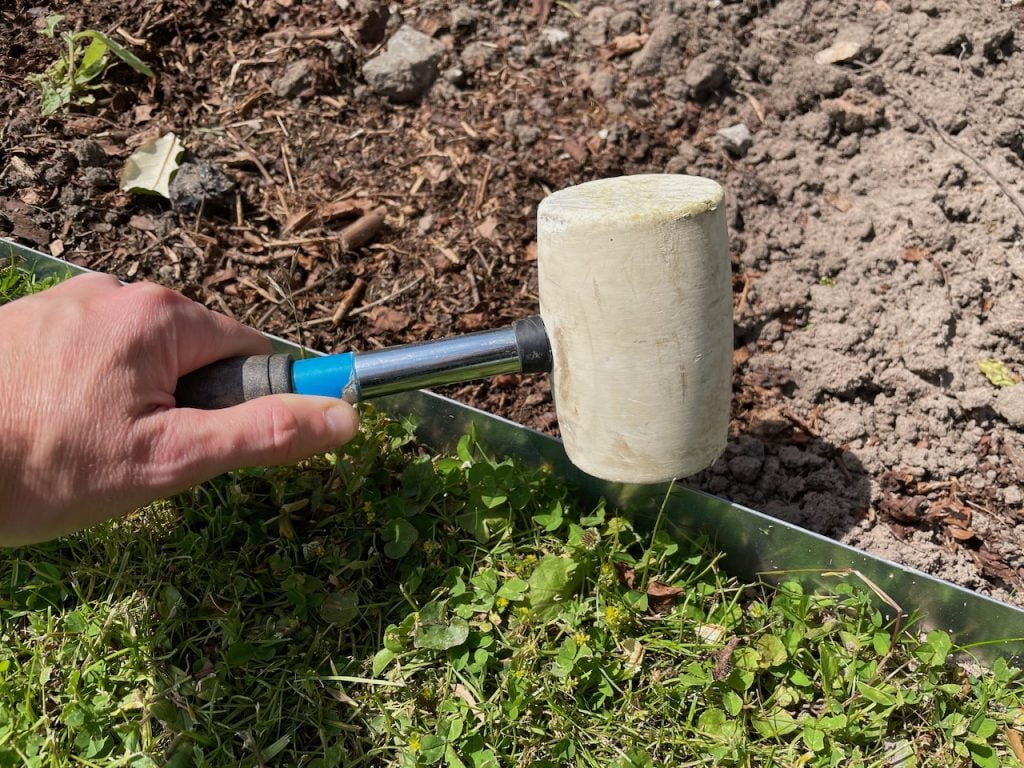
Step 4: Use a mallet to evenly embed the strip into the ground
You want to embed the lawn strip so 3mm is above the soil level of the turf. This allows for easy mowing. You can use the wooden block to even out the pressure from the mallet and stop the metal from being damaged.
Hammer in the lawn edges in a uniform fashion. You may need to work from one side to the other in a repetitive fashion until it’s level.
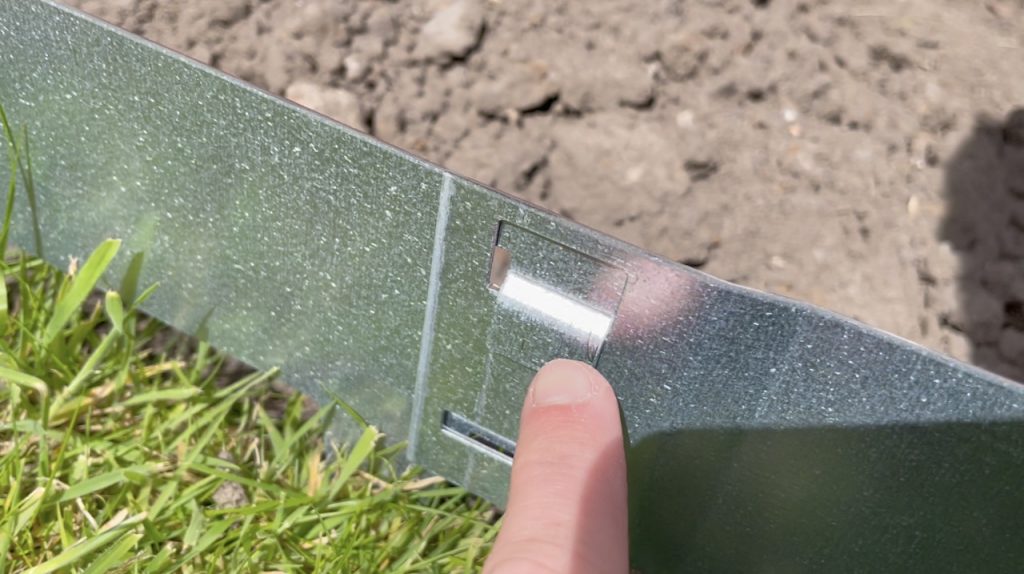
Step 5: Connect the strip using the connector or pins
Most metal edges come with a connector that overlaps slightly on one side, usually the right side. Connect these together to ensure the line is unified and doesn’t bend or flex apart from each other. The screwdriver can help manipulate the connector to fit snugly!
You may need to use the mallet again after this to ensure it’s level.
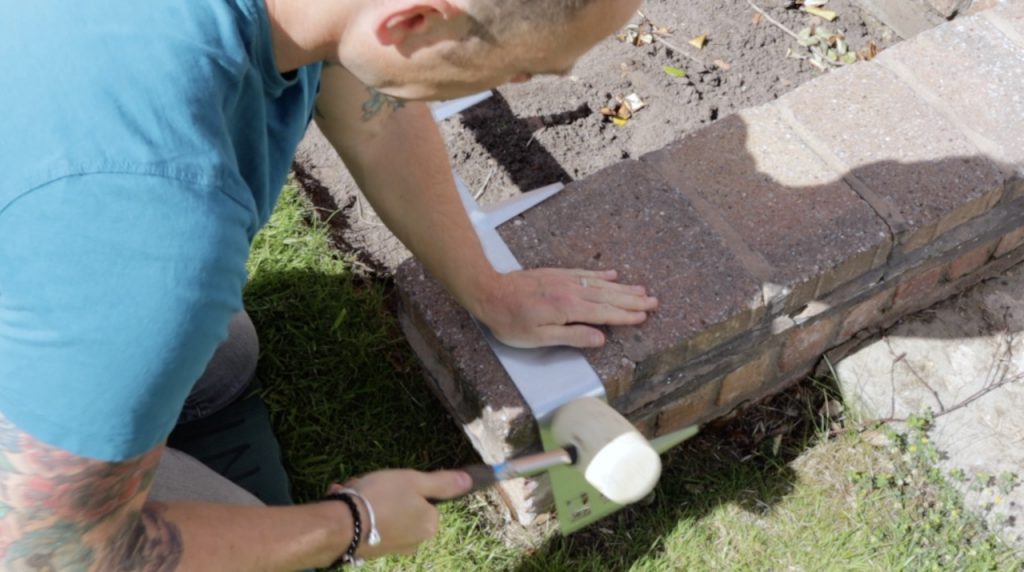
Step 6: Dealing with corners
With metal edging, it’s easy to bend the lawn strip to accommodate corners or even right-angled bends.
Work out where the corner needs to start and then use a strong flat edge, such as a wall, block or piece of wood. You can then bend the edge round by hand. Finish it off by using the mallet to create a flush neat bend. Then fit as you would a regular strip.
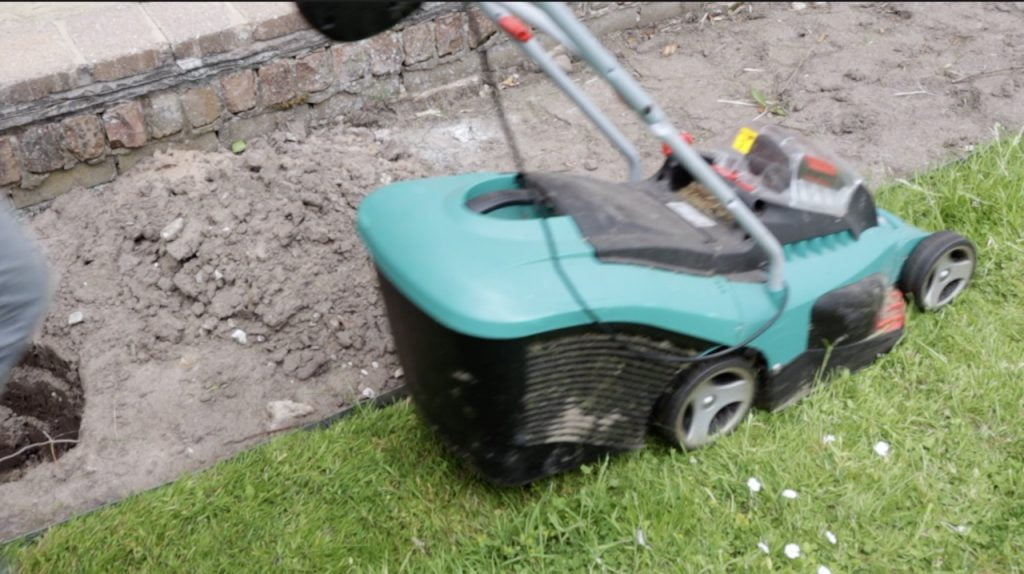
Step 7: Check it’s low enough for the mower to pass over
If your edging is 1-3mm above the soil level your mower on setting 3 (the lowest of most mowers without scalping a lawn) will pass over easily for perfect edges!
How to fit plastic lawn edging
Fitting plastic lawn edging is the same as above, apart from the fact that usually, they don’t come with spikes. Plastic garden edging usually has to be dug into a mini trench or slit. So it can be more time-consuming.
Step 1: Dig a trench that’s at least 10cm deep for the edging
Use a sharp spade and dig your trench along the side of the newly neatened lawn.
Dig your trench for lawn edging 3–6 in (7.6–15.2 cm) deep, depending on soil type (clay soil may be shallower as it will bind more easily, whereas sandy soil will need to be deeper).
Step 2: Backfill the trench to secure the strip
Using your heel, backfill the flower bed of the strip so it’s secure. Ensuring the strip is straight and not at a lean where it can catch your mower’s blades.
Step 3: Use pins, tent pegs or grips to join together.
Plastic lawn edging also uses pins to give it a firm grip and allow you to connect multiple pieces together in one run. It’s always best to try to get the longest run out of one piece rather than joining pieces together. It looks better and is easier to manage.
Installing Lawn Edging on Slopes and Gradients
After twenty years of designing gardens across every conceivable terrain, I can tell you that slopes present the single biggest challenge for lawn edging installation.
Gravity pulls everything downhill, which sounds obvious until you’re hammering edging into the ground and not thinking about what happens during the first heavy rainstorm. Water flowing down slopes creates enormous pressure behind your edging, particularly where you’ve created a dam effect by blocking natural drainage patterns. Add in frost heave during winter, and you’ve got the perfect recipe for edging that gradually migrates southward whether you like it or not.
I’ve found through hard-won experience that any slope exceeding 15 degrees requires modified installation techniques (that’s steeper than it sounds, about 1 metre drop over 4 metres horizontal). Gentle slopes under 15 degrees can usually be handled with standard methods plus a few extra precautions, but anything steeper than that and you’re entering territory where professional installation might save you considerable frustration.
The perpendicular installation principle
Here’s something most DIY guides completely miss. When installing edging on slopes, the absolute worst approach is running it straight down the fall line. I see this mistake constantly, and it’s guaranteed to fail because all the pressure from soil movement, water flow, and frost heave acts directly against the edging’s weakest dimension.
Standard installation depth of 10-15cm simply isn’t sufficient on slopes. I recommend increasing burial depth to 15-20cm, which means choosing taller edging to maintain the desired visible height. EverEdge specifically designed their Pin and Sleeve system for exactly these challenging situations, providing additional anchoring that prevents lateral movement.
The Pin and Sleeve system works brilliantly because it anchors the edging at regular intervals along its length rather than relying solely on the friction of soil against the edging material. On slopes, I install these anchoring pins every 30-40cm rather than the standard 50-60cm spacing used on level ground. This might seem excessive, but it’s the difference between edging that stays put for decades and edging that needs reinstalling every few years.
Drainage considerations that nobody mentions
Creating artificial barriers across slopes without thinking about drainage is asking for trouble. Water needs somewhere to go, and if your edging acts as a dam, pressure will build until something gives. I’ve seen edging literally lifted out of the ground by water pressure during heavy rainfall, particularly in clay soils where drainage is already compromised.
The solution is strategically placed drainage breaks. For metal edging on slopes, I cut small relief notches in the lower edge every 2-3 metres to allow water passage. These notches are barely visible once installed but make an enormous difference to long-term stability. The water can drain through rather than building up behind the edging, and you avoid creating boggy patches on the downhill side where grass struggles.
When slopes require stepped installations
For compound slopes or gradients exceeding 20 degrees, continuous edging simply doesn’t work reliably. Instead, I create terraced sections with level platforms separated by vertical or near-vertical drops. Each level section gets standard edging installation, whilst the vertical sections between levels use different materials like sleepers, stone, or engineering brick that are designed to resist vertical loads.
This terracing approach requires more planning and labour, but it creates genuinely stable results that won’t require remedial work. The key is ensuring each terrace level is genuinely flat (spirit level, not eyeball judgement) before installing edging. Even a slight fall across a terrace will create cumulative stress over the edging’s length.
Which is the best metal or plastic lawn edging?
In my work, I’ve used both metal and plastic. If money is no object, then metal garden edging wins hands down in terms of ease of installation and also lifespan. It tends to fail less, whereas plastic strips can sometimes pop up if not secured properly.
There are other materials you can use to edge lawns and flower beds, such as bricks, concrete, logs or even willow rolls. Let’s look at the cost differences.
The “best and easiest” material depends a bit on what you’re aiming for—whether it’s low maintenance, a natural look, affordability, or ease of installation. Here’s a breakdown of the top options, ranked by ease and effectiveness for beginners:
i) Plastic or Rubber Edging
Best for: Budget-conscious gardeners who want something quick, flexible, and easy.
Pros:
Super easy to install—just dig a shallow trench and press it in.
Flexible for curves and wavy borders.
Often made from recycled materials (eco-friendly versions available).
Affordable and widely available in garden centres and DIY shops.
Cons:
Doesn’t look super “high-end.”
Can lift or warp over time if not installed deep enough.
Ninja Tip: Choose a heavy-duty recycled rubber version for better durability and environmental benefits.
ii) Timber Edging (e.g., Treated Sleepers or Logs)
Best for: Rustic or cottage-style gardens.
Pros:
Natural look that blends with planting schemes.
Easy to source and install (lay in place, peg in if needed).
Cons:
It will rot over time unless properly treated.
Heavier and less flexible than plastic.
Ninja Tip: Raise timber slightly on gravel or stones to prevent direct contact with wet soil—this extends its life.
iii) Metal Edging (Steel or Aluminium)
Best for: Sleek, modern gardens or clean geometric designs.
Pros:
Long-lasting and durable—steel versions can last decades.
Flexible enough for curves, but stays rigid once installed.
Dry-lay bricks for a simple mowing edge without needing mortar—easier for beginners.
Material
Cost
Ease of Install
Durability
Style
Plastic/Rubber
£
⭐⭐⭐⭐⭐
⭐⭐
Casual
Timber
££
⭐⭐⭐⭐
⭐⭐⭐
Rustic
Metal
£££
⭐⭐⭐
⭐⭐⭐⭐
Modern
Brick/Stone
££££
⭐⭐
⭐⭐⭐⭐
Traditional
Cost Differences Between Lawn Edging
Material
Cost per Metre (£)
Pre-formed Concrete
20 – 30
Timber (Wood)
5 – 8
Brick (End-to-End)
25 – 35
Brick (Side-by-Side)
65 – 85
Metal
50 – 100
Plastic
7 – 15
Bamboo
9 – 12
Willow
7 – 9
Log Roll
6 – 15
EverEdge Classic (7.5 cm height)
7 – 10
EverEdge Classic (10 cm height)
9 – 12
EverEdge Classic (12.5 cm height)
10 – 14
What’s the price difference between metal and plastic lawn edging?
The cost is a consideration when you consider that metal edging can be £8-10 per meter vs plastic, which is around £2 per meter. In larger gardens, this can soon add up, making it a costly choice.
However, steel looks far neater and is more robust than plastic lawn edging in my professional opinion!
What is Everedge lawn edging?
Everedge is a proprietary form of metal edging from the UK. Everedge is one of the best and well-recognised brands as it is super easy to fit, available in a range of colours and has a great life span. The edging used in my guide was Everedge, but they did not endorse or sponsor it.
I’m not one for endorsing specific products unnecessarily, but after fifteen years of using EverEdge in my own garden and specifying it for probably 80% of my client projects where metal edging makes sense, I can speak with genuine authority about what makes this product different from the dozens of alternatives flooding the market.
The truth is most metal edging products work reasonably well. The difference between adequate and excellent comes down to details that only become apparent after years of use. Details like how the connections hold up through freeze-thaw cycles, whether the powder coating withstands strimmer contact, and whether the material remains flexible enough to create smooth curves after a decade in the ground.
EverEdge gets these details right in ways that matter for long-term performance.
What actually makes EverEdge different
The core innovation is the interlocking tab system that connects sections without screws, bolts, or separate joining pieces. Each 1-metre section has a male tab at one end and a female slot at the other, creating secure connections that accommodate some ground movement without separating whilst maintaining perfectly aligned top edges.
This sounds trivial until you’ve wrestled with edging systems requiring you to align bolt holes in flexible metal whilst maintaining perfect height and angle. The EverEdge system takes seconds per connection, produces invisible joints when installed correctly, and has genuine mechanical strength because the connection distributes forces across the full height rather than depending on small bolts.
The integral spikes are the second smart design feature. These project 10cm below the main body on standard heights, automatically achieving correct burial depth when you hammer the edging flush with turf level. The spikes angle slightly forward, creating progressively increased grip as you hammer deeper. In stony ground where the spikes hit obstacles, they fold forward rather than deforming the main body, meaning the edging itself remains undamaged even when installation is difficult.
The flush-top design matters more than you’d think. The top edge can sit exactly level with turf or just above is my preference, meaning you can run your mower directly over it without scalping grass or damaging mower blades. This eliminates strimmer work along edges, saving considerable time over years of maintenance. Cheaper metal edging often projects above turf level, creating that annoying line of grass that needs strimming weekly.
The Issues with Everedge
These mainly come from very rocky ground or heavy clay new build gardens. The criticism that resonates most strongly is about rocky ground. If you’ve got very stony soil, particularly builders rubble in new-build gardens, attempting to hammer EverEdge spikes directly will frustrate you enormously. Pre-dig a narrow trench (you’ll need this anyway for builders rubble), position the edging, then backfill. This completely eliminates the rocky ground problem whilst adding perhaps twenty minutes to total installation time.
Common Lawn Edging Mistakes to Avoid
After installing hundreds of metres of lawn edging in client gardens and rescuing countless failed installations, I’ve developed something approaching a sixth sense for spotting problems before they happen. That slight wobble. That barely perceptible lean. The tiny gap where two sections haven’t quite connected properly tells me exactly what shortcuts were taken on installation day.
The frustrating thing about edging mistakes is that they rarely show themselves immediately. Everything looks perfect for the first few weeks, then one heavy rainstorm or hard frost later, problems emerge that require complete reinstallation. Save yourself the aggravation by avoiding these seven mistakes I see repeatedly.
Mistake 1: Not digging deep enough
This is far and away the most common problem I encounter. People look at metal edging with 10cm visible height and think they only need to dig a shallow trench. Wrong. Your edging needs to be buried at least 10-15cm deep, which means that 10cm edging actually needs 20-25cm total height and the lower half goes underground.
Why does depth matter so much? First, frost heave during winter will gradually lift shallow edging out of the ground, leaving it wobbling about like a loose tooth. Second, grass roots absolutely will grow underneath edging that’s only buried 5cm, defeating the entire purpose. Third, shallow installation provides no stability against lateral forces from soil expansion, vehicle traffic, or simply leaning on your spade whilst weeding.
The correct depth is when approximately one-third to one-half of the total edging height sits below ground level. EverEdge and similar metal systems include integral spikes that automatically achieve this depth when hammered flush with the turf surface.
Mistake 2: Hammering directly onto the edging material
I wince every time I see someone take a lump hammer straight to metal edging. Yes, the material is tough, but direct hammer blows deform the top edge, creating an unsightly wavy line and potentially damaging the powder coating that protects against rust. Plastic edging is even worse, cracking or splitting under direct hammer impact.
Always use a wood block or specifically designed installation tool as an intermediary between hammer and edging. A simple 20cm length of 4×2 timber works perfectly, distributing the hammer blow over a wider area and preventing localised damage. This takes slightly longer but produces immeasurably better results. The top edge of your edging should be perfectly straight and undamaged when installation finishes.
Mistake 3: Choosing the wrong material for your ground conditions
Not all edging materials suit all soil types, yet I constantly see inappropriate choices made purely on price or appearance. Heavy clay soil requires edging that won’t rot, crack, or deform under the enormous pressures clay exerts during wet and dry cycles. That rules out most plastic edging and certainly anything made from timber unless you’re prepared for replacement every 5-7 years.
Sandy or stony ground presents different challenges. Plastic edging with short stakes struggles to find purchase in loose sand, gradually working free over time. Metal edging with longer integral spikes works far better, biting into deeper, more stable soil layers. Rocky ground can bend or fold thin metal edging’s spikes when you hit concealed stones, requiring pre-digging of trenches rather than direct hammering.
Mistake 4: Ignoring drainage patterns
Creating barriers across natural water flow without thinking about consequences causes more edging failures than almost anything else. Your lawn isn’t as flat as it looks, water is moving across and through it constantly, and edging creates dams whether you intend to or not.
The classic problem happens when someone installs continuous edging across a gentle slope, inadvertently creating a dam that traps water uphill of the edging. The lawn becomes waterlogged, grass dies, and pressure builds until something gives. Before installing any edging, spend time observing water movement during and after rainfall. Where does water naturally flow? Are there low spots that collect water?
Mistake 5: Installing in waterlogged conditions
I know the temptation. You’ve got a free weekend, the edging arrived last week, and you’re keen to get the job done. Unfortunately, it’s been raining for three days solid and your lawn resembles a wetland nature reserve. Don’t do it. Just don’t.
Installing edging in waterlogged soil causes multiple problems. The trench you dig immediately fills with water, making it impossible to judge correct depth. Saturated soil provides no stability, meaning edging installed today will shift tomorrow as soil settles. Walking on wet ground causes severe compaction that damages soil structure and harms grass health for months afterward.
Mistake 6: Cutting curves too tight for the material’s flexibility
Every edging material has a minimum bend radius, beyond which it will either kink, crack, or require cutting and rejoining. Yet I regularly see installations where someone has tried to force rigid material around curves it simply cannot navigate smoothly, creating ugly crimps and weak points where failure is inevitable.
Metal edging like EverEdge is remarkably flexible for smooth curves, but even it has limits. Trying to create a 30cm radius curve with 2.5m rigid sections requires cutting and overlapping or choosing a more flexible product specifically designed for tight curves. Plastic edging might seem more forgiving but often cracks when bent beyond its design limits, particularly in cold weather.
Mistake 7: Standing on the wrong side when working
This sounds trivial until you’ve watched someone systematically compact and damage the lawn side whilst carefully preserving the border side they’re about to dig up anyway. Always work from the border side, standing in the area you’re about to excavate, not on the lawn you’re trying to protect.
This becomes particularly important when backfilling around newly installed edging. Compacting soil by standing on the lawn side creates a hard, compacted zone right where you want healthy grass growth, whilst the border side where plants will grow receives no compaction. Do it backwards.
Mistake 8: Forgetting to account for overlap
Here’s a mistake that catches out even experienced DIYers. You measure 20 metres of border, order four 5-metre packs of edging, and congratulate yourself on precise planning. Then during installation you discover that each connection point requires 5-8cm overlap, meaning your four packs actually provide 19.6-19.8 metres coverage. You’re now scrambling to find additional sections.
Always add 10-15% to your measured length when ordering materials. This covers not just overlap requirements but also mistakes, damage during installation, and future repairs. Better to have a spare pack in the shed than to leave a 50cm gap because you calculated too precisely.
How deep should lawn edging be buried?
Lawn edging should be buried 10-15cm deep, with approximately one-third to one-half of the total height below ground level. This depth prevents frost heave during winter, stops grass roots growing underneath, and provides stability against lateral forces.
Is metal or plastic lawn edging better?
Metal edging is superior for most applications, offering 15-25 year lifespan compared to plastic’s 5-10 years, requiring zero maintenance versus plastic’s periodic adjustment. The initial cost is higher but cost-per-year analysis strongly favours metal.
How do I keep lawn edging in place?
Proper depth is the single most important factor, with 10-15cm burial providing stability. For additional security on slopes, use supplementary ground anchors every 30-50cm. Metal edging with integral spikes significantly outperforms surface-mounted designs.
Do you need to dig a trench?
Yes for most edging types. Metal edging with integral spikes can sometimes be hammered directly into soft soil, but pre-digging a narrow trench produces dramatically better results. The trench should be 12-15cm deep, approximately 8-10cm wide.
How long does metal lawn edging last?
Quality galvanised steel edging lasts 15-25+ years minimum, with many installations exceeding 30 years. My own EverEdge installation is fifteen years old and looks virtually identical to installation day. Corten potentially lasts 30-40+ years.
How do you bend metal lawn edging?
Metal edging designed for gardens like EverEdge flexes naturally for gentle curves without special treatment other than some elbow grease! For curves with radius over 1 metre, simply guide the edging during installation. Very tight curves under 50cm radius may require cutting and overlapping.
What is the easiest lawn edging to install?
Metal edging with integral spikes and interlocking connections represents the easiest installation, requiring only rubber mallet, measuring tape, and spirit level. Most people complete 20 metres in 3-4 hours working alone.
Can you install over existing grass?
No, always strip turf first. Installing through grass prevents correct depth, leaves grass roots competing with edging, and creates untidy finish. Proper installation requires exposing bare soil, positioning edging accurately, then backfilling.
Does edging prevent grass spreading?
Yes, provided it’s installed with sufficient depth (minimum 10cm below turf level) to prevent grass roots growing underneath. Shallow edging of 5-6cm burial will be undermined within a single growing season.
What’s the difference between landscape and lawn edging?
The terms are largely interchangeable, both describing products that create definition between garden zones. ‘Landscape edging’ encompasses wider applications whilst ‘lawn edging’ specifically describes edging adjacent to turf. Products are often identical.
Learn more about Garden Design
Why not consider expanding your growing and garden design knowledge with one of my online gardening courses? My Garden Design for Beginners Course is here to help you transform your garden with an affordable online course, no matter how little your experience with plants.
This course offers step-by-step guidance from me, Lee Burkhill, the Garden Ninja—award-winning garden designer and presenter on BBC1’s Garden Rescue. In this course, you’ll go from a garden design novice to a confident designer equipped to tackle any green space.
Planting Techniques – Select and arrange plants like a pro.
Design Styles & Layout Options – Explore different styles to suit every garden.
Course Features:
20 Hours of Study Time
Flexible Online Learning
Engaging Video Lessons & Quizzes
Real-World Case Studies
Certification upon Completion
Taught by Award-Winning Designer Lee Burkhill
Enrol now for just £199 and start your journey toward garden design mastery!
29
Garden Design Examples for Small Gardens: 30 Design Templates & Planting Plans
Garden Design Examples for Small Gardens: 30 Design Templates & Planting Plans: In this online gardening course, I’ll walk you through 30 fantastic garden designs, explaining the logic behind the layout, the plant choices, and take-home tips for applying them in your own garden.
Weekend Garden Makeover: A Crash Course in Design for Beginners
Learn how to transform and design your own garden with Lee Burkhills crash course in garden design. Over 5 hours Lee will teach you how to design your own dream garden. Featuring practical design examples, planting ideas and video guides. Learn how to design your garden in one weekend!
Garden Design for Beginners: Create Your Dream Garden in Just 4 Weeks
Garden Design for Beginners Online Course: If you want to make the career jump to becoming a garden designer or to learn how to design your own garden, this is the beginner course for you. Join me, Lee Burkhill, an award-winning garden designer, as I train you in the art of beautiful garden design.
Lawn edging is a great way to reduce maintenance and sharpen up the look of your garden. It means you can spend less time edging and more time enjoying your green space. With a multitude of colours and materials, the choice is yours whether you want to make your lawn edges look like a statement piece or just blend in.
I’d love to hear back from you on your grow-your-own journey! How have your seedlings been getting on? Why not get in touch on Social media? You can Tweet, Facebook or Instagram me. You can also check out the other guides and vlogs on my Youtube channel.
Lee Burkhill, known as the Garden Ninja, is an award-winning garden designer and horticulturist with over 30 years of gardening experience and 15 years as a professional garden designer. A qualified RHS (Royal Horticultural Society) professional, Lee specialises in sustainable garden design and practical horticultural advice. He designs and presents on BBC1’s Garden Rescue and in leading gardening publications. Lee combines three decades of hands-on gardening knowledge with professional design qualifications to help gardeners create beautiful, functional outdoor spaces.


If your borders are more curved rather than having corners will the metal edging still work ? Can it be bent /shaped to follow a curved edge? Thanks