How to Plant Spring Bulbs in Autumn: A Step-by-Step Guide
Lee Burkhill: Award Winning Designer & BBC 1's Garden Rescue Presenters Official Blog
Beginner level
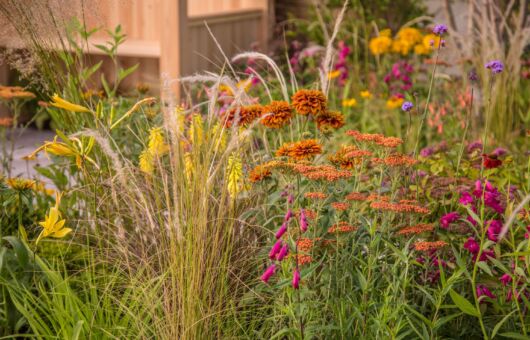
Planting bulbs is one of the most optimistic activities of the gardening year. Planting bulbs of hope ready to flower in spring and fill your garden with scent and colour. But many gardeners plant bulbs at the wrong time of year or make some key mistakes! This beginner guide to planting spring bulbs will help you avoid them and set you up for success next spring!
The arrival of autumn is a harbinger of change in the garden, signalling the time to prepare for the upcoming spring season when the bulbs emerge and bring the first blast of flowers to the gardening year! Knowing how to plant spring bulbs can take your garden to the next level in terms of colour and interest.
One of my favourite and most rewarding gardening tasks during the autumn season is planting spring bulbs in your garden. This means you can extend the seasonal interest in your gardens and also help wildlife out by providing much-needed early nectar for honey bees and insects.
These bulbs, including Tulips, Daffodils, Crocuses, and Hyacinths, hold the promise of vibrant and colourful blooms that will burst forth when winter’s chill finally subsides. In this comprehensive guide, we will take you through the steps of planting spring bulbs in autumn, ensuring that your garden awakens with a spectacular display of flowers in the coming months.
This page contains affiliate links for products I use and love. If you take action (i.e. subscribe, make a purchase) after clicking a link, I may earn some gardening commission which helps me keep the Garden Ninja Blog free for all.
Beginner Guide to Planting Spring Bulbs
If you want your garden to be full of bright-coloured spring plants, follow my beginner guide below to plant spring bulbs easily.
Wondering what the top 10 easy-to-grow bulbs are? Then look no further at the super easy specimens below. Click to jump to each species to see why they make the top ten for spring flowers!
I love nothing more than planting spring bulbs in all of my garden designs, as they act as a cheery reminder that summer is on its way. Spring bulbs like Daffodils, Tulips, or Snowdrops also add a pop of colour to the garden while other plant types lie dormant. This helps create what we expert garden designers call ‘succession planting‘. Let’s dig deeper to teach you how to plant spring bulbs.
Step 1: Selecting Bulbs
The first and crucial step in planting spring bulbs is selecting the right ones. Visit your local garden centre or browse online catalogues to choose bulbs that suit your garden’s size, style, and colour preferences. Consider factors such as the month they flower, ultimate height, and hardiness to ensure the bulbs are well-suited to your location.
Assessing Bulb Quality Before Planting
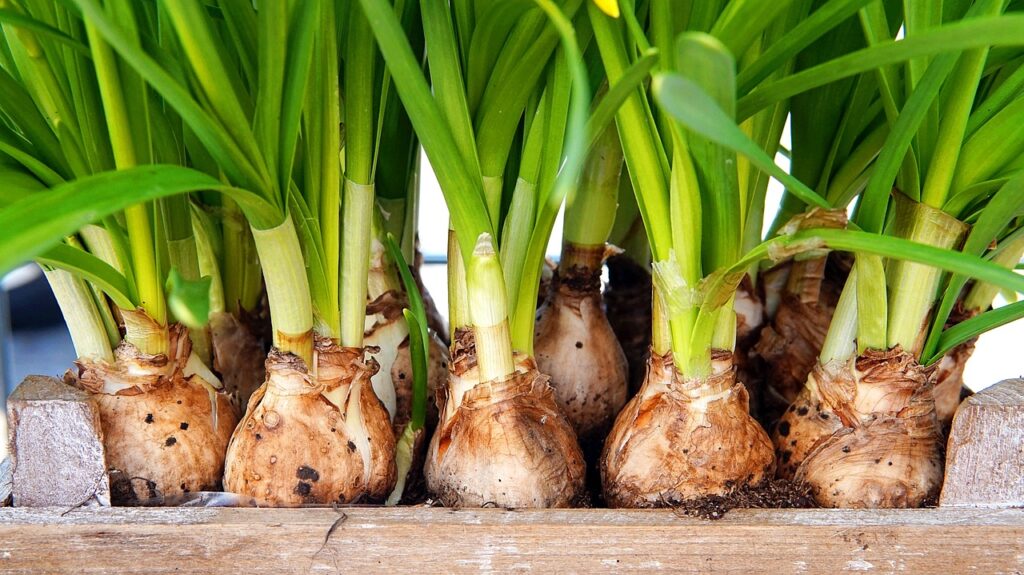
Before you even get your trowel out, it’s worth spending a minute checking your bulbs are actually worth planting. Firm bulbs are good bulbs. Give each one a gentle squeeze; it should feel solid and heavy for its size, a bit like a good onion. Soft, squishy bulbs have rotted internally and should go straight in the compost bin. They won’t recover, and planting them is just a waste of your time and garden space.
Look for any obvious damage or mould. A bit of papery outer skin flaking off is completely normal and nothing to worry about. However, bulbs with wet, slimy patches or a strong, unpleasant smell are diseased and should be binned immediately. Green powdery mould (usually botrytis) is another red flag. These infected bulbs will only spread disease to healthy neighbours if you plant them.
Sprouting isn’t necessarily a death sentence, though it’s not ideal. Bulbs with small shoots of 2 to 3cm can still be planted successfully; just handle them carefully to avoid snapping off the shoots. However, if your bulbs have developed long, pale, etiolated shoots from sitting in a dark shed for months, they’ve used up significant energy reserves and may struggle to flower well in their first year. Plant them anyway, as they’ll often recover by the second year.
Step 2: Choosing the Planting Location for Bulbs
Spring-blooming bulbs thrive in well-drained soil with good sun exposure. Select a location in your garden that receives at least six hours of sunlight per day in the spring. This is key.
It doesn’t need 6 hours of full sun all year round, just when the bulbs are in flower/leaf.
Usually, in spring, you can get away with planting bulbs under trees as the trees won’t come into leaf, casting shade, until the bulbs have finished flowering!
Ensure the soil drains well to prevent bulbs from rotting in soggy conditions. If your soil is heavy or poorly draining, consider creating raised beds or amending the soil with organic matter to improve drainage.
Step 3: Timing is Crucial for Bulbs
Planting time is crucial for spring bulbs.
You’ll want to plant them in autumn, i.e. September to the end of October, ideally six weeks before the first hard frosts in your area if it gets that cold where you live.
This timing allows the bulbs to establish roots before winter and ensures they receive the chilling period necessary for proper flowering. Check your local climate and frost dates to determine the best planting window for your area.
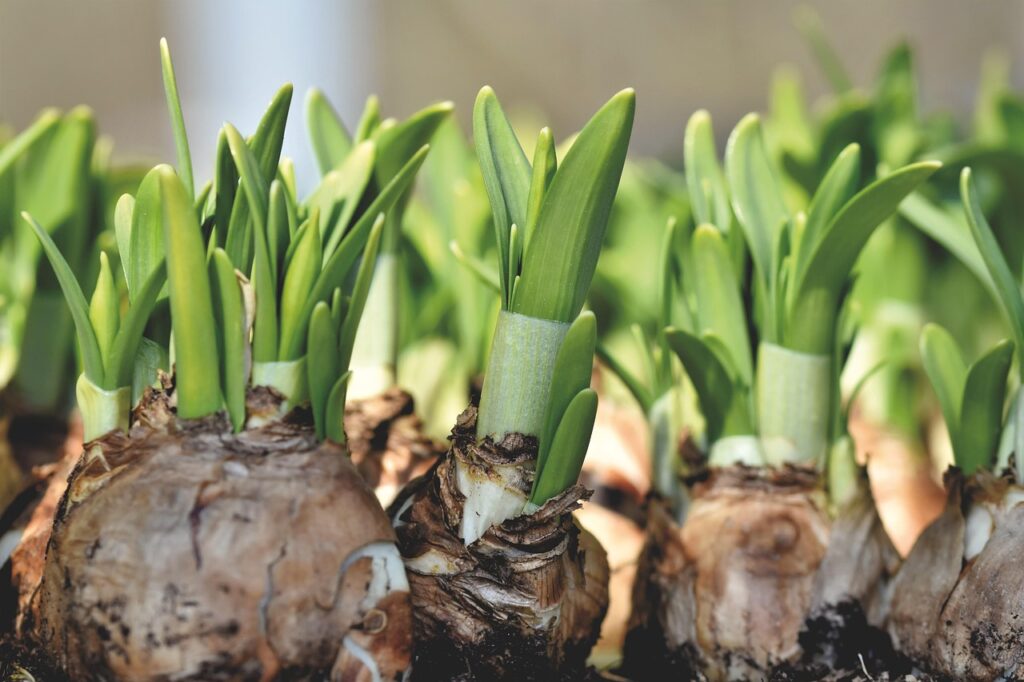
Step 4: Preparing the Soil
If your soil is in good condition, then you really don’t need to do anything for bulbs as the bulbs themselves contain all the energy they need to grow, flower and then store more energy from the sun for next year.
Spring bulbs thrive in well-drained, fertile soil, allowing excess moisture to escape, as overly wet soil can cause bulb rot. Heavy clay is usually a no-no for spring bulbs. Bulbs prefer a slightly acidic to neutral pH (6-7), though many varieties are not too fussy and will grow in any free-draining soil.
For best results when planting spring bulbs, loosen and amend the soil with organic matter like compost to improve drainage and nutrient content. Sandy or loamy soils work well, but if your soil is heavy clay, consider adding grit or sand to aid drainage or revert to planting spring bulbs in raised beds or well-draining pots.
If you’re dealing with particularly poor soil, it’s a good idea to remove any weeds, rocks, or debris and incorporate organic matter, such as compost or well-rotted manure, to enrich the soil. This will provide essential nutrients for your bulbs as they establish roots.
Plant large bulbs like tulips and daffodils at a depth of 6-8 inches.
Plant smaller bulbs like crocuses and snowdrops at a depth of 3-4 inches.
The best tip is to plant all bulbs 3 times their depth in the ground. Which works for all bulbs, even if you don’t know what the bulb is!
Next, space the bulbs according to their size and planting guidelines on the packaging. Typically, bulbs should be spaced two to three times their width apart. This prevents overcrowding, allowing each bulb sufficient room to grow and flourish. Bulbs propagate by multiplication, creating lateral buds that develop into daughters or mini bulbs, which then separate from the parent bulb and require space.
Step 6: Planting Techniques
You can use a few different techniques when planting spring bulbs, depending on the size of your garden, the amount of time you have, and the look you’re going for.
Individual Planting
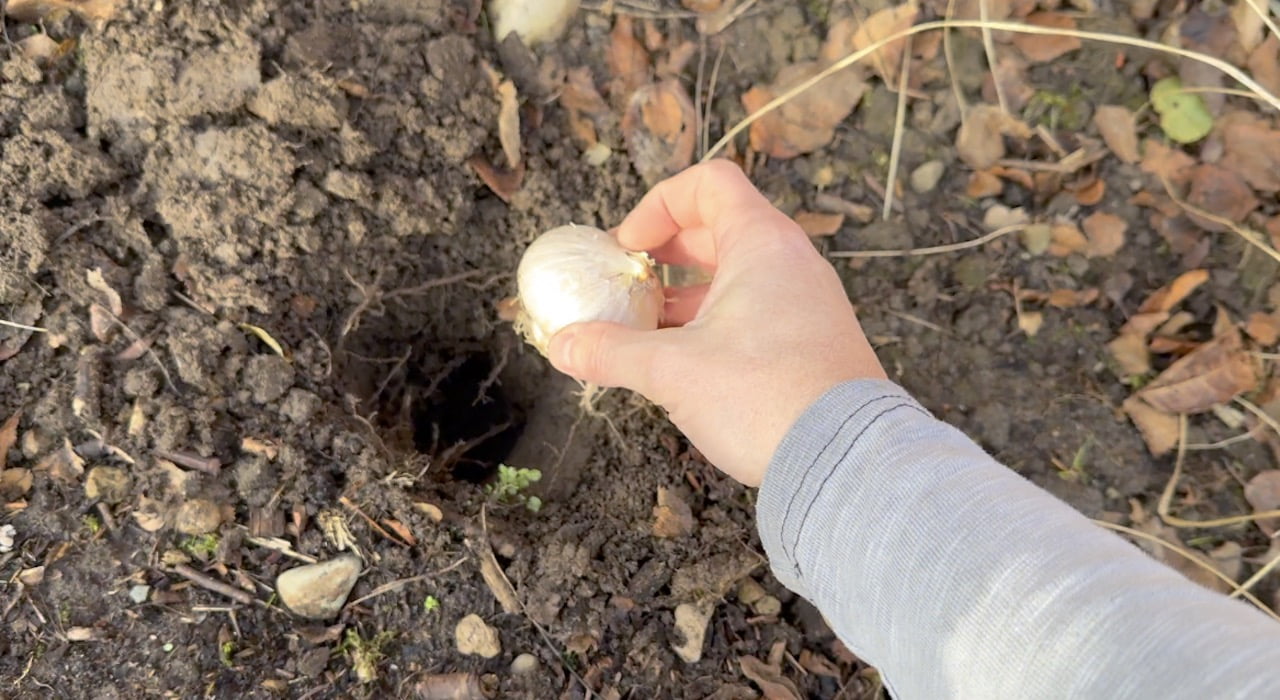
Dig individual holes for each bulb, 3 times the depth of the bulb, ensuring proper spacing. Place the bulb in the hole with the pointed end facing upward. Cover the bulb with soil, gently tamp it down, and water thoroughly.
Group Planting
For a more natural look, you can plant bulbs in clusters or drifts. Dig a larger hole, place several bulbs in the hole, and cover with soil. This creates a more naturalistic effect when the bulbs bloom.
You can also throw a handful of bulbs into your flower bed and lawn and then plant them where they stop for a truly natural effect!
Layered Planting
To achieve a stunning display of bulbs that bloom at different heights and times, consider layering your bulbs in the same hole. Plant the larger bulbs at the recommended depth, cover them with soil, and then plant smaller bulbs on top, covering them with another layer of soil. This is sometimes called a bulb lasagne and is used in container gardening.
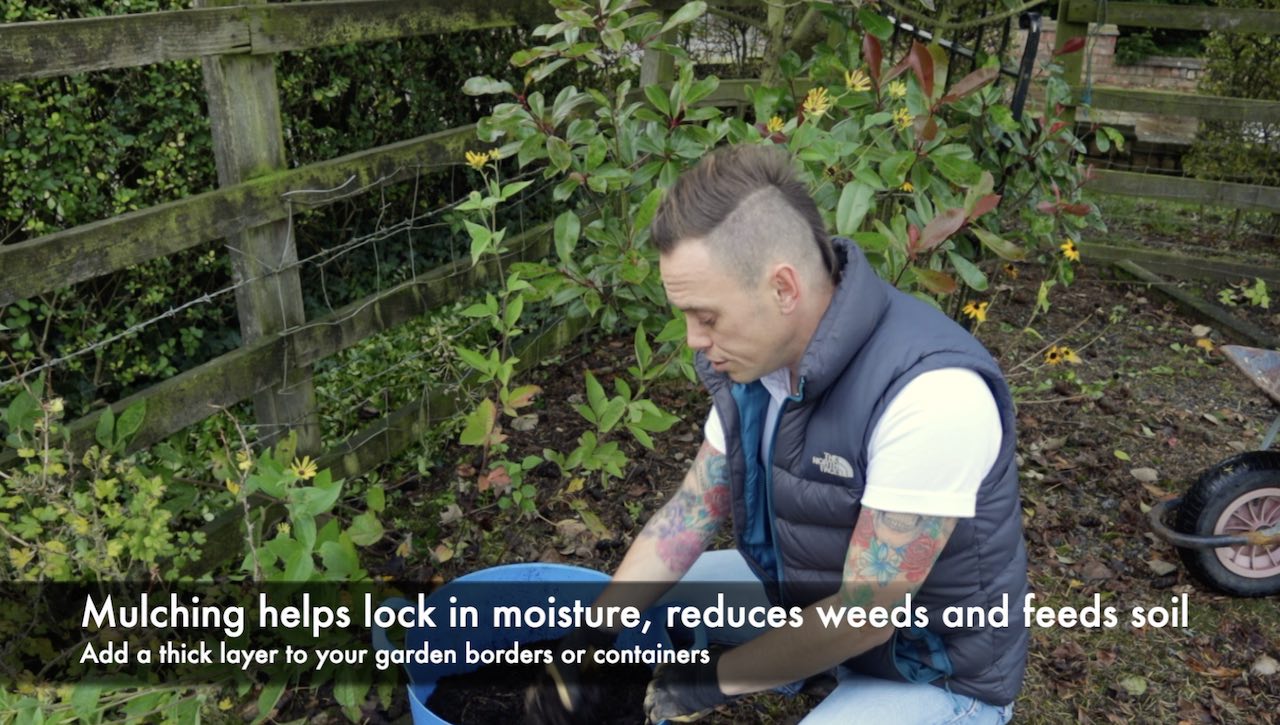
Step 7: Watering and Mulching
After planting, thoroughly water your bulbs to settle the soil and help the roots establish. This is the step that most people miss.
It’s imperative to water new bulbs even if it’s been raining, as the bulbs still require watering even when dormant. If they dry out, they will die.
Lastly, apply a layer of mulch, such as leaf mould, to conserve moisture, regulate soil temperature, and deter weeds. Mulch also adds an extra layer of protection during winter.
Proper maintenance in autumn is vital to ensuring a successful spring display. Keep an eye on your newly planted bulbs, especially during dry spells, and water as needed to keep the soil evenly moist but not waterlogged. Be mindful of overwatering, which can lead to bulb rot.
Step 8: Fertilisation of Bulbs
While spring-blooming bulbs are not heavy feeders, you can give them a boost by applying a balanced bulb fertiliser or bone meal after their first flowering. Follow the recommended dosage on the fertiliser packaging. A yearly mulch will be just as good though of peat free compost.
Step 9: Pest and Disease Management
Keep an eye out for signs of pests like squirrels, voles, or deer, which may try to dig up or munch on your newly planted bulbs. Use deterrents like netting or even rose prunings, which are thorny, to protect your bulbs. Layer rose clippings around the holes of your newly planted bulbs, or use chicken wire.
In addition, be vigilant for signs of bulb diseases, such as mould or rot, before you plant your bulbs. If you notice any issues, promptly remove and dispose of affected bulbs to prevent the spread of disease to healthy ones. If your bulbs have turned green and powdery, do not plant them. Compost them instead.
Step 10: Patience and Anticipation
With your bulbs properly planted and cared for, all that’s left to do is wait patiently for spring. As the days grow longer and warmer, your garden will come to life with the vibrant colours and fragrant blooms of your spring-blooming bulbs. This anticipation is one of the most rewarding aspects of gardening, and the beauty of your spring garden will make all your efforts in autumn well worth it.
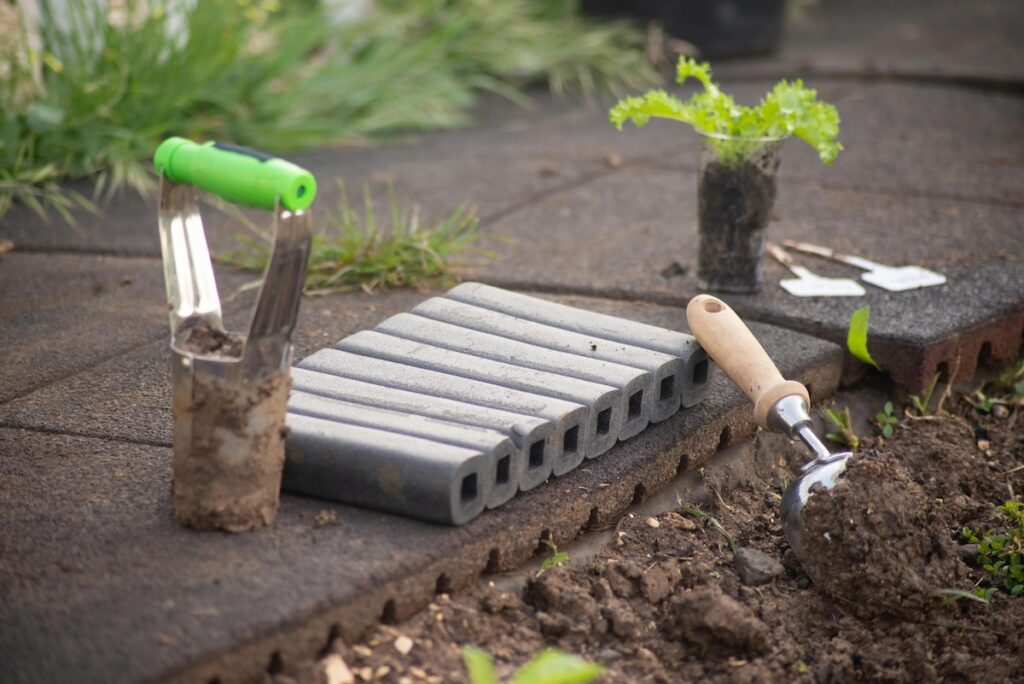
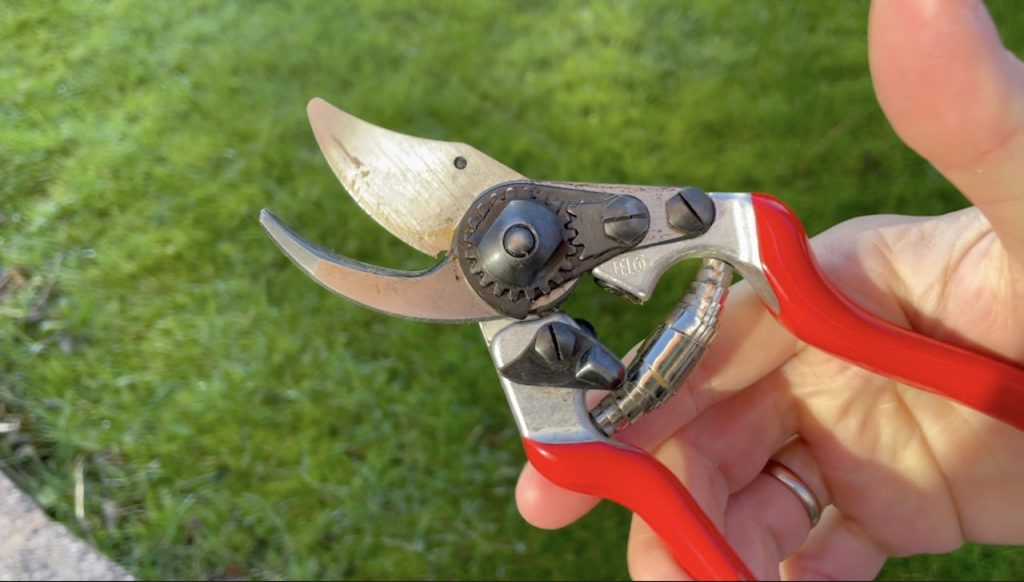
Essential Tools for Planting Bulbs
Having the right tools transforms bulb planting from a backbreaking chore into a genuinely enjoyable autumn ritual. You don’t need a shed full of equipment, but a few well-chosen tools will save your knees, your back, and considerable amounts of time.
The Bulb Planter
A dedicated bulb planter is genuinely one of the most satisfying garden tools you’ll ever use. These cylindrical devices create perfect holes with a quick push and twist, depositing the soil plug to one side. When you pull the planter back up, you’ve got an ideal hole at exactly the right depth. Pop the bulb in, replace the plug, and you’re done. It’s particularly brilliant for lawns where you want to naturalise bulbs without creating massive divots everywhere. The long-handled versions are absolute godsends for anyone with dodgy knees or a reluctant back. You can plant dozens of bulbs without getting down on the ground even once.
The Hori Hori Knife
This traditional Japanese digging knife has become something of a cult favourite amongst gardeners, and for good reason. It’s essentially a heavy-duty, serrated blade with measurements marked along the edge, perfect for gauging planting depth. The pointed tip slices through soil brilliantly, and you can use it for everything from digging individual holes to cutting through roots. It’s particularly useful when you’re planting in established borders where you need to work around existing plants. If you’re only going to invest in one specialist tool for bulb planting, make it a good hori hori knife.
Traditional Tools That Work Brilliantly
Don’t discount your standard garden tools either. A good quality trowel is perfect for smaller bulbs and gives you excellent control in tight spaces. For mass plantings, a spade allows you to lift entire sections of turf or soil, plant a group of bulbs underneath, and replace the top layer. This technique is particularly effective for naturalising crocuses or daffodils in drifts. A kneeling pad or garden kneeler with handles makes a massive difference to your comfort, especially when you’re planting hundreds of bulbs. Trust me, your knees will thank you the next morning.
Measuring and Marking
A simple dibber or even a bamboo cane marked with measurements helps ensure consistent planting depth. Some gardeners swear by making a permanent depth gauge by marking their trowel handle or planting tool with waterproof tape or paint at the most common planting depths (3 inches, 6 inches, 8 inches). It takes five minutes to set up and saves countless moments of second-guessing throughout the planting season.
Protection and Comfort
A decent pair of gardening gloves protects your hands from blisters and keeps them clean. Opt for ones with good grip but enough flexibility to handle small bulbs easily. A garden trugg or bucket keeps your bulbs close at hand whilst you’re planting, preventing that annoying need to keep walking back to your pile of bulbs. Some gardeners use old cushions or foam pads to kneel on, whilst others invest in proper kneeling pads with waterproof covers.
The investment in proper tools pays itself back not just in time saved but in the sheer pleasure of the task. Bulb planting should be meditative and enjoyable, not an endurance test. With the right equipment, you’ll find yourself actually looking forward to those crisp autumn afternoons spent tucking bulbs into the soil, daydreaming about the spring display to come.
11. Do bulbs come back each year?
Yes, bulbs are perennials, so they will come back each year, especially if they are in a suitable place and their foliage is left to absorb energy from the sun after flowering.
The only exceptions are Tulips, particularly hybrid cultivars with frilly or unusual patterns. These tend to revert over the years to a more mauve-coloured Tulip as the revision and variegations are not stable. Unfortunately, they are bred to be used as annuals, so with each passing year, they become a bit less lacklustre.
Gardeners may choose to enjoy these hybrids for a single season and then replace them with new varieties the following year. But I find this really wasteful, so I prefer to plant bulbs that come back year after year from an environmental standpoint.
Stick to more simple Tulip varieties to ensure repeat flowering year after year!
12. Should I cut back foliage off bulbs after flowering?
Resist the urge to cut back the foliage too soon after flowering, as the leaves continue to nourish the bulb for future growth. If you cut them back after flowering to make them look tidier, you are robbing the bulbs of nutrients, meaning they may not flower again the following year. This weakens the bulbs and makes it less likely for them to come back and flower each year.
For bulbs in containers, always provide a good liquid plant feed just after flowering. This ensures they have enough stored energy to flower the following year.
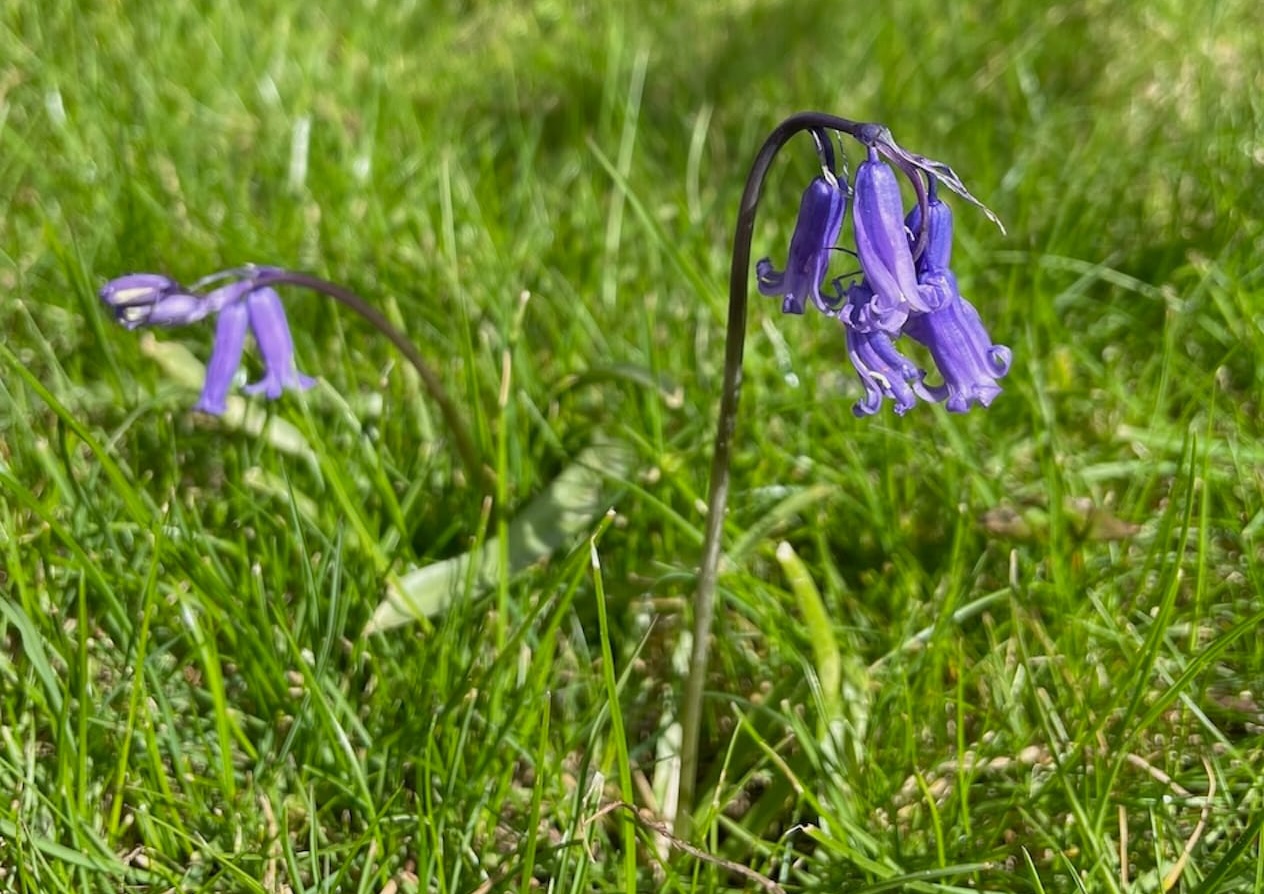
13. Do Bluebells and Snowdrops Flower the Year After Planting?
One of the most common questions I get asked about woodland bulbs concerns flowering expectations, particularly with bluebells and snowdrops. Unlike most spring bulbs that flower reliably in their first year, bluebells and snowdrops often take longer to settle in and may not flower until their second or even third year after planting. This isn’t a sign that you’ve done something wrong; it’s simply how these particular bulbs behave as they establish themselves.
English bluebells (Hyacinthoides non scripta) are particularly notorious for taking their time to establish. Research from specialist growers indicates that it’s not unusual for newly planted bluebell bulbs to produce only foliage in their first year, with no flowers whatsoever. This happens because the bulbs are prioritising root development and establishment over flowering. They’re essentially investing their energy underground rather than above it, building a strong foundation for years of reliable flowering to come. In some cases, particularly with dry bulbs planted in autumn, bluebells can take two to three full growing seasons before they finally reward you with that dreamy carpet of nodding blue bells.
Snowdrops (Galanthus) are slightly more forgiving but still require patience. Specialist bulb growers report that snowdrops typically take at least one full year to become properly established, meaning bulbs planted in autumn will often produce only light flowering or possibly just foliage in their first spring. By their second year, they’ll usually flower more reliably and begin developing into the thick patches we all love. This establishment period is particularly pronounced when planting dry bulbs in autumn, which is why many experienced gardeners prefer planting snowdrops “in the green” during late winter or early spring, when they’re already in active growth with their leaves present.
Why This Happens
Both bluebells and snowdrops are woodland natives that have evolved very specific growing strategies. When you plant them, whether as dry bulbs or in the green, they need time to re-establish their root systems in their new location. During this critical establishment phase, the bulbs divert all their energy and resources into growing strong, healthy roots rather than producing flowers. It’s a bit like moving house; you need to get properly settled before you can throw a party.
The method of planting makes a significant difference to first-year flowering. Bulbs planted “in the green” (whilst still in leaf after flowering) typically establish faster than dry bulbs because they never fully go dormant. Their roots remain active, allowing them to adapt to their new home more quickly. However, even bulbs in the green may skip flowering in their first year if they’ve been heavily disturbed during lifting and transplanting.
Types of Spring Bulbs to Plant in Your Garden
So we know how to plant spring bulbs, but it’s time to decide which spring bulbs you should choose for your garden and why! Let’s delve into some of the most popular and beloved varieties, each offering its unique charm to your garden.
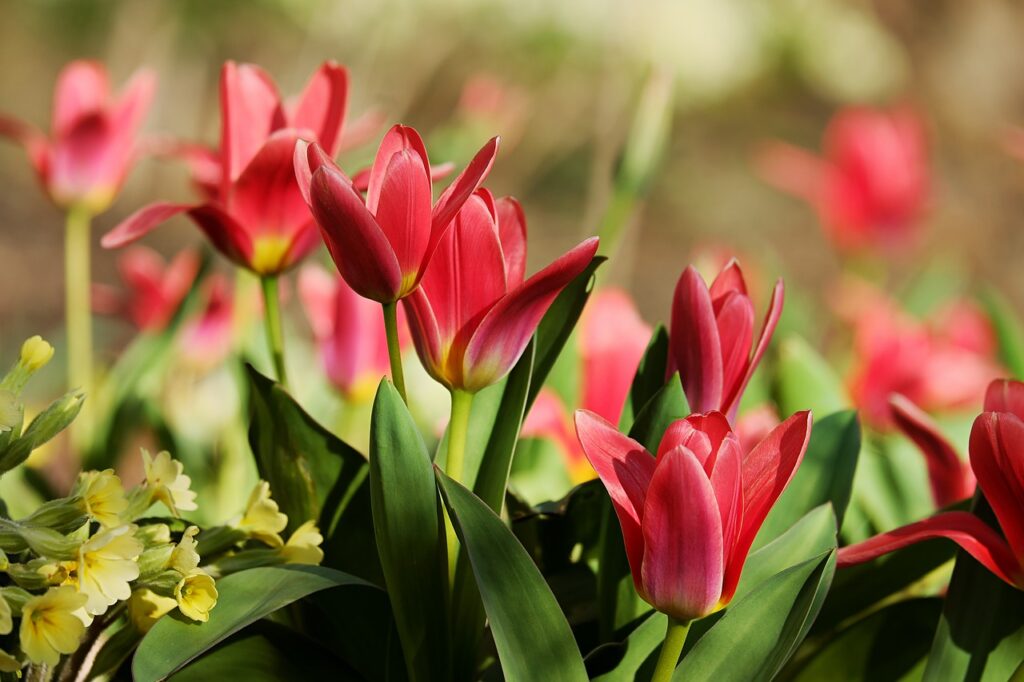
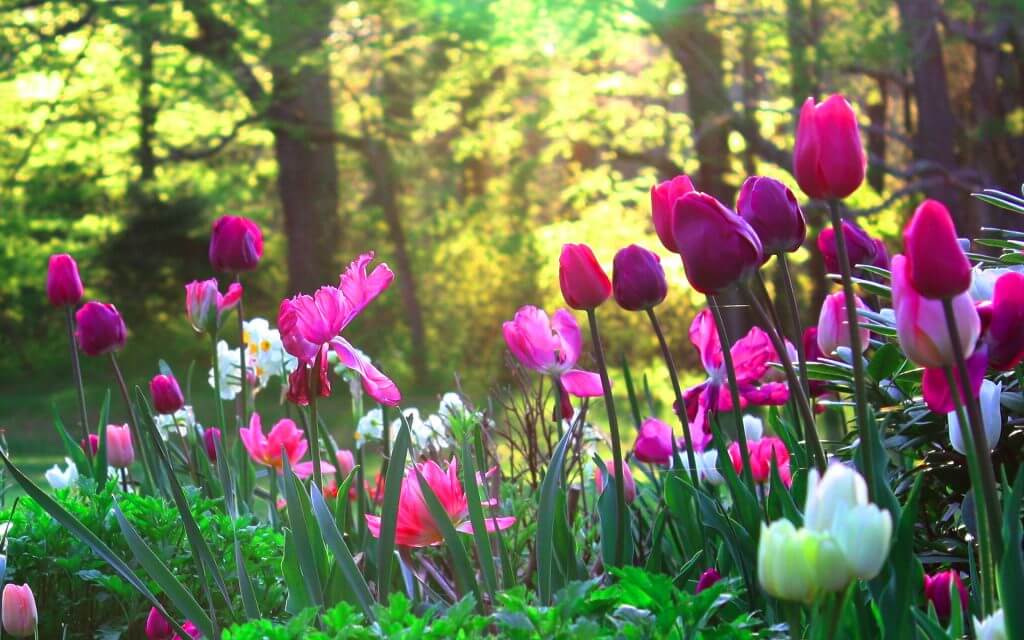
1. Tulips (Tulipa spp.)
Tulips are perhaps the most iconic of all spring bulbs, known for their bold, cup-shaped flowers that come in an astonishing range of colours. From classic reds and pinks to unique varieties like parrot tulips and fringed tulips, there’s a tulip for every taste.
They vary in height, making them versatile for garden borders, containers, and even naturalizing in lawns. Tulips bloom in early to mid-spring, and with proper care, they can return year after year.
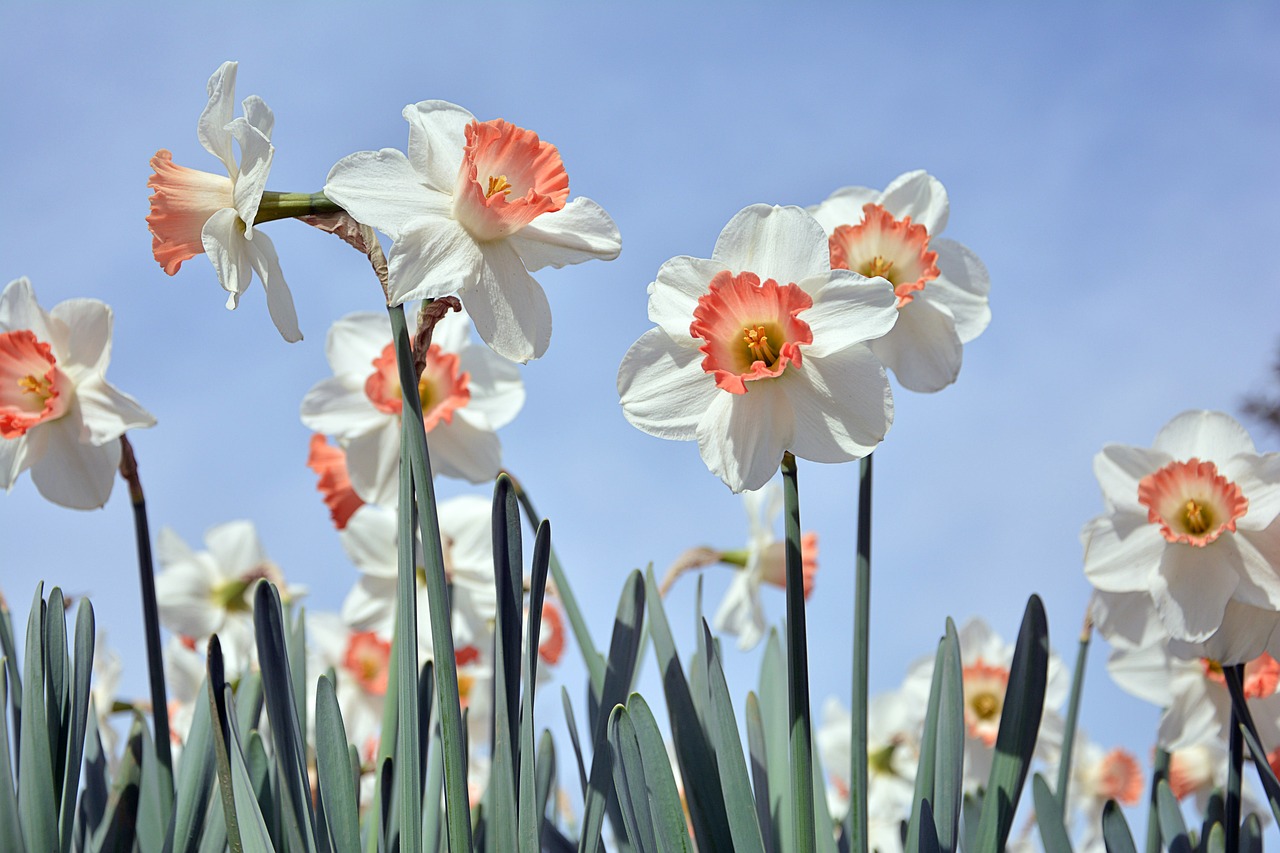
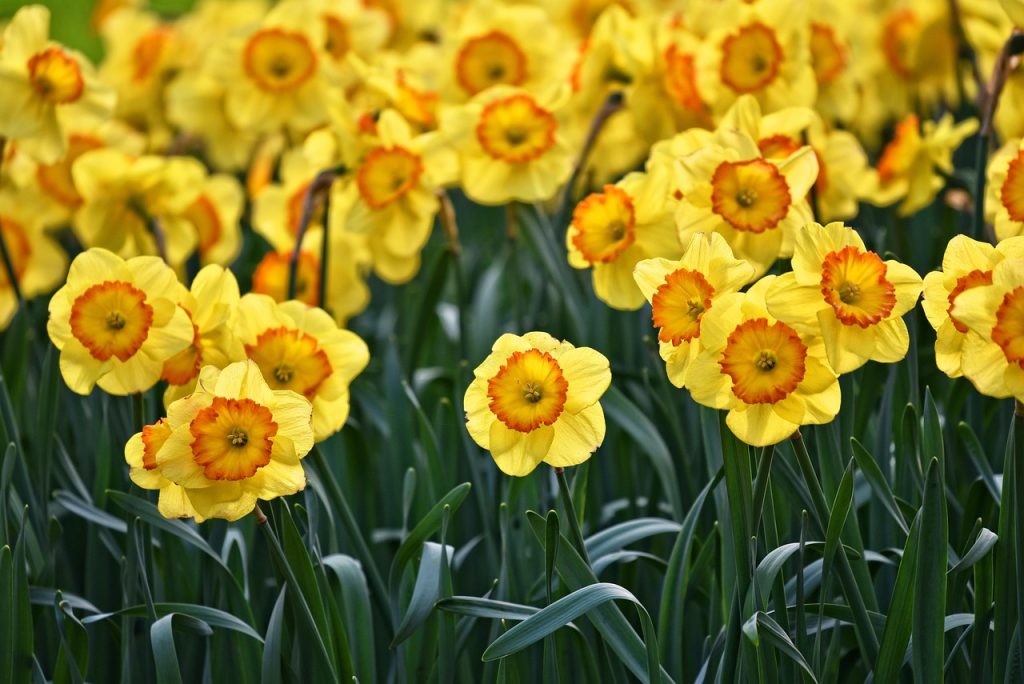
2. Daffodils (Narcissus spp.)
Daffodils, often referred to as “narcissus,” are heralds of spring with their cheerful, trumpet-shaped flowers. They come in various sizes and colours, from the classic yellow daffodils to white, pink, and even orange varieties.
Daffodils are low-maintenance and naturalize well, spreading into drifts of golden blooms over the years. Their deer-resistant nature makes them an excellent choice for gardens where deer are a concern.
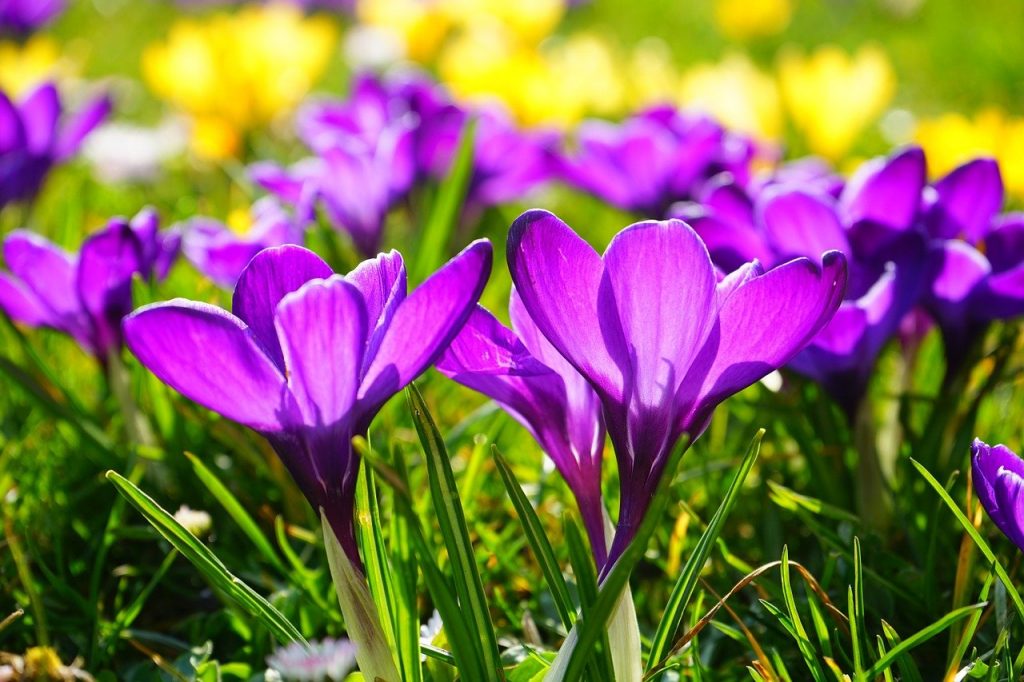
3. Crocuses (Crocus spp.)
Crocuses are some of the earliest spring bulbs to bloom, often poking their heads through the snow to reveal delicate, goblet-shaped flowers. These small but mighty bulbs come in shades of purple, yellow, white, and even striped varieties.
Crocuses work well in rock gardens, pathways, or woodland settings. They naturalize readily, forming charming carpets of colour.
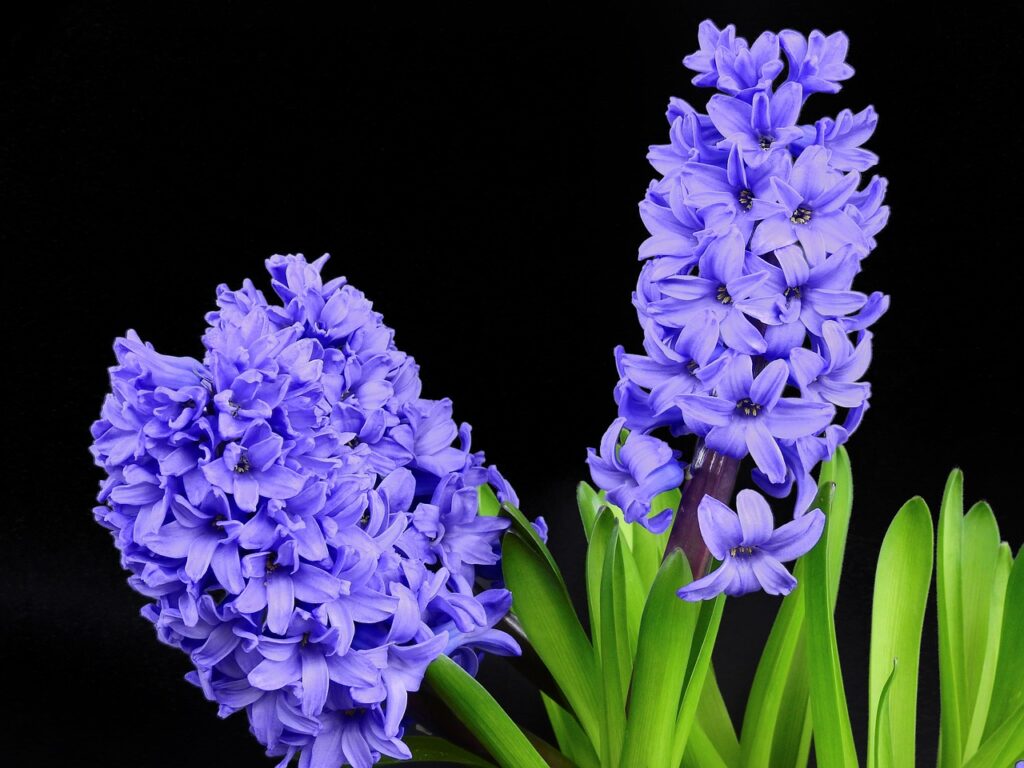
4. Hyacinths (Hyacinthus spp.)
Hyacinths are prized for their intensely fragrant, dense clusters of flowers in shades of blue, pink, white, and lavender. They thrive in well-drained soil and are perfect for containers or mixed borders.
Their fragrance is an added bonus, filling the air with a sweet perfume that signals the arrival of spring. But it can be a bit of a love and hate scent! Plant hyacinths near walkways or seating areas to fully enjoy their perfume.
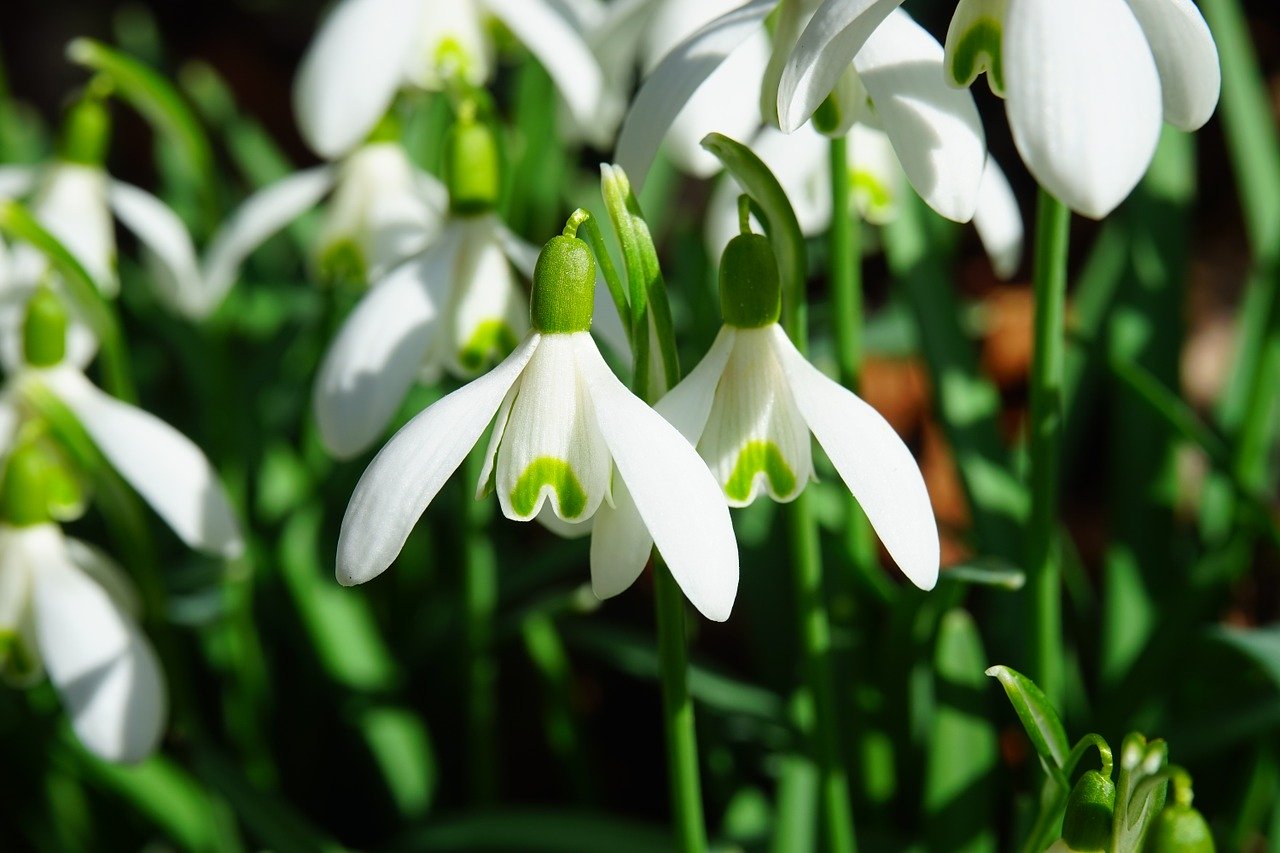
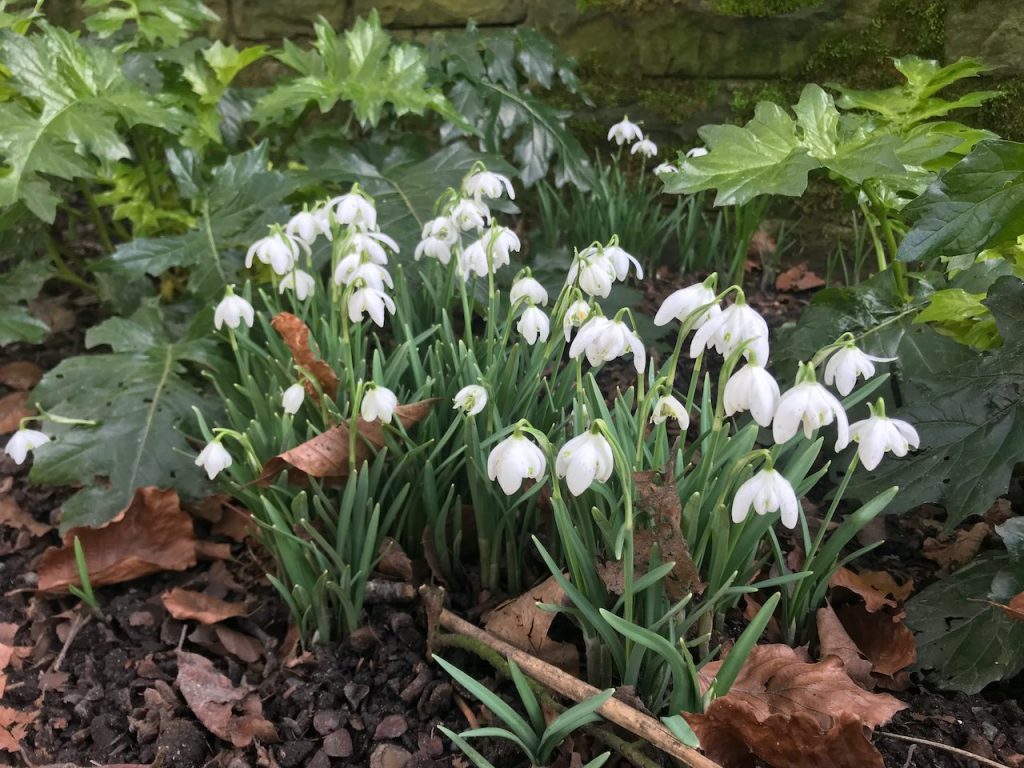
5. Snowdrops (Galanthus spp.)
Snowdrops are the first to appear in late winter, often pushing through the last vestiges of snow. These small, nodding, bell-shaped flowers are primarily white, with delicate green markings.
Snowdrops are beloved for their tenacity and resilience in the face of winter’s grip. They make excellent companions to other early bloomers like crocuses and hellebores.
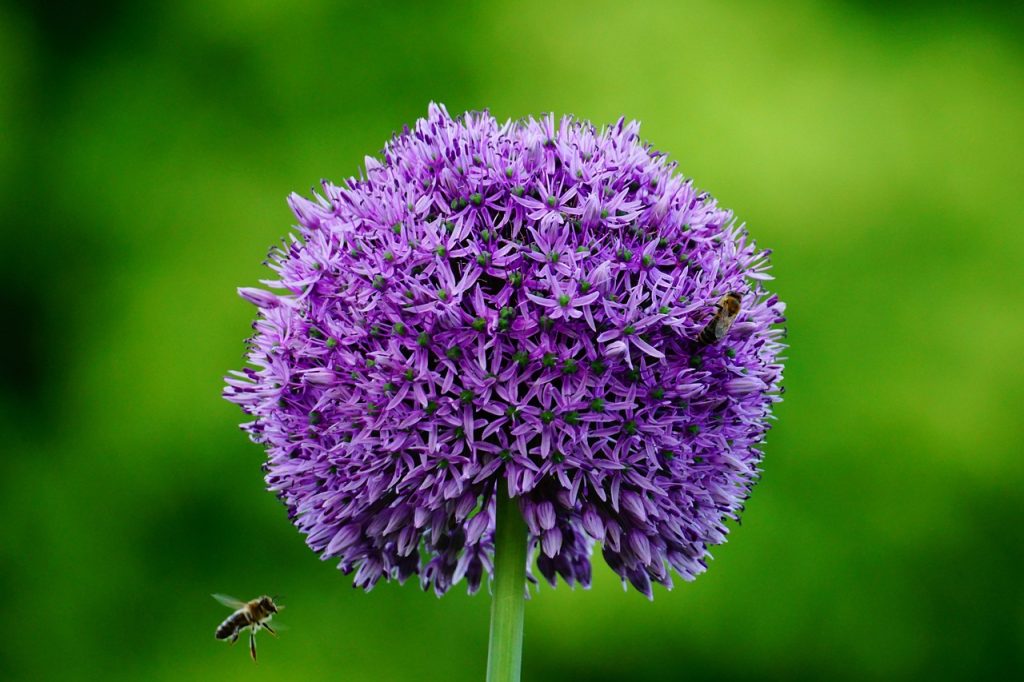
6. Alliums (Allium spp.)
Alliums, also known as ornamental onions, offer a unique and architectural element to the spring garden. These bulbs produce globe-shaped flower clusters in various sizes and colours, including shades of purple, blue, pink, and white.
Alliums are excellent for adding height and drama to borders and can also be used in cut flower arrangements. Their blooms persist into late spring, bridging the gap between early and mid-spring flowers.
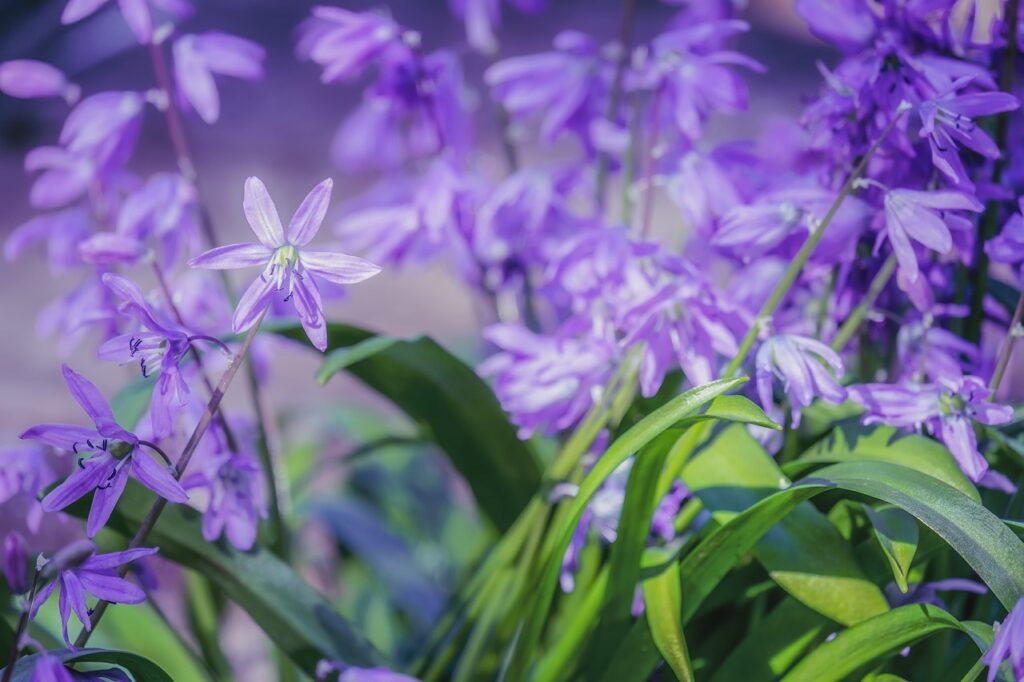
7. Scilla (Scilla spp.)
Scilla, commonly known as squill, is another early bloomer with star-shaped, blue or white flowers that often carpet the ground. These bulbs are excellent for naturalising under trees or in woodland gardens. They’re easy to grow and create a charming, woodland-like atmosphere in your garden.
8. Fritillarias (Fritillaria spp.)
Fritillarias are unique spring bulbs known for their distinctive, bell-shaped flowers that often appear in shades of purple or checkerboard patterns. The most famous variety is the Crown Imperial (Fritillaria imperialis), characterised by its striking upright growth and pendant, orange or yellow flowers.
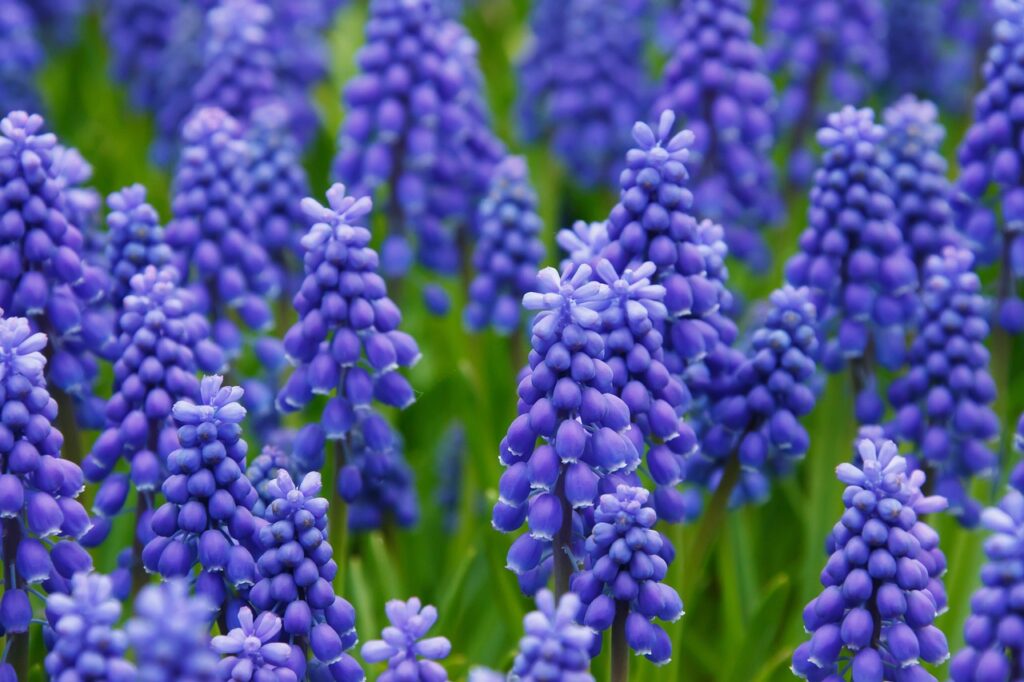
Grape hyacinths are charming spring bulbs with small, clustered flowers that resemble bunches of grapes. They are usually blue or purple, but can also be found in white or pink varieties. Grape hyacinths naturalise easily and are great for edging borders or planting in drifts.
They often bloom early in spring and pair well with other spring-blooming bulbs. Beware, though, once you have them, you’ll find it hard to ever get rid of them as they are prolific propagators!
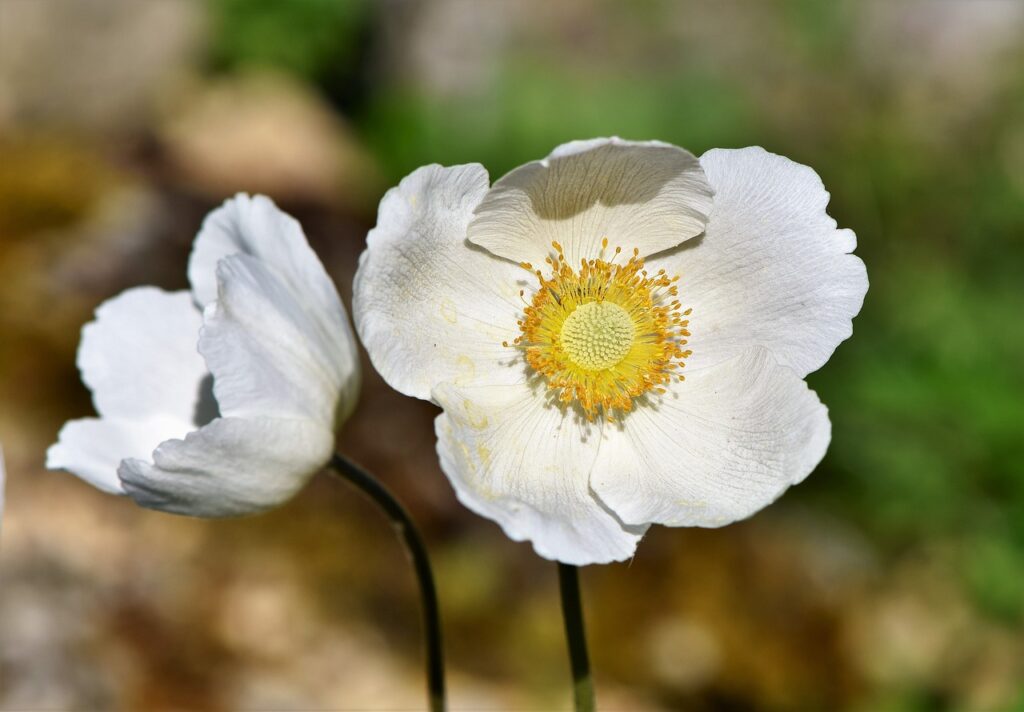
10. Anemones (Anemone spp.)
Anemones are delicate spring bulbs known for their daisy-like flowers in various shades of white, pink, and purple. They have a graceful nodding habit and are excellent for naturalising in woodlands or planting in mixed borders. Anemones often bloom in early to mid-spring, adding a touch of elegance to your garden.
What’s the latest time you can plant bulbs?
Planting spring bulbs at the right time is essential for a vibrant spring display. Generally, the sweet spot for planting bulbs is from September to late November, when the soil is still workable and the bulbs have time to settle in before the frost. This timeframe gives them ample opportunity to develop strong root systems, which helps them burst into life as soon as the warmer days of spring arrive.
However, if life gets in the way and you’re planting a bit later, don’t worry! Hardy bulbs like tulips can often still thrive when planted as late as December or even January in milder climates. Keep in mind that, while a late planting can be effective, the bulbs may require a bit more care and may bloom slightly later or less robustly in their first year.
For gardeners in cooler regions, it’s essential to plant those bulbs before the ground freezes solid. If you’re facing an early freeze, try planting in raised beds or pots, which warm up faster in the spring and allow you to protect your bulbs from harsh ground conditions.
To give those late bulbs the best start, aim for well-draining soil—bulbs can rot in soggy ground. If you’re planting in heavy clay, add a bit of grit or sand to improve drainage, or consider using pots with high-quality compost to keep them cosy.
What If You’ve Forgotten to Plant Your Bulbs?
Life happens. Perhaps those bulbs have been languishing in the garage since September, or maybe you only just discovered a bag of them at the back of the shed. Please don’t panic, and absolutely don’t bin them. Several options can still give you flowers, even if you’ve missed the ideal autumn planting window.
Late Autumn and Early Winter Planting
The brilliant news is that as long as the ground isn’t frozen solid, you can still plant bulbs. I’ve successfully planted tulips in December and even sneaked some daffodils into the ground in early January during a mild spell. They may bloom slightly later than usual or produce shorter flower stalks in their first year, but they’ll almost certainly still flower. The key is getting them in the ground as soon as you realise you’ve forgotten them, rather than waiting until next autumn. Each day they sit in storage, they’re losing vigour and food reserves.
If you’re planting late, pay particular attention to drainage and protection. Add a generous layer of mulch after planting to insulate the bulbs and prevent them from being heaved out of the ground by freeze-thaw cycles. In areas where the ground freezes, watch the weather forecast and plant during any mild spells when the soil is workable. A mattock or pickaxe can help break through the surface if it’s slightly frozen, though admittedly, this is more of a workout than most of us sign up for.
Forcing Bulbs Indoors
If the ground is genuinely too frozen to contemplate digging, or you simply want guaranteed flowers this year, forcing bulbs indoors is a wonderful alternative. Plant your bulbs in pots filled with good quality compost, with the tips just poking above the soil surface. Water them in, then store them somewhere cold but not freezing, ideally around 4°C (40°F). A garage, shed, or even the bottom of your fridge works perfectly. They need this cold period for 10 to 13 weeks to initiate flowering.
After the chilling period, bring the pots into a cool room, around 15-20°C (60-70°F). Keep them in moderate light at first, then move to a brighter spot as shoots develop. Within a couple of weeks, you should have flowers. Paperwhite narcissi and hyacinths are particularly brilliant for forcing because they don’t need the lengthy cold period that other bulbs require. Once forced bulbs have finished flowering, you can plant them out in the garden where they’ll often recover and bloom normally in subsequent years, although they may take a season or two to regain full strength.
Assessing Bulb Viability
Before attempting to salvage forgotten bulbs, give them a quick health check. Firm bulbs are good bulbs. Soft, squishy, or mouldy bulbs should go straight into the compost bin as they’re beyond saving. Bulbs that have started sprouting aren’t ideal, but they’re still worth planting. The shoots may look a bit sorry for themselves initially, but they’ll often straighten up and carry on once they’re in the ground. Shrivelled bulbs have lost moisture and food reserves, making them less likely to perform well, but if they’re still firm, they’re worth a punt.
Discard any bulbs showing signs of disease, particularly ones that are green and powdery (this is often botrytis) or have wet, rotten patches. These will only spread disease to healthy bulbs and soil. If your bulbs smell unpleasant or have obvious fungal growth, they’re telling you very clearly that they’re past saving. On the other hand, a bit of surface mould that brushes off easily isn’t necessarily a death sentence. Brush it off, let the bulb dry, and plant as normal.
Spring Planting as Absolute Last Resort
If you genuinely can’t plant until spring, get them in the ground the moment the soil is workable, even if it seems absurdly late. They likely won’t flower that first year because they’ve missed their essential cold period and haven’t established roots properly. However, if you keep their foliage healthy through the growing season by watering and feeding, they’ll build up reserves for the following year. Essentially, you’re writing off this year’s flowers but setting them up for success next spring. It’s not ideal, but it’s infinitely better than keeping them in storage for another six months, by which point they’ll be completely useless.
The key lesson here is that whilst autumn planting is definitely ideal, bulbs are remarkably forgiving. They want to grow and flower. Your job is simply to give them the best chance you can, even if that means bending the rules slightly. And honestly? A bulb that flowers in May instead of April is still bringing joy to your garden.
Learn How to Design Your Own Garden
Now that you’re a pro at planting spring bulbs why not consider the wider garden with some design training? My Garden Design for Beginners Course is here to help take your garden from average to amazing with a affordable online course no matter how little your experience with plants.
This course offers step-by-step guidance from me, Lee Burkhill—award-winning garden designer and presenter on BBC1’s Garden Rescue. In this course, you’ll go from a garden design novice to a confident designer equipped to tackle any green space.
Planting Techniques – Select and arrange plants like a pro.
Design Styles & Layout Options – Explore different styles to suit every garden.
Course Features:
20 Hours of Study Time
Flexible Online Learning
Engaging Video Lessons & Quizzes
Real-World Case Studies
Certification upon Completion
Taught by Award-Winning Designer Lee Burkhill
Enrol now for just £199 and start your journey toward garden design mastery!
29
Garden Design Examples for Small Gardens: 30 Design Templates & Planting Plans
Garden Design Examples for Small Gardens: 30 Design Templates & Planting Plans: In this online gardening course, I’ll walk you through 30 fantastic garden designs, explaining the logic behind the layout, the plant choices, and take-home tips for applying them in your own garden.
Weekend Garden Makeover: A Crash Course in Design for Beginners
Learn how to transform and design your own garden with Lee Burkhills crash course in garden design. Over 5 hours Lee will teach you how to design your own dream garden. Featuring practical design examples, planting ideas and video guides. Learn how to design your garden in one weekend!
Garden Design for Beginners: Create Your Dream Garden in Just 4 Weeks
Garden Design for Beginners Online Course: If you want to make the career jump to becoming a garden designer or to learn how to design your own garden, this is the beginner course for you. Join me, Lee Burkhill, an award-winning garden designer, as I train you in the art of beautiful garden design.
Planting spring bulbs offer a delightful way to welcome the changing season with bursts of colour and fragrance. Whether you opt for the timeless beauty of tulips, the early cheer of daffodils, or the delicate charm of snowdrops, there’s a spring bulb variety to suit every garden style and preference.
Planting these bulbs in autumn sets the stage for a breathtaking display of flowers in spring, making all your efforts in the garden well worth it.
So, roll up your sleeves, gather your bulbs, and get ready to enjoy the breathtaking beauty of spring in your own backyard. Happy planting!
Make sure you visit my Youtube channel, for more gardening guides. You can also check out my Tweet, Facebook or Instagram for more garden help and tips.
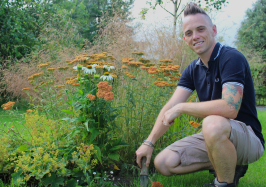
Lee Burkhill, known as the Garden Ninja, is an award-winning garden designer and horticulturist with over 30 years of gardening experience and 15 years as a professional garden designer. A qualified RHS (Royal Horticultural Society) professional, Lee specialises in sustainable garden design and practical horticultural advice. He designs and presents on BBC1’s Garden Rescue and in leading gardening publications. Lee combines three decades of hands-on gardening knowledge with professional design qualifications to help gardeners create beautiful, functional outdoor spaces.