How to Start a Vegetable Garden from Scratch for Beginners: The Complete UK Guide
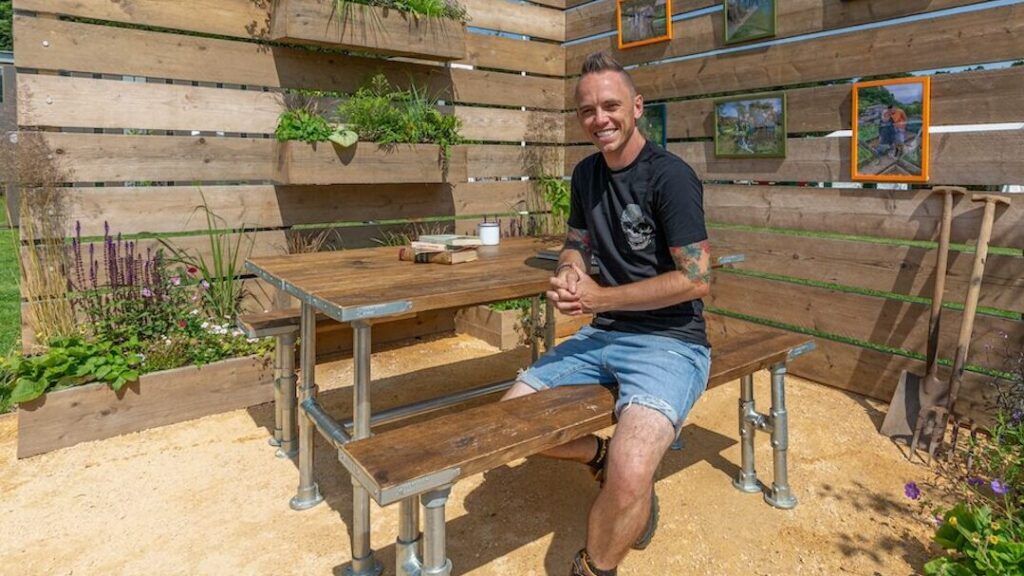
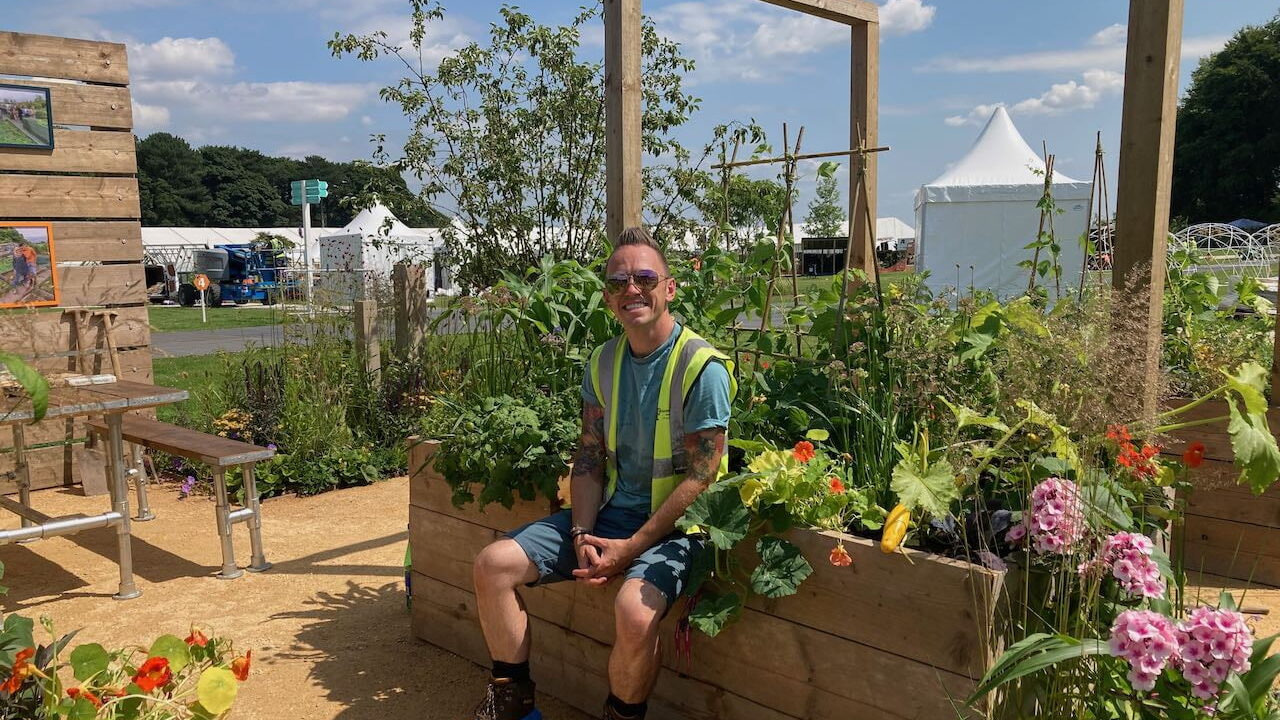
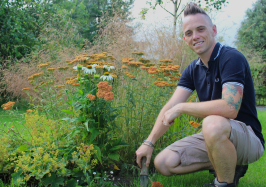
Lee Burkhill: Award Winning Designer & BBC 1's Garden Rescue Presenters Official Blog
Beginner level
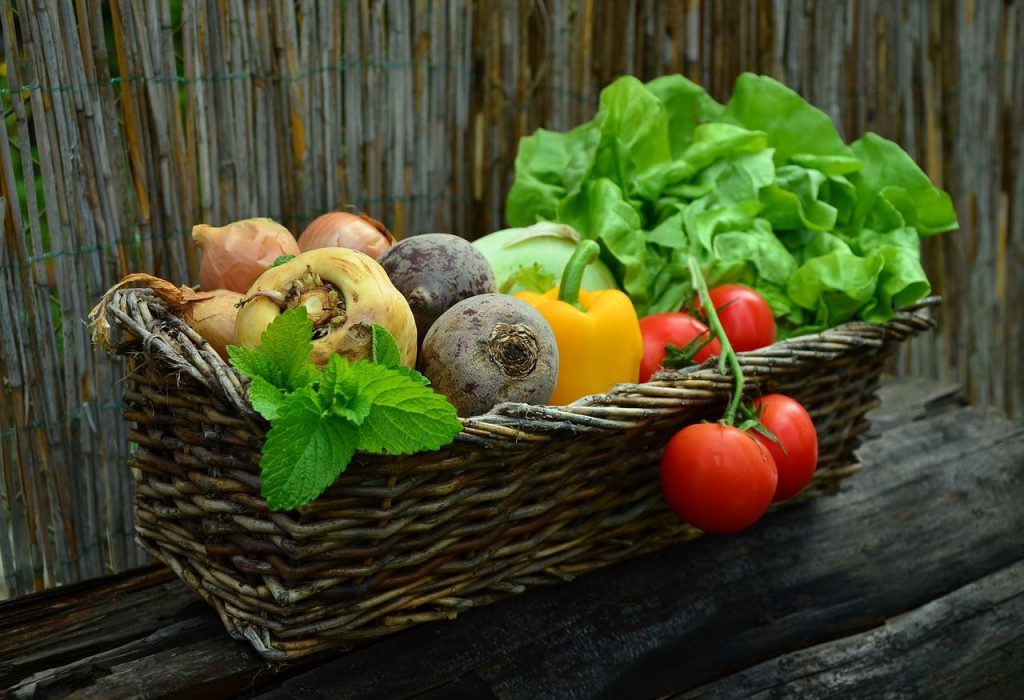
Growing your own vegetables is one of the most rewarding things you can do in your garden. There's absolutely nothing quite like the taste of a sun-warmed tomato you've grown yourself or the satisfaction of harvesting crisp lettuce for tonight's salad. If you've been thinking about starting a vegetable garden but feel overwhelmed by where to begin, you're in exactly the right place!
This comprehensive guide will walk you through everything you need to know about starting a vegetable garden from scratch, based on my years of experience as an award-winning garden designer and what I’ve learned from growing my own veg. I’ll share the mistakes I’ve made (so you don’t have to repeat them!), the techniques that actually work in British gardens, and practical advice that will have you harvesting your own food faster than you might think.
Whether you have a large garden, a small urban space, or even just a sunny patio, this guide will show you exactly how to create a productive vegetable garden that suits your lifestyle. This is a comprehensive, long-read article covering everything I’ve learned in my 30 years as a professional garden designer about vegetable gardens, so bookmark this page to revisit it at any time. Let’s dig in!
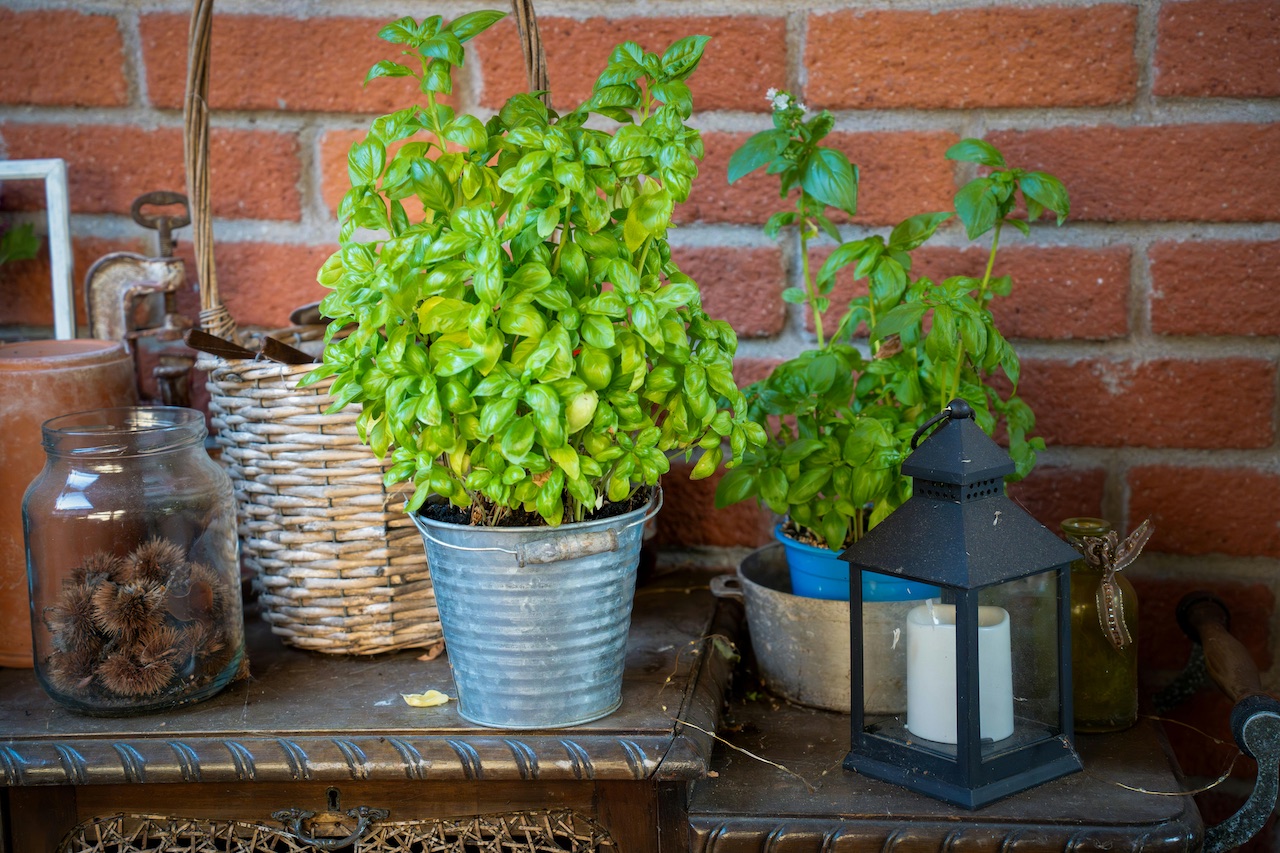
A vegetable garden is a dedicated space where edible plants, such as vegetables, herbs, salad leaves, and occasionally fruits, are grown. Unlike ornamental flower beds, vegetable gardens are designed primarily for food production, though that doesn’t mean they can’t look absolutely stunning! I’ll show you how to have both beauty and delicious edibles in your garden.
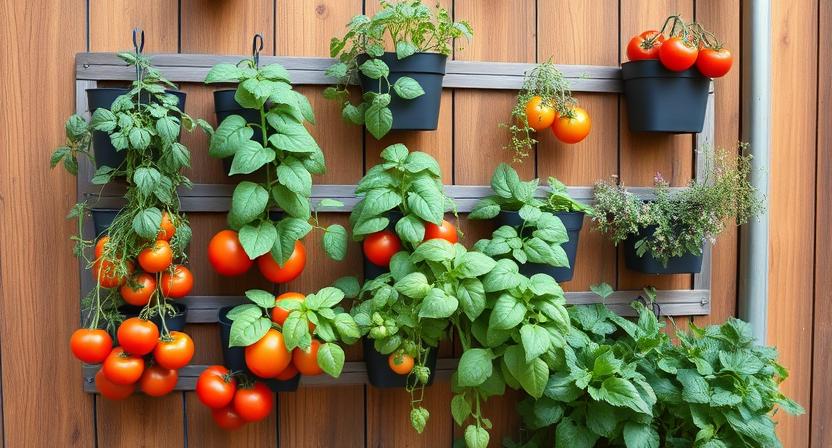
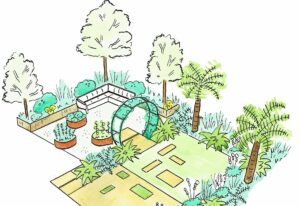
Vegetable gardens can take many forms. They might be traditional in-ground plots with neat rows of crops, raised beds filled with high-quality soil, container gardens on patios, or even vertical gardens that maximise small spaces. The beauty of vegetable gardening is that it can be adapted to work in almost any situation.
The key difference between a vegetable garden and other types of gardening is the focus on edible crops that require regular harvesting, crop rotation, and specific growing conditions to produce optimal yields. But don’t let that intimidate you! Once you understand a few basic principles, growing your own food becomes second nature.
Why Start a Vegetable Garden? The Benefits
Before we get into the practical side, let’s talk about why growing your own vegetables is such a brilliant idea. Over the years of my garden design and presenting on Garden Rescue, I’ve seen countless people discover the joys of homegrown food, and the benefits extend far beyond just saving money at the supermarket.
A) Unbeatable Flavour and Freshness
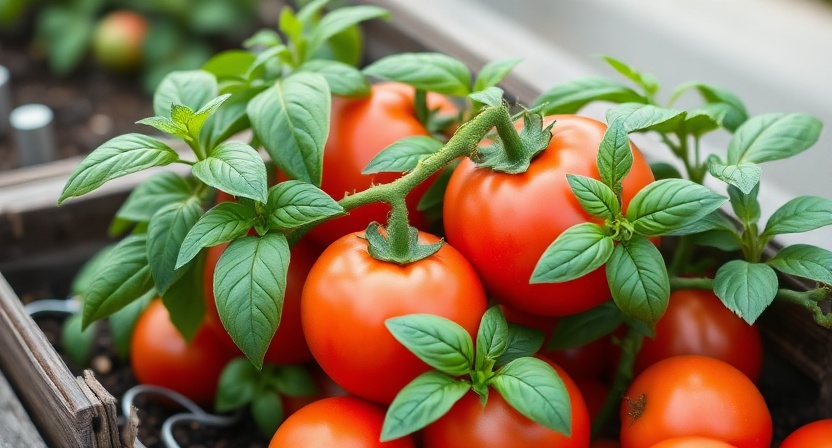
There’s simply no comparison between a supermarket tomato that’s been shipped halfway across the country and one you’ve picked fresh from your own garden. Home-grown vegetables have flavour that’s miles ahead of shop-bought produce. You’ll taste the difference immediately, and once you do, you’ll be absolutely hooked!
B) Know Exactly What You’re Eating
When you grow your own veg, you control everything. No mystery pesticides, no unknown chemicals, just pure, honest food that you’ve nurtured from seed or seedling. If you want to go organic, you can. If you prefer minimal intervention, that’s your call. This level of control over your food is incredibly empowering.
C) Significant Cost Savings
Yes, there’s some initial investment in tools and materials, but once you’re up and running, the savings can be substantial. A single packet of lettuce seeds might cost £2 and produce enough salad leaves for an entire summer. Those expensive “superfood” salads in the shops? You can grow them for pennies! Better still, you know exactly what’s been sprayed or not sprayed on them, and they taste incredible!
D) Mental and Physical Health Benefits
Gardening is genuinely therapeutic. The combination of fresh air, gentle exercise, connecting with nature, and the satisfaction of growing something has been proven to reduce stress and improve mental well-being. I’ve seen it transform people’s lives, to be honest. Plus, you’ll be getting regular, low-impact exercise without even realising it. Ask most allotment gardeners, and they never need to hit the gym!
E) Environmental Impact
Growing your own reduces food miles dramatically, cuts down on plastic packaging, and creates a habitat for beneficial insects and pollinators. Your vegetable garden becomes a mini-ecosystem that supports local wildlife while producing food. That’s a proper win-win situation! I have shown thousands of new gardeners how to garden without plastic or pesticides, meaning you’re helping Mother Nature by limiting the environmental impact of your food.
F) Teaching Opportunity for Children
If you have kids, a vegetable garden is an incredible educational tool. Children who grow vegetables are far more likely to eat them, and they’ll learn valuable lessons about where food comes from, the seasons, nature, and patience. Some of my favourite Garden Rescue moments have involved creating spaces where families can grow together, which is beautiful to see take shape! Children like nothing better than being asked to harvest the vegetables for dinner that night!
Common Beginner Mistakes to Avoid
Right, let’s get the tough love out of the way early. I’ve made every single one of these mistakes myself when I started gardening, and I’ve watched countless beginners make the same mistakes. Learn from our collective experience and sidestep these common pitfalls!
i) Starting Too Big
This is the number one killer of vegetable gardening dreams. People get excited (which is brilliant!), create a massive plot, and then find themselves overwhelmed by the work involved. A month later, they’re exhausted, the garden’s overgrown with weeds, and they’ve given up entirely.
Start small! A 1.2m x 1.2m raised bed or even a few large containers is plenty for your first year. You can always expand once you’ve got the hang of things. I’d rather see you succeed with three crops in a small space than fail with twenty in a large one.
ii) Ignoring Sunlight Requirements
Most vegetables need at least six hours of direct sunlight daily. Putting your vegetable garden in that shady corner because it’s convenient won’t work for sun-loving crops like tomatoes, peppers, and courgettes. Observe your garden throughout the day before committing to a location. Trust me on this one; it’ll save you enormous frustration!
iii) Planting Everything at Once
Beginners often sow entire packets of seeds at once, then wonder what to do with forty lettuces that are all ready to harvest simultaneously. This is where succession planting comes in. Sow small amounts every couple of weeks rather than everything at once. You’ll have continuous harvests rather than feast or famine.
iv) Skimping on Soil Quality
Soil is absolutely fundamental to the success of vegetable gardening. If you’re working with heavy clay or poor, compacted soil, your plants will struggle, regardless of how much you water and feed them. Invest in quality topsoil or compost from the start. It’s the single most crucial decision you’ll make, and it’ll pay dividends for years.
v) Overwatering or Underwatering
Finding the watering sweet spot takes practice. Too much water can cause the roots to rot or encourage disease. Too little and plants will stress, bolt to seed, or fail to thrive. The key is consistency. Most vegetables prefer deep, less frequent watering rather than light daily sprinkling. Stick your finger in the soil; if it’s dry past your first knuckle, it’s time to water.
vi) Overcrowding Plants
When you’re planting tiny seedlings, it’s tempting to squeeze them closer together than recommended. Resist this urge! Overcrowded plants compete for light, water, and nutrients. They’re more prone to disease, produce smaller yields, and become difficult to harvest. Follow the spacing guidelines on seed packets; there’s proper science behind those recommendations.
vii) Neglecting Pest Management Until It’s Too Late
That first slug you spot munching your lettuce? It’s got about a hundred mates hiding nearby. The aphid colony on your beans? It’ll double every few days. Stay vigilant! Check your plants regularly (daily if possible during peak growing season). Catching problems early makes them infinitely easier to manage.
viii) Forgetting About Crop Rotation
Growing the same vegetables in the same spot year after year depletes specific nutrients, allowing pests and diseases to build up in the soil. Even in a small space, basic crop rotation makes an enormous difference to plant health and yields. If this is making your head spin, check out my detailed guide on crop rotation for beginners here. It opens in a new window so that you won’t lose this page.
Choosing the Perfect Location for Your Vegetable Garden
The location of your vegetable garden will largely determine its success. You can have perfect soil and impeccable timing, but if your site doesn’t meet fundamental requirements, you’ll be fighting an uphill battle. Here’s what to look for when selecting the ideal spot.
A) Follow the Sun & Work Out Light Levels First
I cannot stress this enough: most edible crops are absolutely greedy for sunshine. You need a minimum of six hours of direct sunlight daily, but more is better. Eight to ten hours is ideal for vegetables like tomatoes, peppers, courgettes, and beans.
Walk around your garden at different times of day. Note where shadows fall throughout the day and across the seasons. Remember that the sun sits lower in the sky during spring and autumn, so a spot that’s sunny in midsummer might be shaded in April or September when you’re starting and finishing your growing season.
If your garden is partially shaded, don’t despair! Some vegetables tolerate less sun, and I have a full guide on vegetable gardens for shaded spots. Leafy greens like lettuce, spinach, kale, and rocket can tolerate four to six hours. Many herbs are also more forgiving. Just be realistic about what you can grow in your specific conditions by understanding how much sun and where it falls in your garden!
B) Water Access is Essential
You’ll need to water regularly, especially during dry spells and when plants are in fruit. Lugging watering cans hundreds of metres from your tap gets old remarkably quickly, trust me! Site your vegetable garden within easy reach of a water source, ideally close enough to use a hose.
Consider installing water butts near your vegetable plot. Rainwater is brilliant for plants, it’s free, and it takes pressure off mains water during dry periods. I’ve got three butts around my vegetable garden, and they’re worth their weight in gold during summer.
C) Drainage and Soil Conditions
Good drainage is crucial. Vegetables don’t thrive in waterlogged soil, as it can cause root rot and promote fungal diseases. Observe your garden after heavy rain. If water puddles and sits for hours, that’s not ideal for most vegetables.
Heavy clay soil that stays wet requires amending with organic matter; otherwise, creating raised beds is a better option. Conversely, very sandy soil that drains too quickly also requires the addition of organic matter to help retain moisture and nutrients.
Test your soil before you start. Dig down about 30cm. Is it dark and crumbly, or pale and compacted? Can you easily dig it, or is it rock-hard clay? This assessment will determine whether you need to improve existing soil or create raised beds with fresh topsoil. Improving soil is nearly always achieved by adding rich organic matter such as peat-free compost, manure, leaf mould or mushroom compost.
D) Shelter from Strong Winds
Whilst vegetables need good air circulation to prevent disease, strong winds can be damaging. They can snap plant stems, shred leaves, dry out soil rapidly, and stress plants. If your garden is exposed to prevailing winds, consider creating some shelter.
This doesn’t mean building solid barriers that create turbulence. Instead, consider semi-permeable screens, such as hedges, willow hurdles, or trellises with climbing plants. These filter wind whilst still allowing airflow p[rotecting your plants and alswo adding beneficial environments fo birds and other wildlife. Win-win!
E) Proximity to the Kitchen
This might seem minor, but it’s genuinely important! The closer your vegetable garden is to your kitchen door, the more likely you are to use it. Popping out to grab herbs for dinner or picking lettuce for lunch is much more appealing when it’s steps away rather than a trek to the bottom of the garden. I’ve seen kitchen gardens that are half an acre away from clients’ houses, and they simply sit there unused. If possible, place your raised beds and vegetable kitchen gardens close to the house to maximise their use.
Convenience genuinely affects how engaged you stay with your vegetable garden. Position it somewhere you pass regularly, where you can easily check on plants, spot problems early, and enjoy watching everything grow. You can still make it look beautiful as well as functional.
F) Level Ground (Or Create It)
Whilst slight slopes can work, steep gradients make vegetable gardening challenging. Water runs off quickly, soil can erode, and creating stable beds becomes complicated. If you’re working with a slope, consider creating terraced beds or installing raised beds that provide level growing surfaces. We’ll cover raised beds in detail later in this article, so don’t panic – all will be explained.
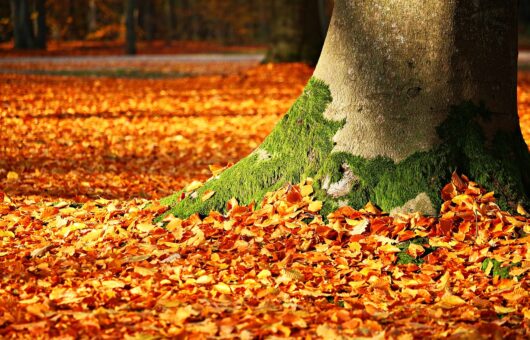
G) Away from Tree Roots and Heavy Shade
Large trees compete aggressively for water and nutrients. Their extensive root systems can dominate an area, making it nearly impossible for vegetables to thrive. Additionally, the shade they cast often makes the site unsuitable for sun-loving crops. So, where possible, avoid planting directly under these trees.
Try to site your vegetable garden at least the height of nearby trees away from their trunks. This gives your vegetables a fighting chance at accessing water and nutrients without excessive competition from tree roots. However, it’s worth considering again how the sun moves around the trees in the day. Some west-facing gardens start with shade under trees, but after lunch, it’s full sun all day, so don’t panic too much. Focus on determining where and when the sun rises and placing vegetable beds in relation to this.
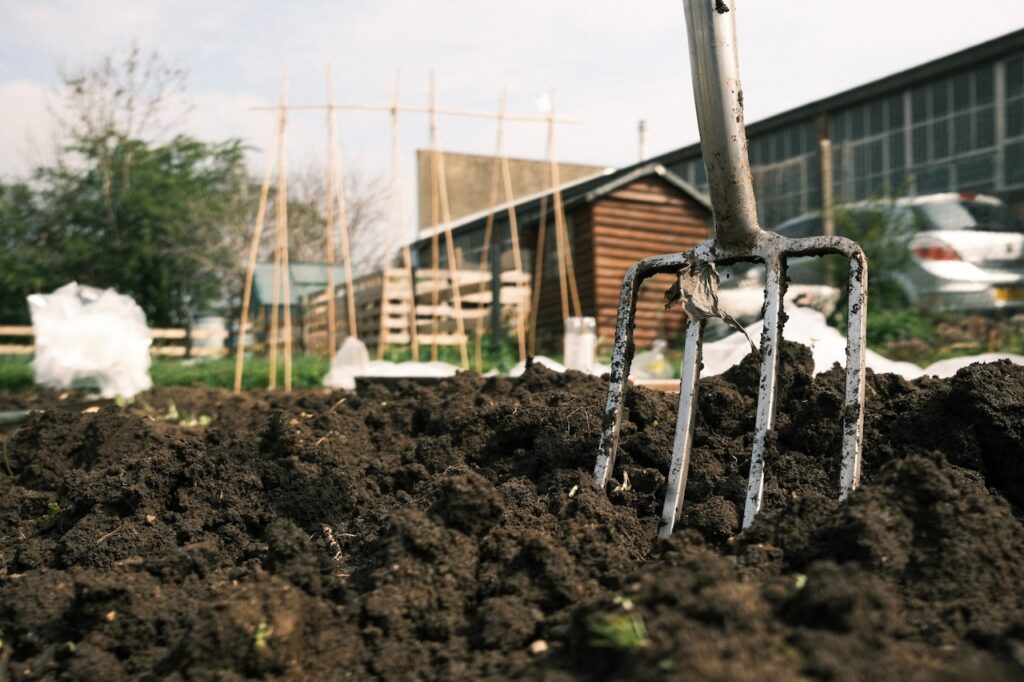
Understanding Your Soil: The Foundation of Success
Right, let’s talk about dirt. Except we’re not going to call it dirt because quality soil is absolutely precious and is a different beast from that dusty dirt you may have considered as soil! Understanding soil is fundamental to the success of vegetable gardening, yet it’s something many beginners overlook. Get this right from the start, and half your work is done. Soil differs from dirt as it’s a living, breathing organism that both feeds and supports plants, making it vital for good crops.
What Makes Good Vegetable Garden Soil?
Excellent vegetable soil has three key characteristics:
It’s fertile (full of nutrients)
Well-draining (water doesn’t sit on the surface, but soil doesn’t dry out instantly either)
Has a good structure (crumbly texture that roots can easily penetrate).
The ideal soil for most vegetables is a medium loam.
This means a balanced mixture of:
Sand (for drainage)
Silt (for moisture retention and nutrients)
Clay (for structure and nutrients)
Plus plenty of organic matter to feed and sustain both soil and plants
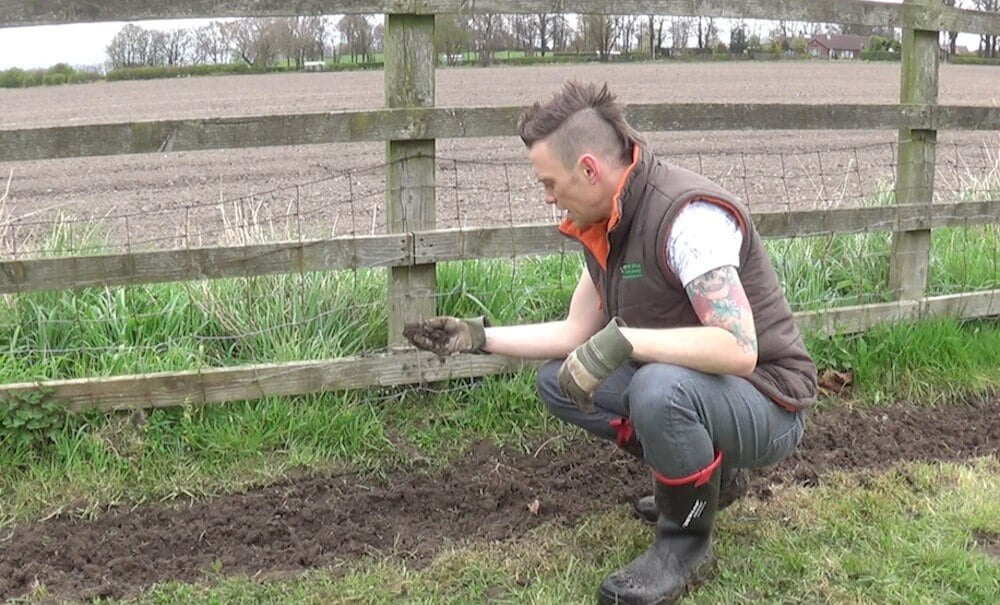
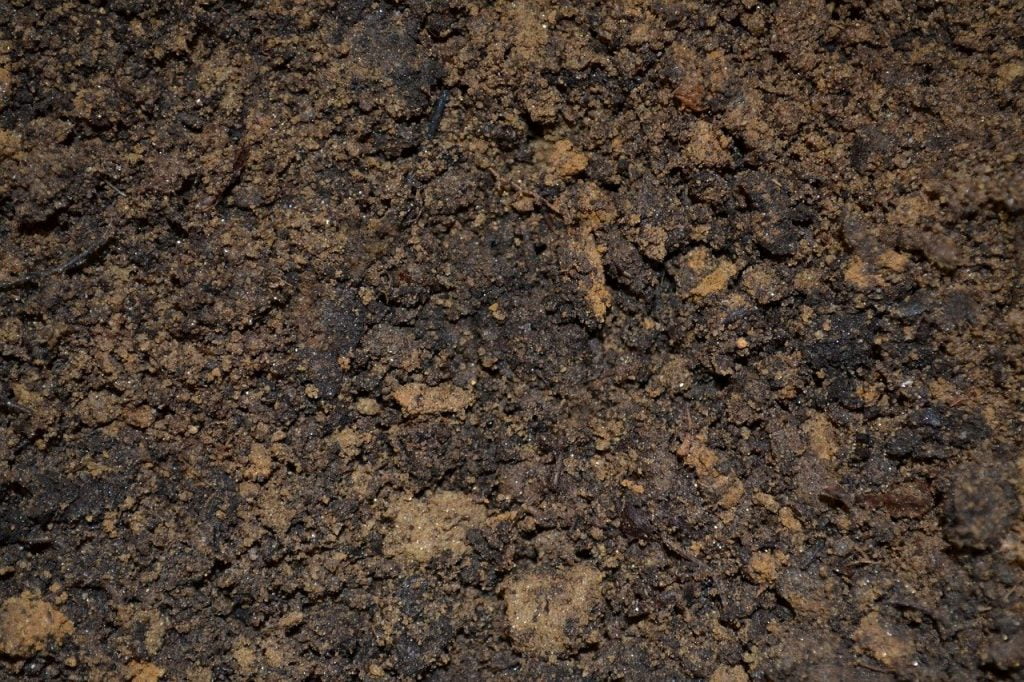
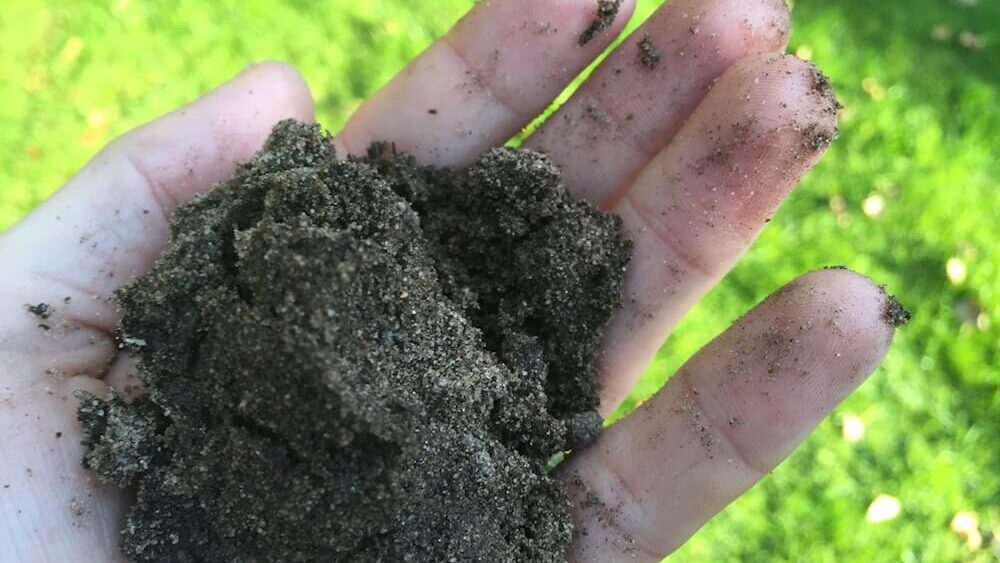
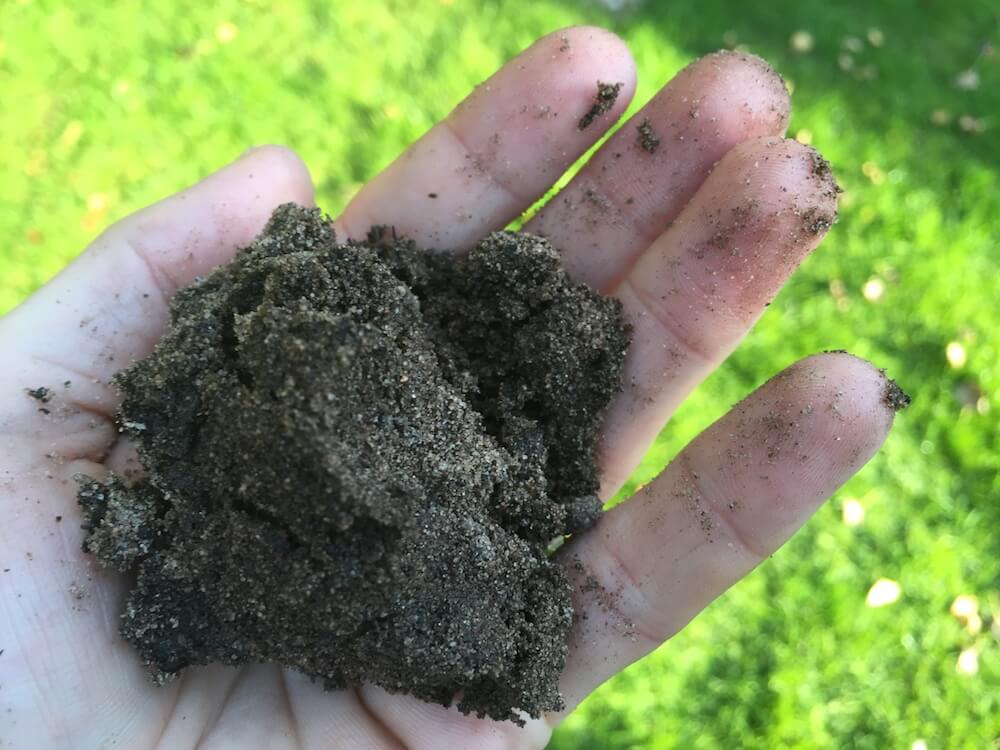
If you pick up a handful of good vegetable soil, squeeze it, and then open your hand, it should hold together in a ball but crumble easily when you poke it. Too sandy, and it falls apart immediately. Too much clay and it stays in a solid, sticky lump.
Testing Your Soil Type
Grab a handful of soil from your proposed vegetable garden site. Wet it slightly and try to form it into a ball. If it won’t form a ball at all and runs through your fingers, you’ve got sandy soil. This drains quickly (good!) but dries out fast and doesn’t hold nutrients well (challenging for vegetables).
If it forms a tight, sticky ball that you can roll into a sausage shape or even a ring without it cracking, you’ve got clay soil. This is fertile (excellent!) but drains slowly, compacts easily, and is tough to work with (difficult for vegetables).
If it forms a ball that holds together but breaks apart fairly easily, congratulations! You probably have lovely, loamy soil that’s ideal for vegetables.
Improving Your Soil
Sandy Soil: Add a generous amount of organic matter, such as compost, well-rotted manure, or leaf mould. This improves water and nutrient retention. You’ll need to add organic matter annually because sandy soil breaks it down quickly.
Clay Soil: Also needs organic matter, which improves drainage and structure. Incorporate plenty of compost, but be patient. Clay improvement takes time. Never work clay soil when it’s very wet (you’ll damage the structure) or bone dry (it’s like concrete). Alternatively, build raised beds on top and fill them with better-quality topsoil.
Good Loamy Soil: Lucky you! Maintain it by adding compost or well-rotted manure on an annual basis. Mulching with organic matter maintains excellent soil structure and high fertility.
pH Levels Matter
Soil pH measures acidity or alkalinity. Most vegetables prefer neutral to slightly acidic soil (pH 6.0 to 7.0). You can test pH with an inexpensive kit from any garden centre or buy an electric meter like the one below. The soil pH impacts how different plants can absorb nutrients, so if you have extremes, either too acidic or alkaline, it’s a struggle to get vegetables to grow to their full potential. The good news is that there are tweaks you can make to change the pH.
If your soil is too acidic (below 6.0), add garden lime. If it’s too alkaline (above 7.5), add pine needles and or plenty of organic matter. Most British soils tend towards slightly acidic, which suits vegetables perfectly.
The Magic of Compost and Organic Matter
I genuinely cannot overstate the importance of organic matter for vegetable growing. It improves soil structure, adds nutrients, encourages beneficial soil life, improves water retention, and helps drainage. It’s basically magical stuff!
Good organic matter includes: homemade compost, well-rotted manure (never fresh), leaf mould, spent mushroom compost, composted bark, and peat-free compost. Aim to add a layer 5-10cm thick annually, ideally in autumn or early spring.
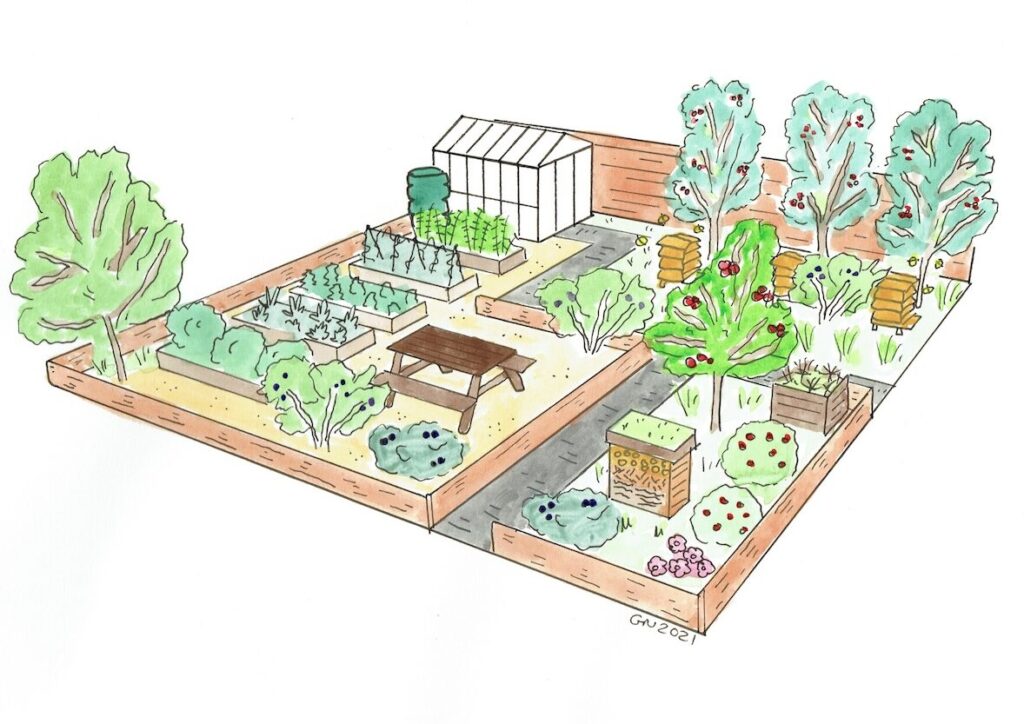
Planning Your Vegetable Garden Layout
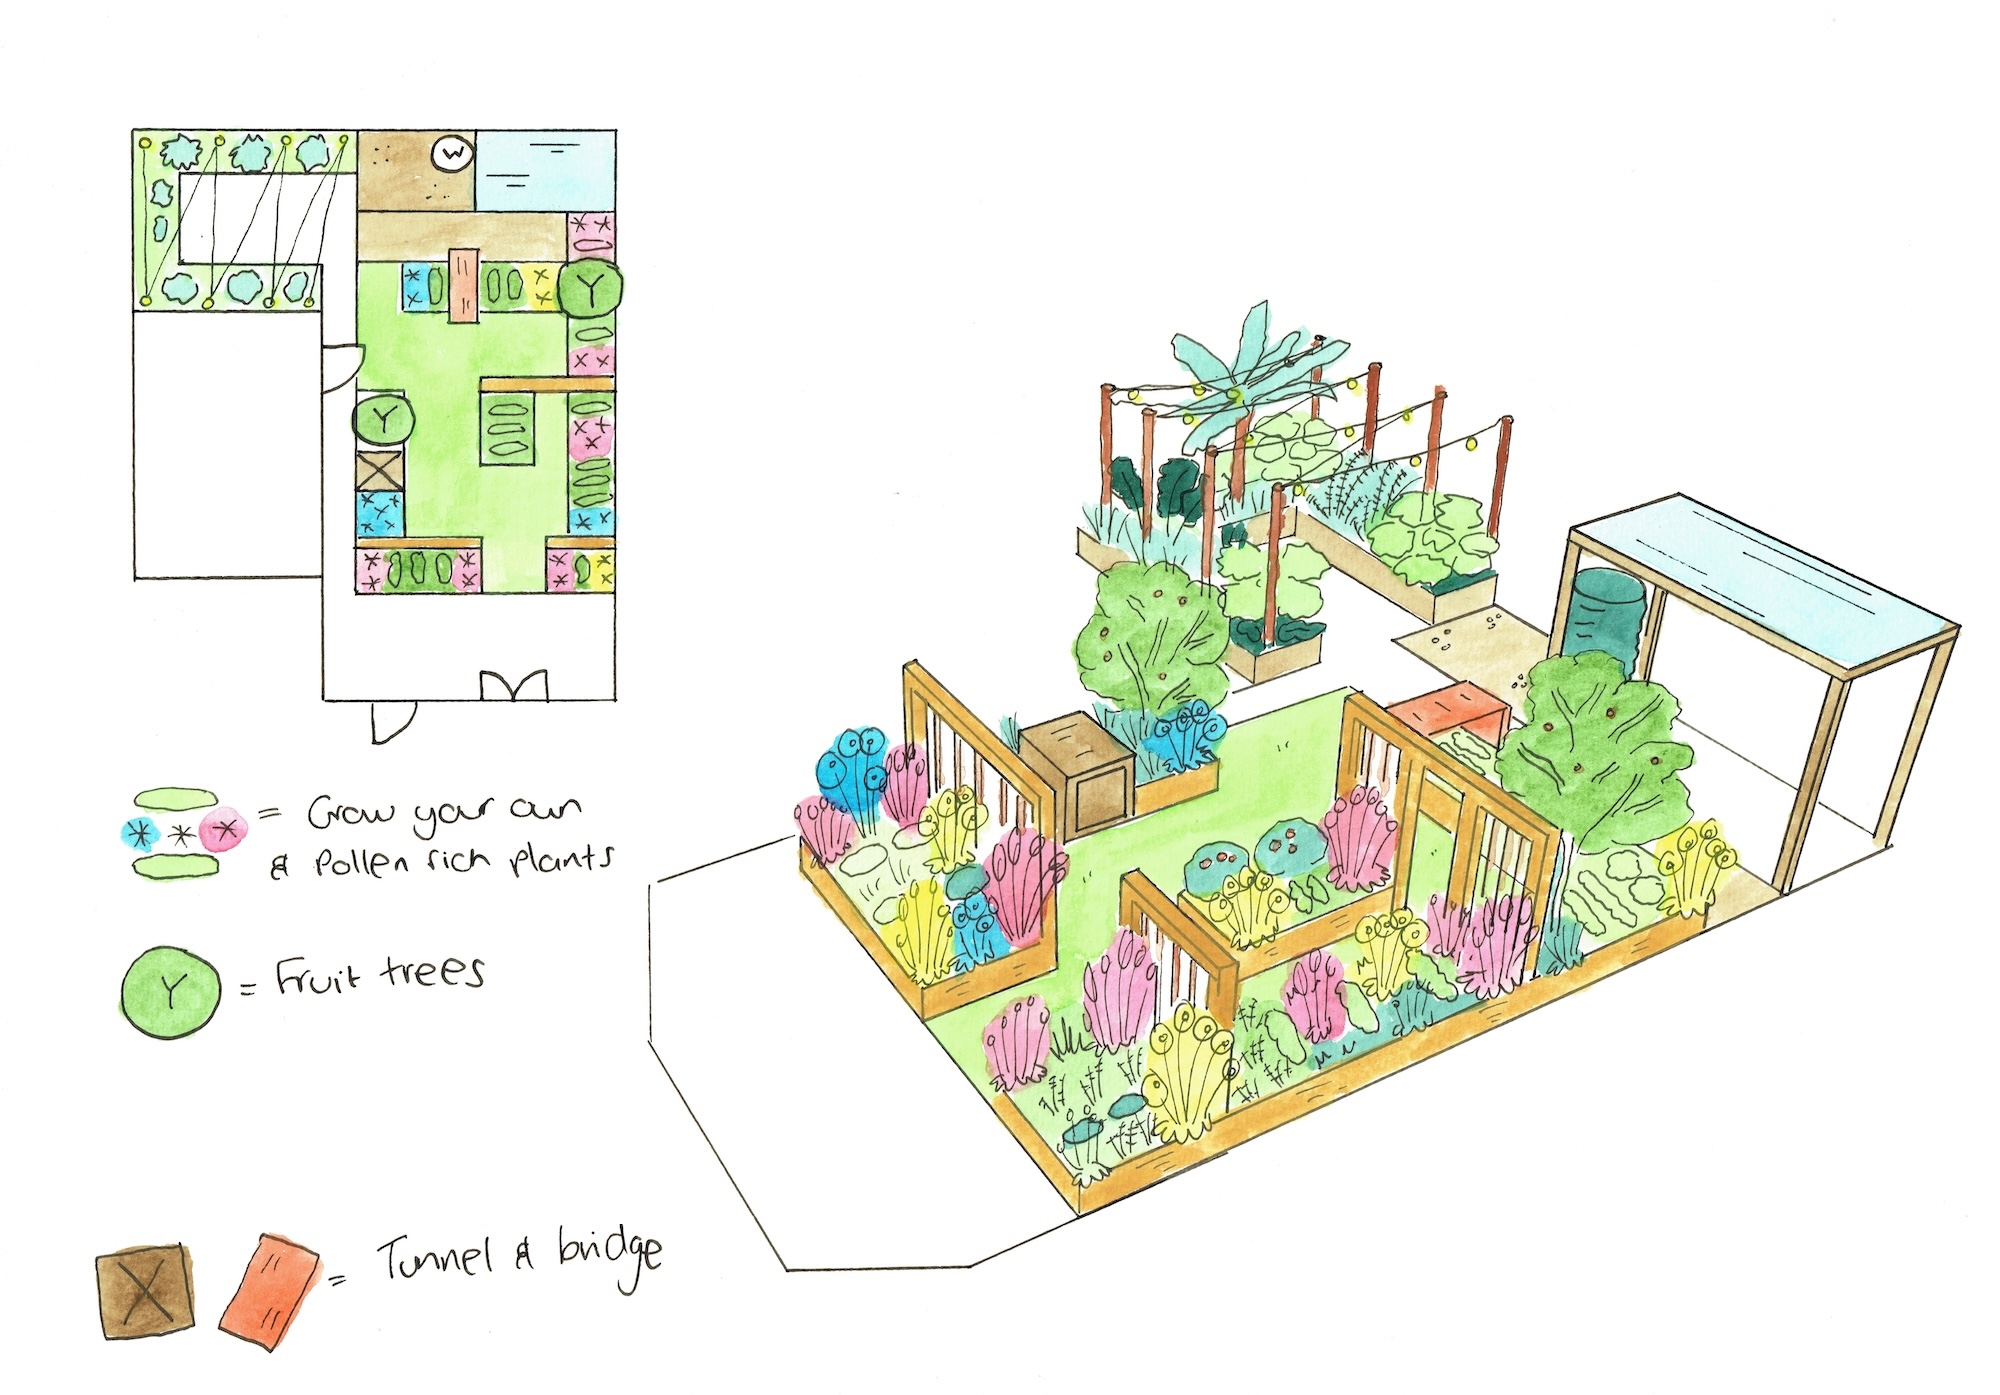
Before you start digging or building, take time to plan your layout. Proper planning makes your vegetable garden more productive, easier to manage, and ensures you’re maximising your available space effectively. This is where solid garden design becomes invaluable, as it allows you to avoid costly and frustrating mistakes, and enables you to understand exactly why things are being placed where and why they will work for you. Grab a cuppa, some paper, and let’s work through this together.
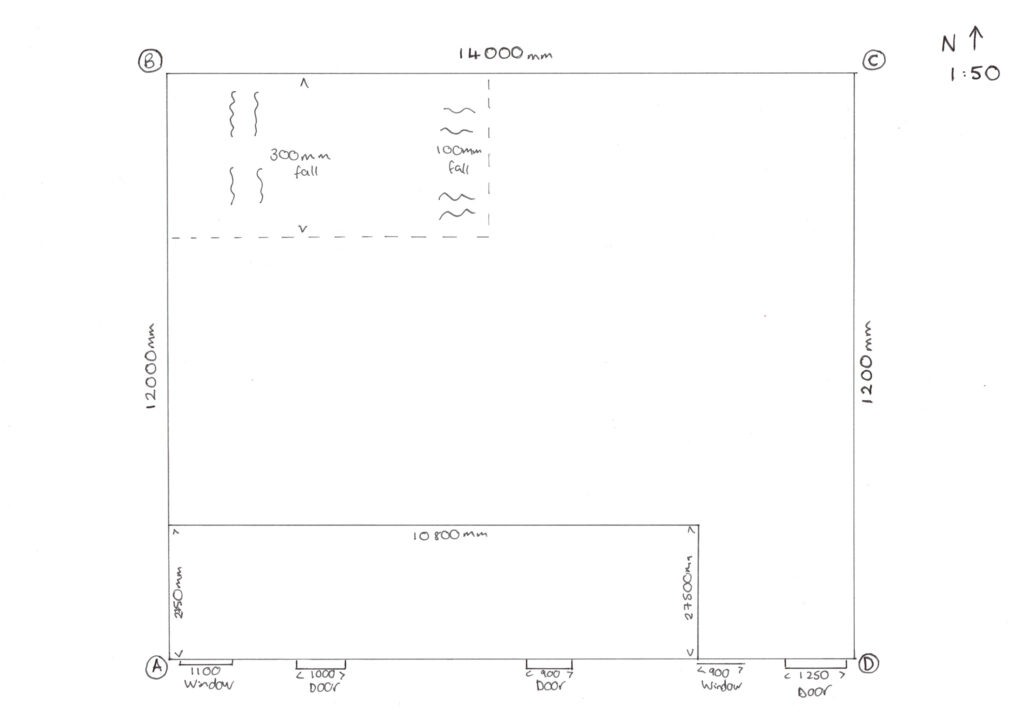
i) Measure Your Space
Start by accurately measuring your available space. Length, width, and note any features like paths, water sources, or structures. Draw a rough sketch to scale. Graph paper makes this easier, with each square representing a set measurement (perhaps 10cm or 20cm per square).
This visual plan helps you see how everything fits together before you commit to building or planting anything. Trust me, measuring twice and digging once saves enormous effort!
ii) Decide on Your Growing Method
You’ve got three main options for vegetable growing, and each has distinct advantages:
In-Ground Beds: The traditional approach. You improve existing soil and plant directly into the ground. This works brilliantly if you have decent soil and good drainage. It’s the most cost-effective method, but requires the most initial soil improvement work.
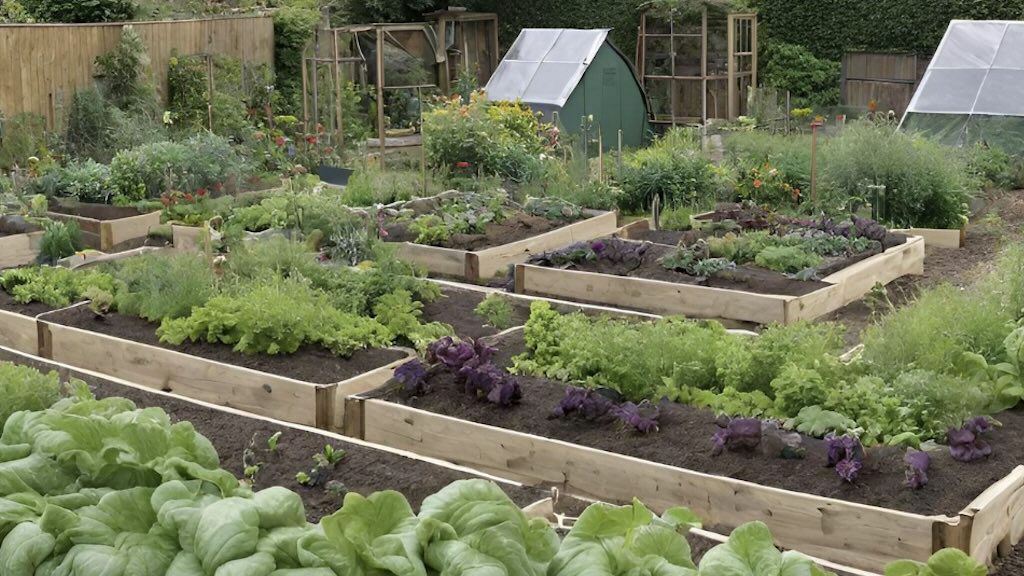
Raised Beds: These are elevated planting areas contained within a frame (usually timber, metal, or stone). They’re my personal favourite for most situations. Raised beds warm up faster in spring, drain better, are easier on your back, and allow you to bring in quality topsoil even if your existing soil is poor. The initial investment is higher, but the benefits are substantial.
Container Gardening: Perfect for patios, balconies, or small spaces. Many vegetables grow brilliantly in large containers. This method offers ultimate flexibility (you can move containers to follow the sun) and requires minimal space. However, containers need more frequent watering and feeding.
Bed Dimensions and Spacing
If you’re creating beds (raised or in-ground), keep them no wider than 1.2 metres. This lets you easily reach the centre from either side without stepping on the soil. Stepping on soil compacts it, reducing air space and making it harder for roots to grow.
Length is more flexible, though I’d suggest keeping beds under 3 metres long for practicality. Anything longer and you’ll be tempted to take shortcuts (literally) by stepping over or through rather than walking around.
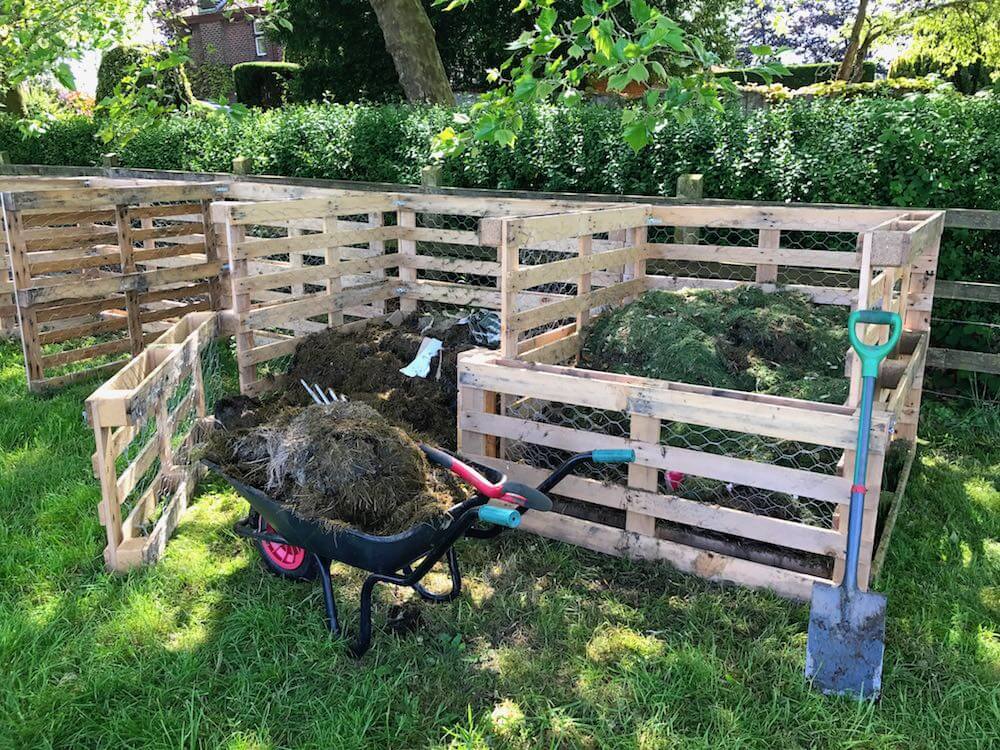
Allow paths of at least 60cm between beds; wider paths may be necessary to accommodate a wheelbarrow. These paths make accessing plants easy for watering, weeding, and harvesting.
For my comprehensive guide to building a raised bed, complete with exact measurements and instructions, check out my Ultimate Guide to Raised Beds article. In a nutshell, raised beds allow you to garden anywhere and create vegetable beds quickly, even with poor new build garden soil, or even by placing them on top of flags. They make vegetable growing accessible to everyone, and I highly recommend them.
Consider Vertical Growing
Think in three dimensions! Many vegetables climb and can grow upwards rather than sprawling across the ground. Beans, peas, cucumbers, and even some squashes can be trained up supports, dramatically increasing your growing space.
Vertical growing also improves air circulation around plants (reducing disease), makes harvesting easier, and can create living screens or attractive garden features. Obelisks, teepees, trellises, and simple cane structures all work brilliantly in containers, so if you’re pushed for space and only have a terrace or balcony, you can still grow vegetables, Ninjas!
Group Plants by Water and Care Needs
Plant vegetables with similar watering requirements together. Thirsty crops, such as tomatoes, courgettes, and beans, can be grouped together in one area. Drought-tolerant herbs like rosemary and thyme go elsewhere. This makes caring for plants more efficient.
Similarly, group plants by growing season. Keep perennial herbs together (they won’t need replanting each year). Have a dedicated area for quick-growing salads that you’ll be constantly replanting.
Plan for Crop Rotation
Even in a small garden, basic crop rotation can improve soil health and reduce pest problems. Vegetables are grouped into families that share similar pests and diseases and have comparable nutrient requirements.
The main groups are:
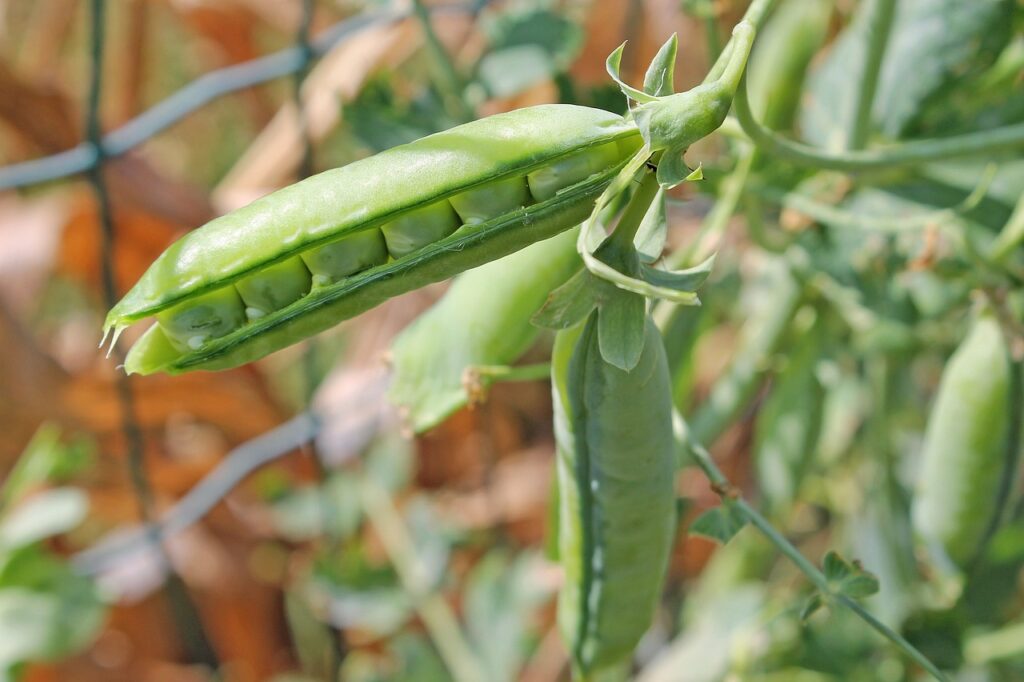
Legumes (peas and beans): add nitrogen to the soil
Brassicas (cabbage, broccoli, kale, cauliflower): heavy feeders, need firm soil
Root vegetables (carrots, parsnips, beetroot): need deep, stone-free soil
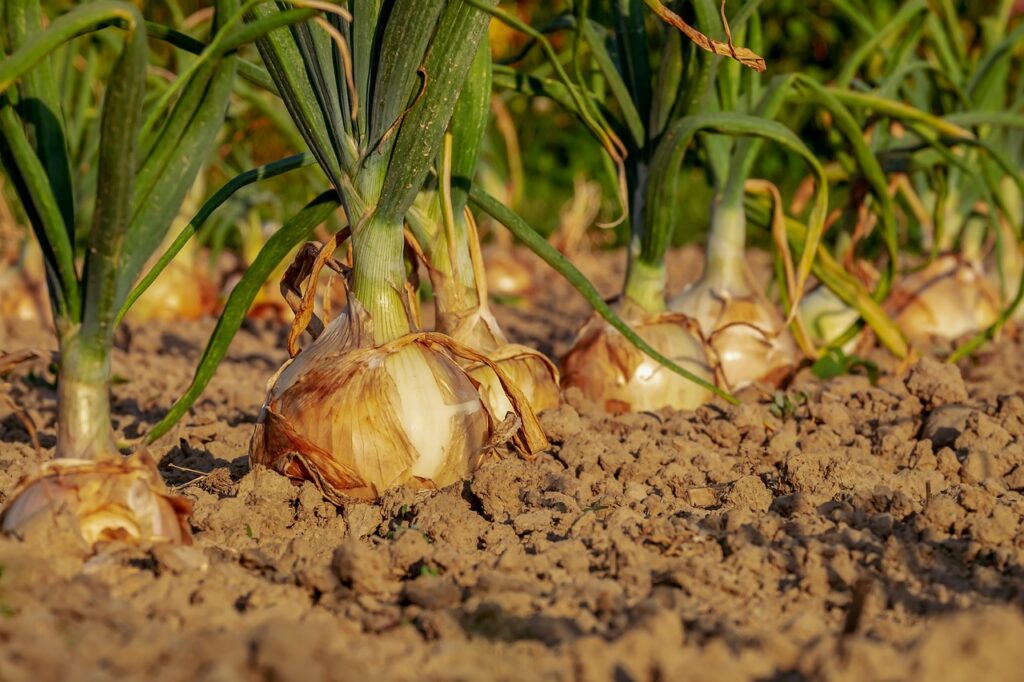
Alliums (onions, garlic, leeks): light feeders
Solanaceae (tomatoes, potatoes, peppers, aubergines): heavy feeders, prone to specific diseases
Rotate these groups around your beds each year. Never grow the same family in the same spot for at least three years. This simple practice has a dramatic impact on plant health and yields.
Legumes (Nitrogen Fixers)Peas, broad beans, French beans, runner beans
Legumes (Nitrogen Fixers): Peas, broad beans, French beans, runner beans
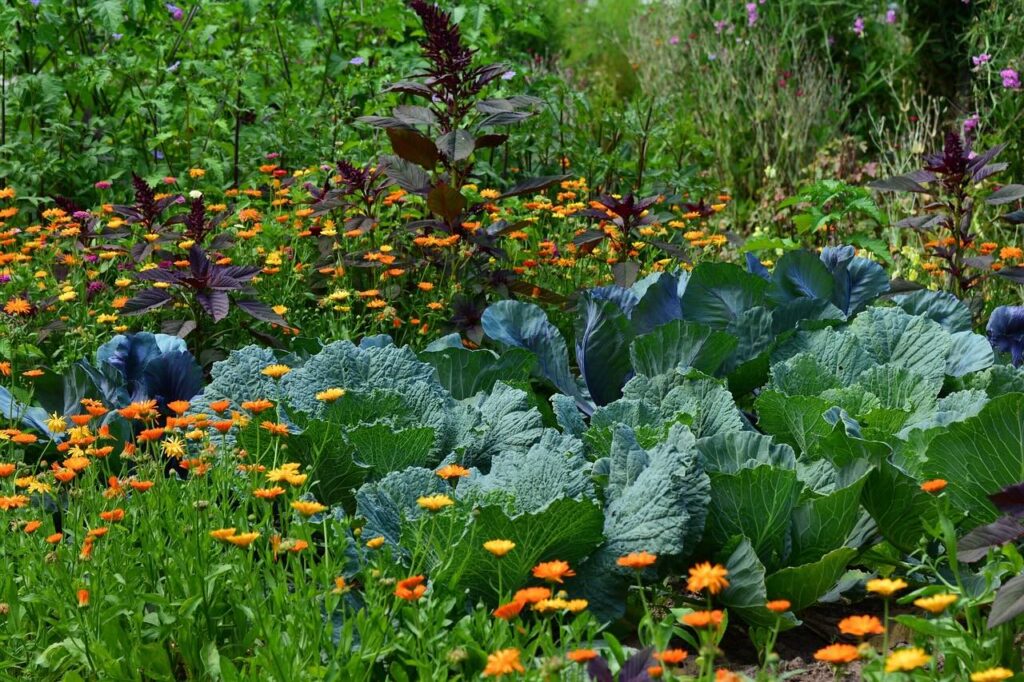
Companion Planting Considerations
Some plants grow brilliantly together, providing mutual benefits where one plant deters pests or is a sacrificial lamb so they ignore your main crop. Tomatoes and basil are classic companions. Carrots and onions confuse each other’s pests. French marigolds deter aphids and add colour.
Conversely, some plants don’t get along. Onions can stunt the growth of peas and beans. Fennel inhibits most vegetables and is best grown separately in herbaceous flower beds instead and used as an ornamental flower.
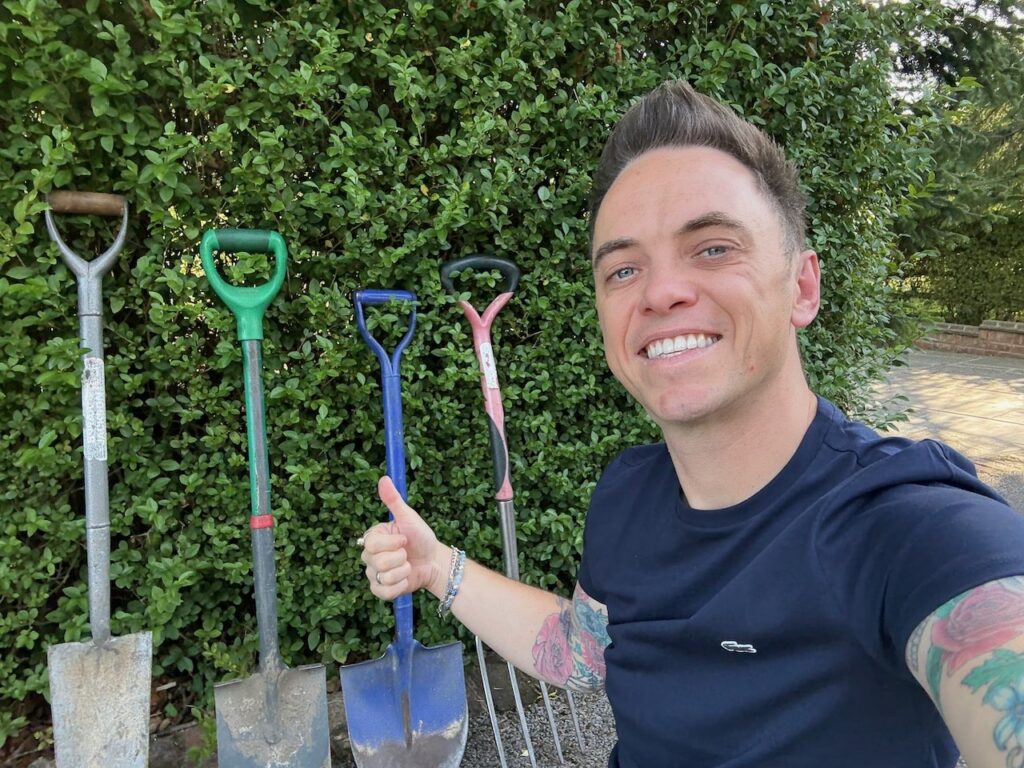
You don’t need a shed full of expensive equipment to start a vegetable garden. In fact, beginners often waste money on tools they’ll never use! Here’s my essential kit list based on years of practical experience. Buy quality basics rather than quantity, and add specialised tools as you discover you actually need them. I’ve listed these vegetable garden tools in order of importance, so buy the top three first, then work your way down!
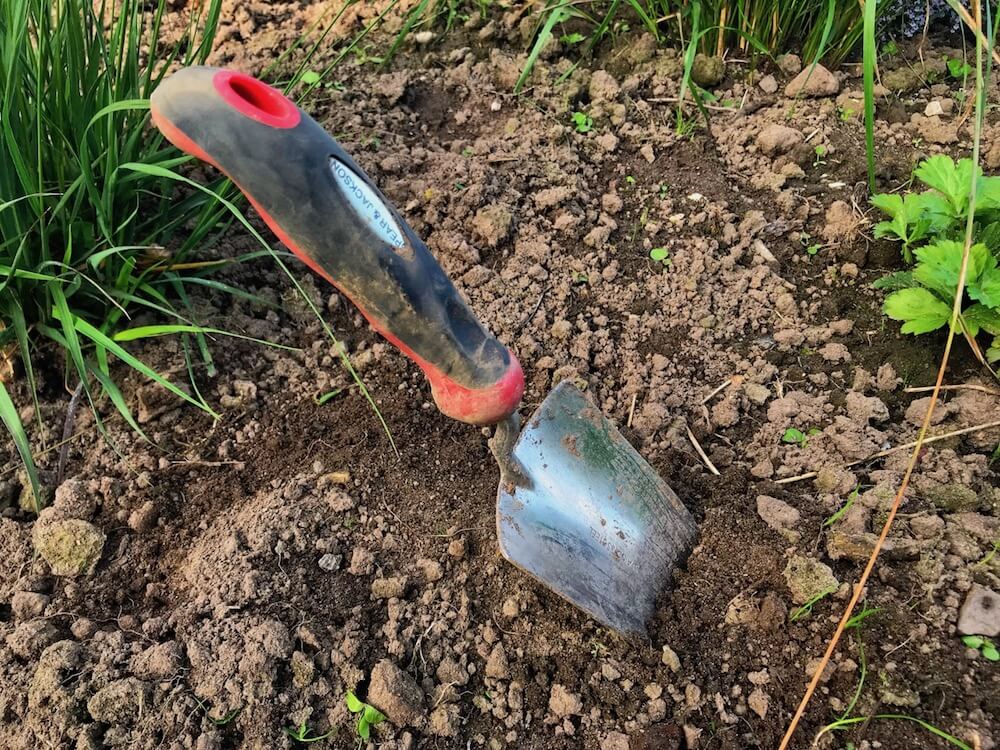
Hand Trowel
Your most-used tool. Invest in a stainless steel one with a comfortable grip. Cheap trowels bend or snap when you hit a stone. A quality trowel lasts decades.
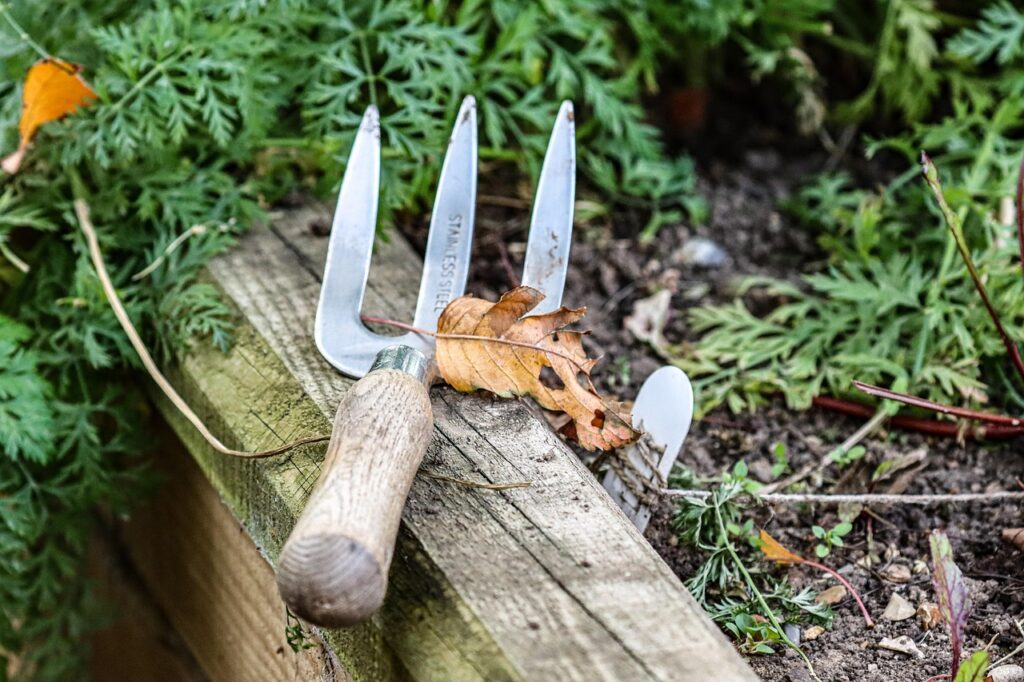
Hand Fork
Perfect for weeding, loosening soil, and mixing in compost. Again, stainless steel with a solid handle.
Spade
For digging, turning soil, and moving compost. A border spade (smaller than a full-size digging spade) is perfect for vegetable plots and easier to manage if you’re not super strong. Check out my full detailed guide on spades and forks here!
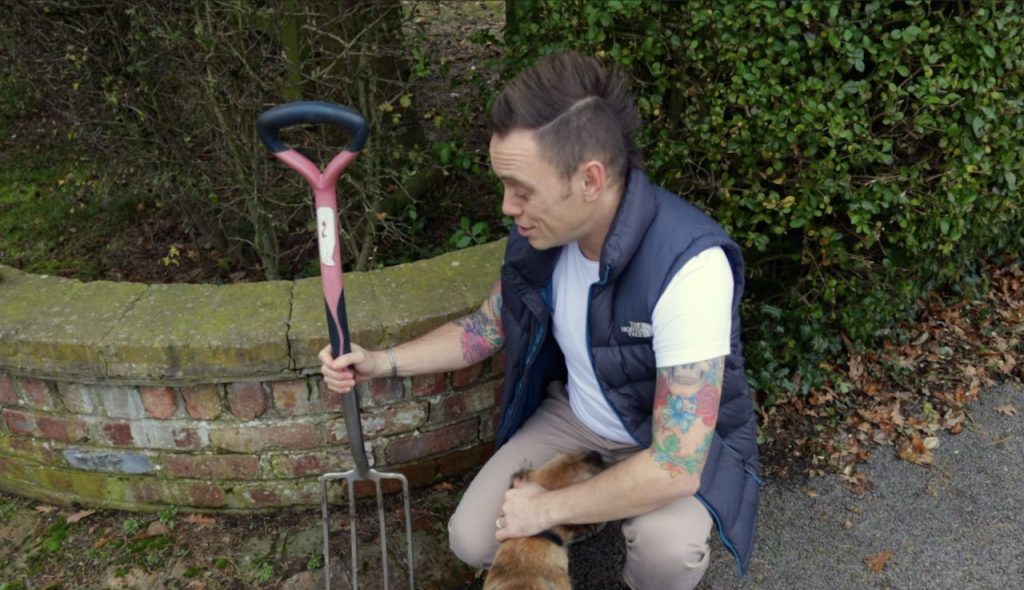
Fork (Digging Fork)
Essential for breaking up soil and lifting crops, such as potatoes. Look for one with square-section tines rather than flat ones; they’re far stronger.
Hoe
Brilliant for quick weeding and creating drills (shallow trenches for sowing seeds). A Dutch hoe or stirrup hoe is most useful for vegetable gardens, or even better, the occisalating hoe!
Rake
Needed for levelling soil, creating fine tilth for seed sowing, and clearing debris. A standard garden rake with metal tines works perfectly.
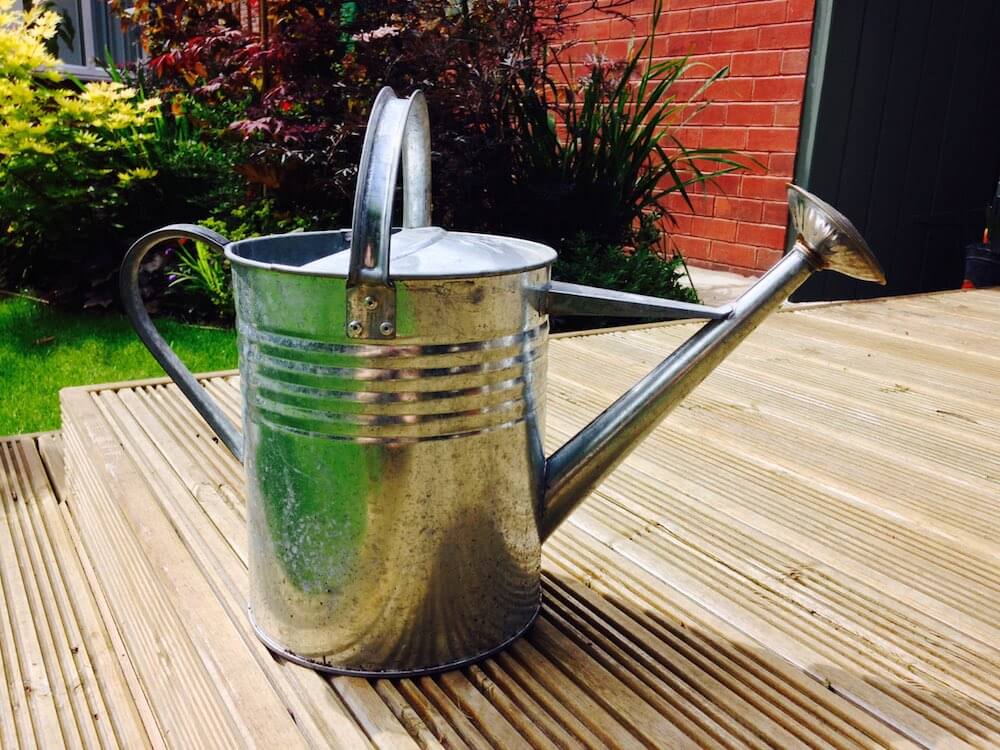
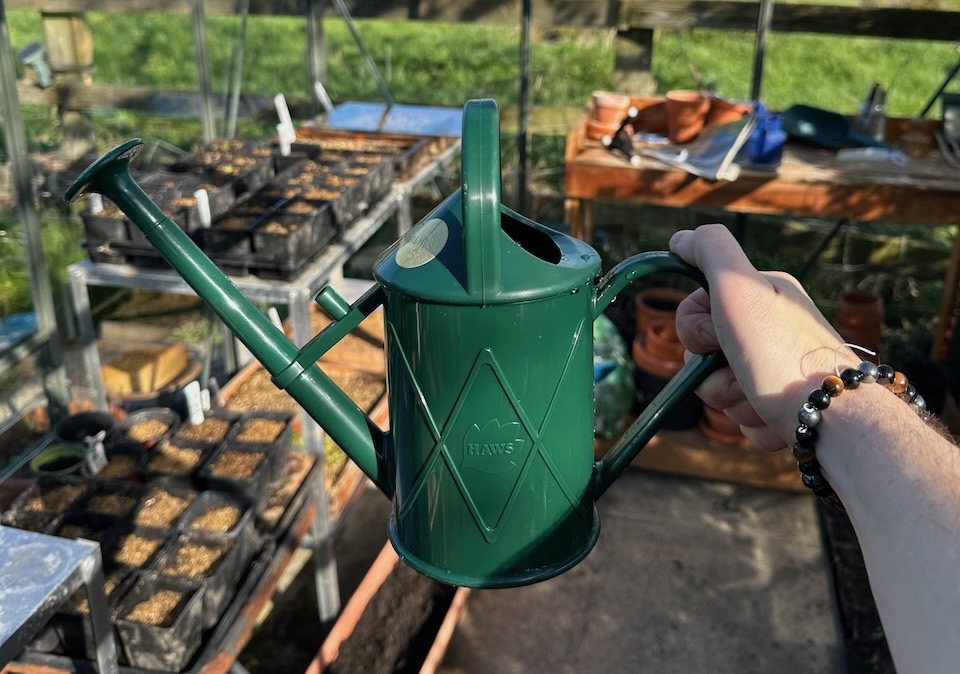
Watering Can
Get a large one (8-10 litres) with both a rose (sprinkler head for gentle watering) and the ability to remove the rose for direct watering at the base of plants.
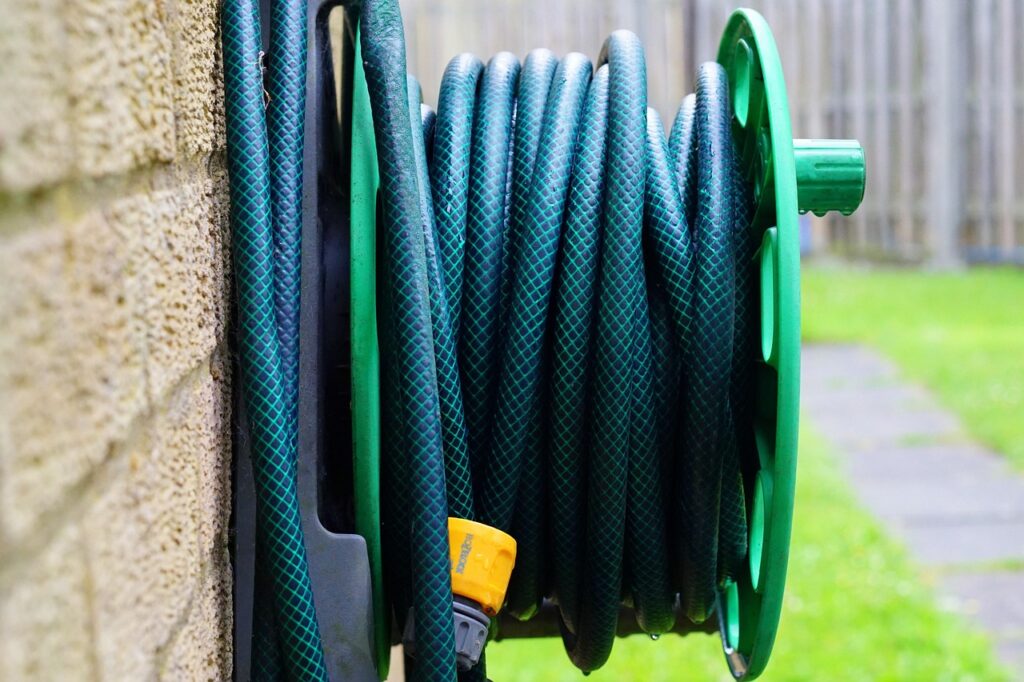
Garden Hose
Unless your plot is tiny and right by a tap, a hose makes watering infinitely easier. Get a proper hose with brass connectors, not cheap ones that split after one season.
Additional Gardening Tools, if you want to get serious about vegetable growing
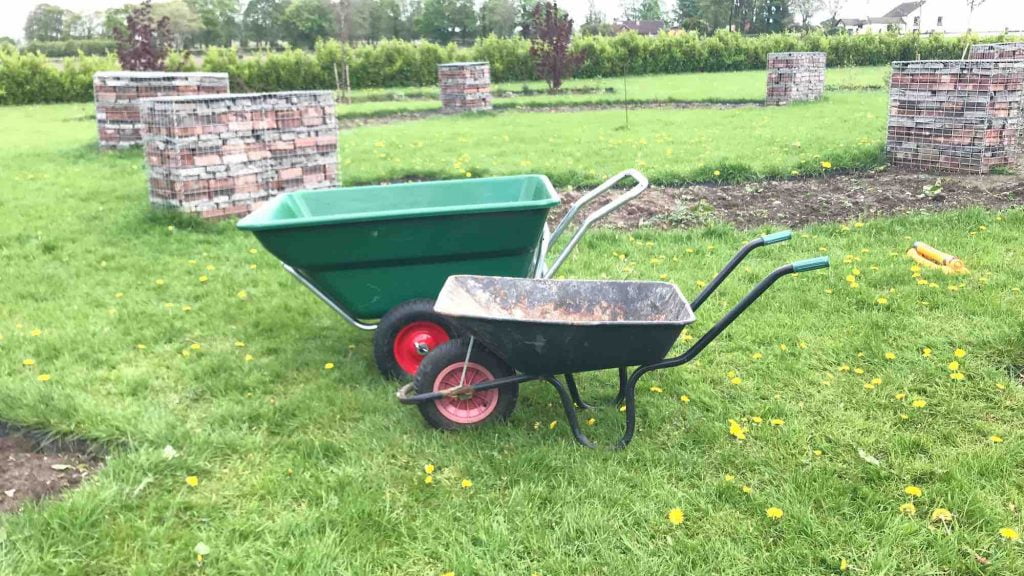
Wheelbarrow: Makes moving compost, soil, tools, and harvests far easier. Worth the investment if you have storage space.
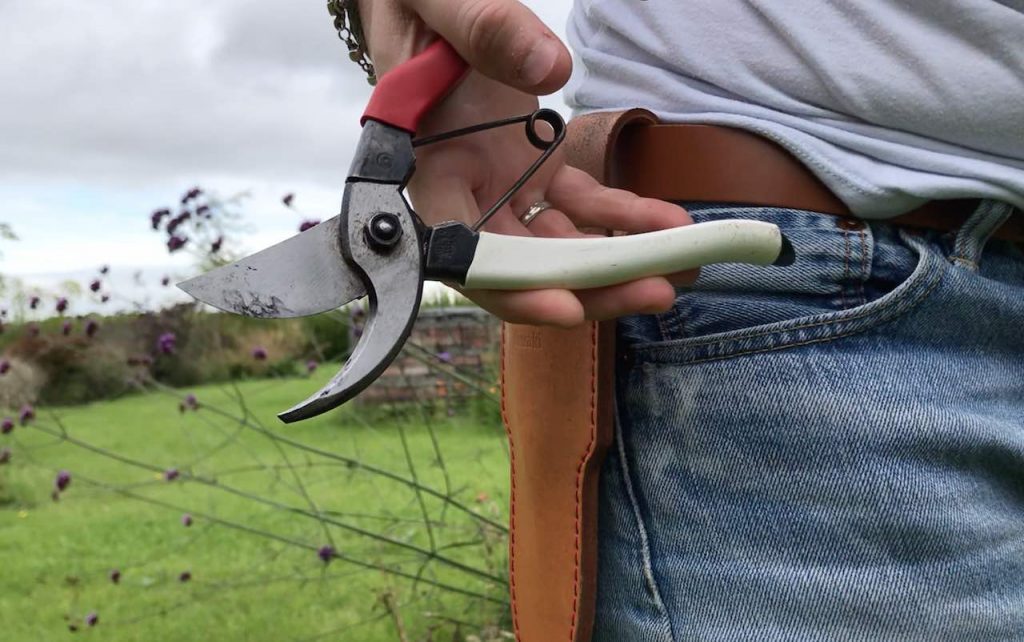
Secateurs: Essential for pruning tomatoes, harvesting stems, and general tidying. Bypass secateurs (scissor-action) are better quality than anvil types.
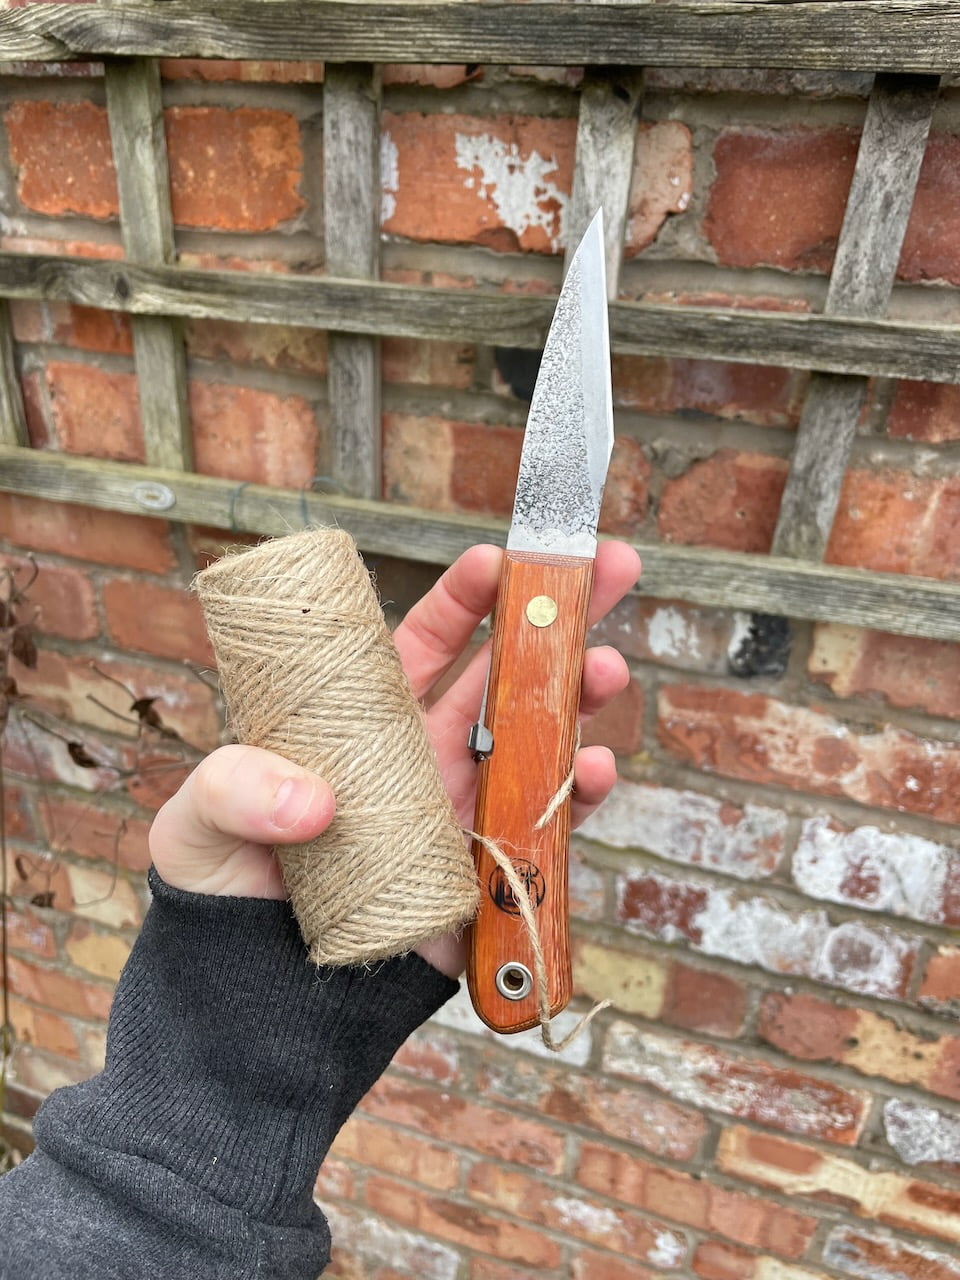
Garden Twine/String: Needed for supporting plants, creating straight rows when sowing, and a hundred other uses. Natural jute or hemp twine is excellent.
Dibber: A pointed tool for making holes for transplanting seedlings or planting sets (onions, shallots). You can use an old broken spade handle or even a thick stick.
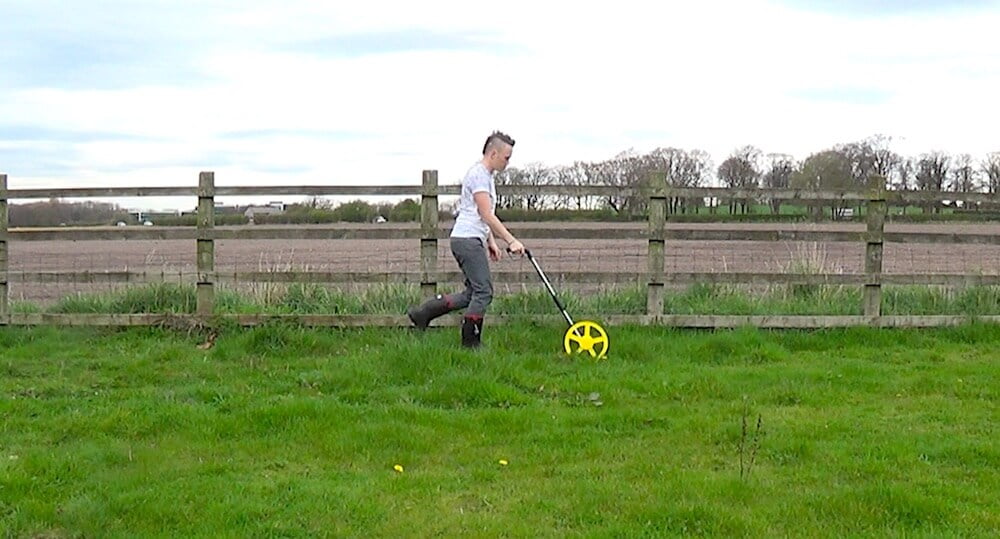
Measuring Tape: Accurate spacing matters for healthy plants. A 3-metre or 5-metre tape is perfect or if you’re thinking bigger a trundle wheel like the one I’m using below enabled you to measure out larger distances for big plots.
Labels and Permanent Marker: Trust me, you will not remember what you planted where! Wooden or plastic labels, along with a waterproof marker, can save enormous confusion.
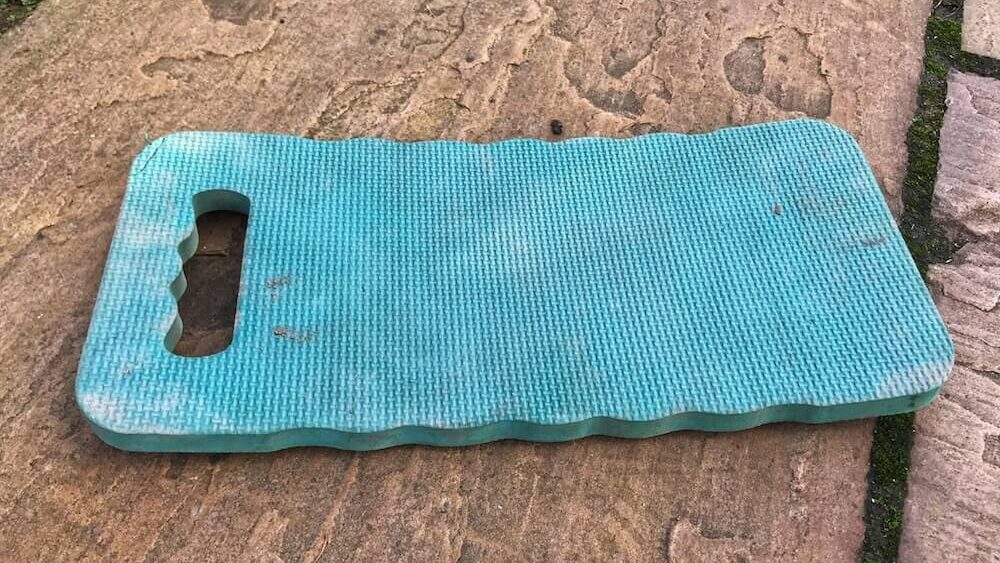
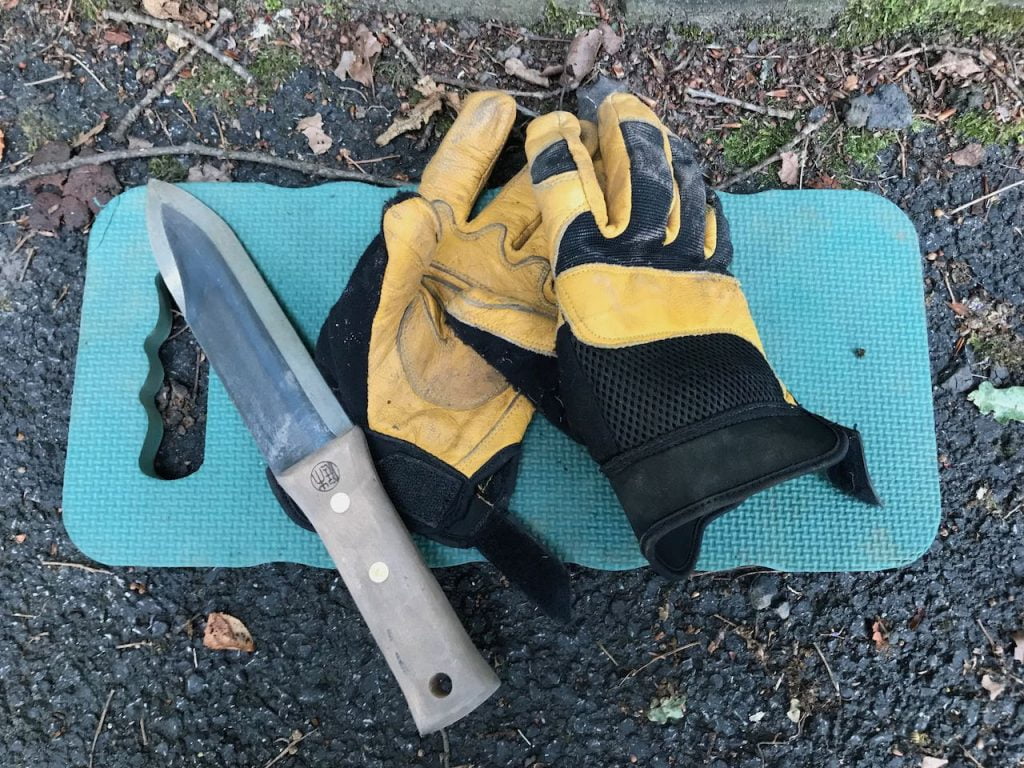
Kneeling Pad: Save your knees! A foam pad or kneeler makes weeding and planting far more comfortable, especially as you get older.
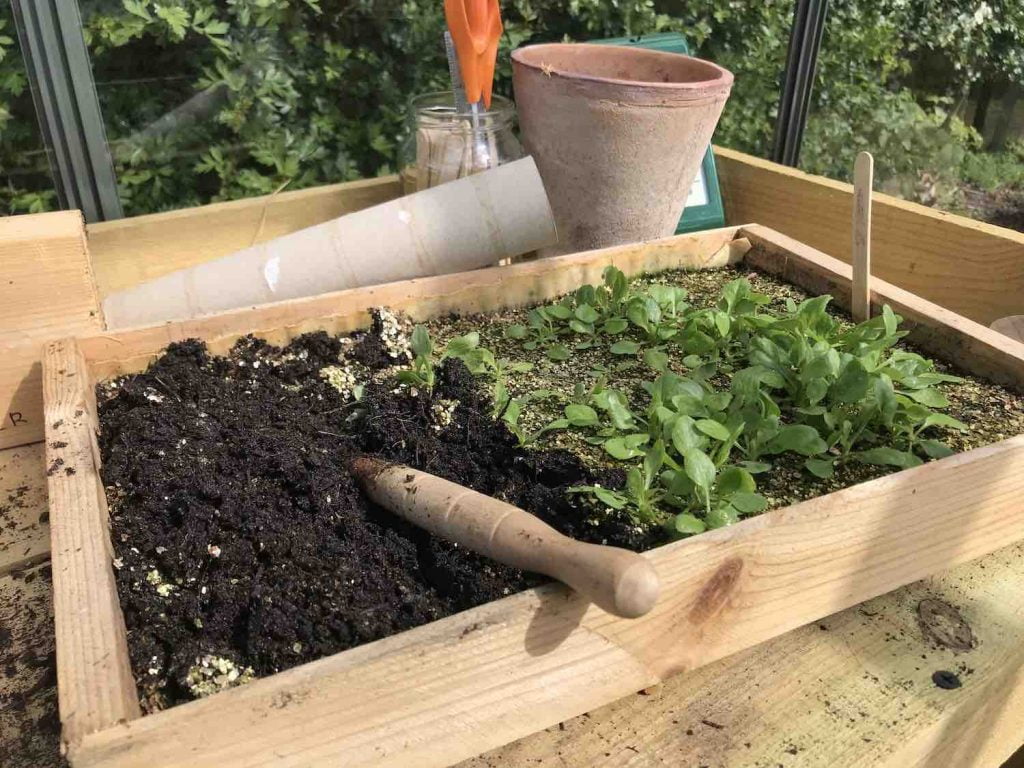
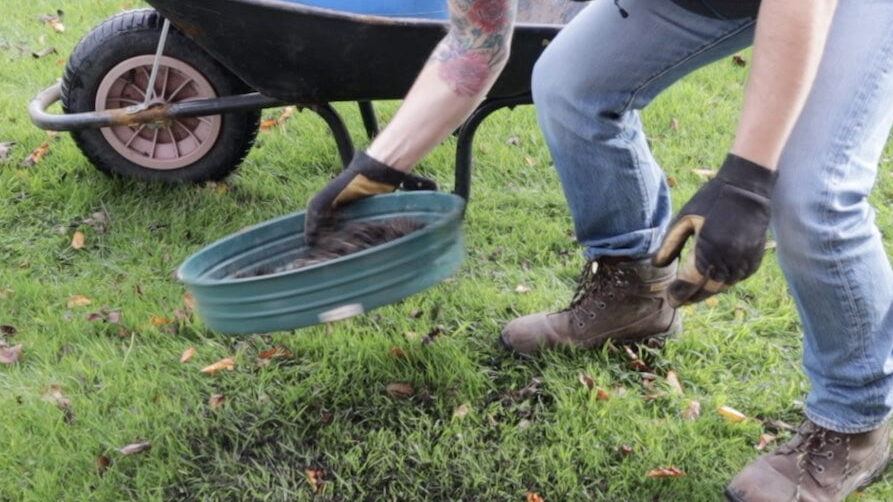
Garden Sieve: For creating fine compost for seed sowing or removing stones from soil.
Hori-Hori Knife: A Japanese gardening knife that’s phenomenally versatile for planting, weeding, cutting, and dozens of other tasks.
Tool Maintenance Matters
Take care of your tools, and they’ll last for years. Clean them after each use. Wipe metal parts with an oily rag to prevent rust. Sharpen spade and hoe edges annually. Hang tools rather than leaving them on the ground, where they rust and get damaged.
For detailed guidance on my garden tool recommendations, check out my blog, where I review the tools I actually use every single day in my garden design work and personal vegetable plot!
What to Grow: Best Vegetables for Beginners
Right, this is where excitement really builds! It’s time for me to show you the easiest beginner vegetables to grow in your newly planned vegetable gardens, containers or balconies. Deciding what to grow is one of the most enjoyable parts of vegetable gardening. However, not all vegetables are created equal when it comes to ease of growing. Some are absolutely foolproof, whilst others demand experience, patience, and perfect conditions.
For your first year, focus on the easy wins. Success breeds confidence, and confidence leads to experimentation. Here are the vegetables I recommend every beginner start with, based on what grows reliably well in British gardens without too much fuss.
Year 1 Crops to Grow
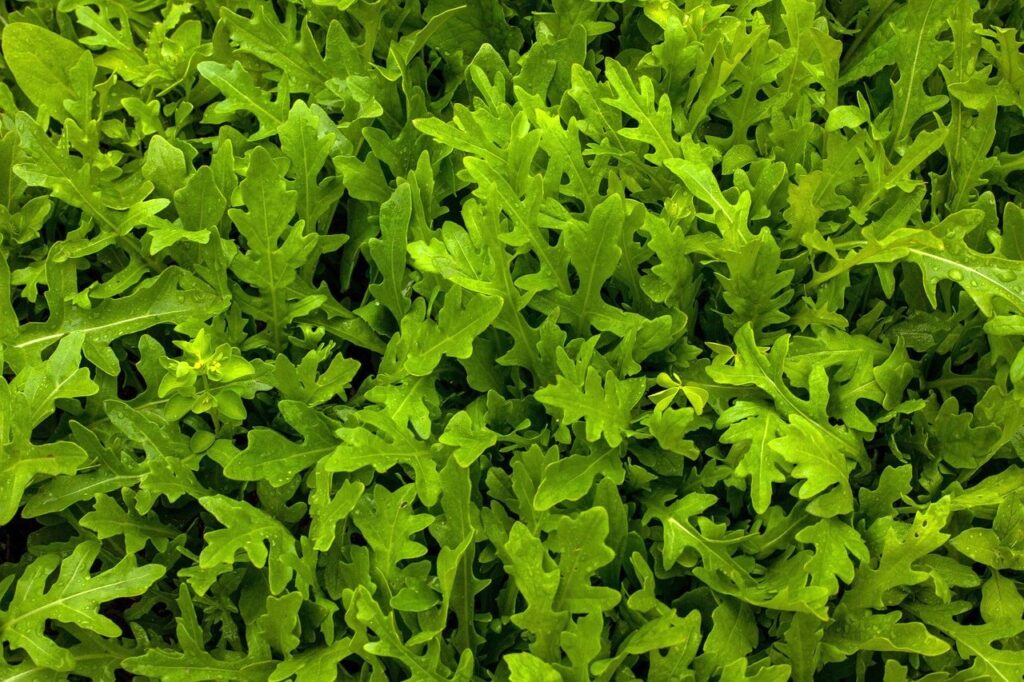
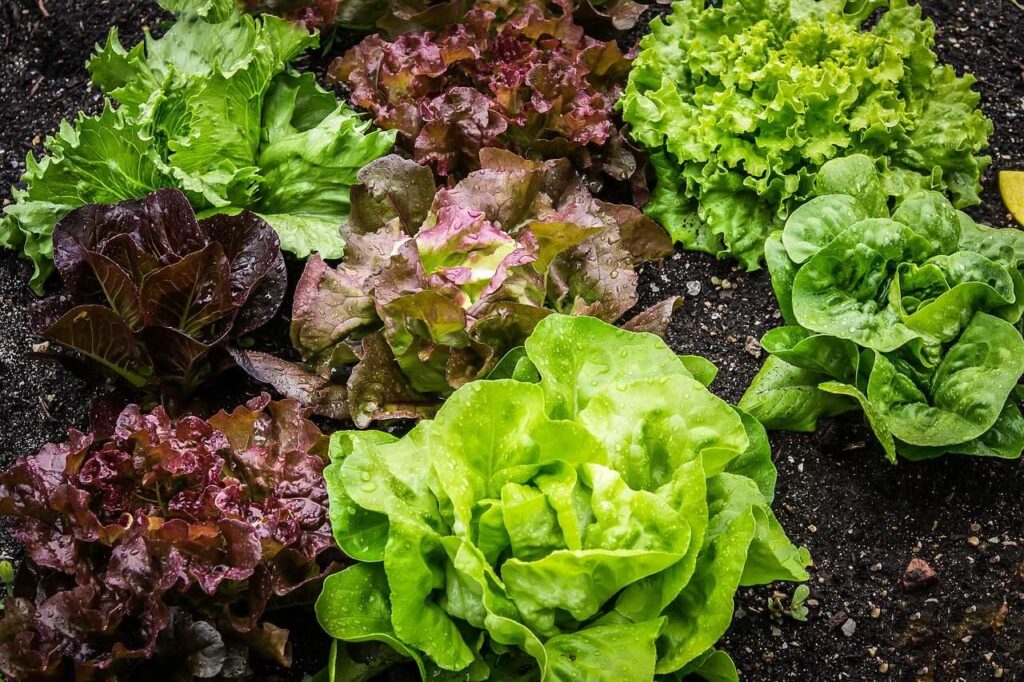
Salad Leaves (Lettuce, Rocket, Mizuna)
Ridiculously easy, incredibly fast (you can be harvesting in three to four weeks), and phenomenally expensive in shops. Sow small amounts every fortnight for a continuous supply. They tolerate partial shade and grow happily in containers. Honestly, if you grow nothing else, grow salad leaves!
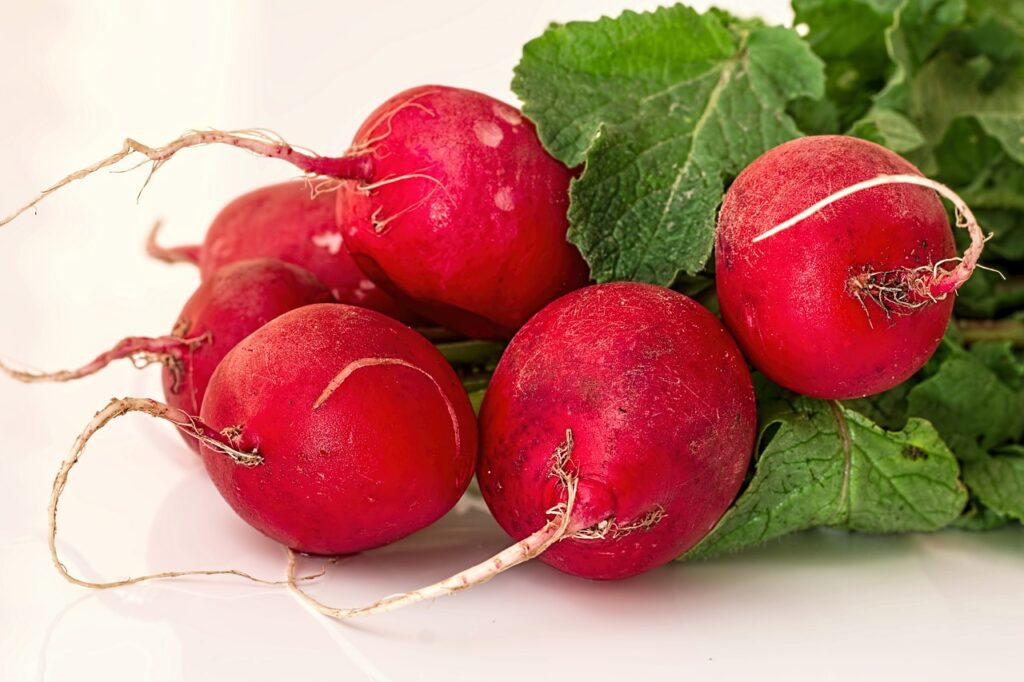
Radishes
This speedy, beginner-friendly vegetable has a place in my heart as it was the first edible I ever grew at the age of 4! The ultimate instant gratification crop. From seed to harvest in as little as three to four weeks. Kids love them because they can see results fast. Radishes aren’t fussy about soil, tolerate cool weather, and the peppery roots are delicious in salads or roasted.
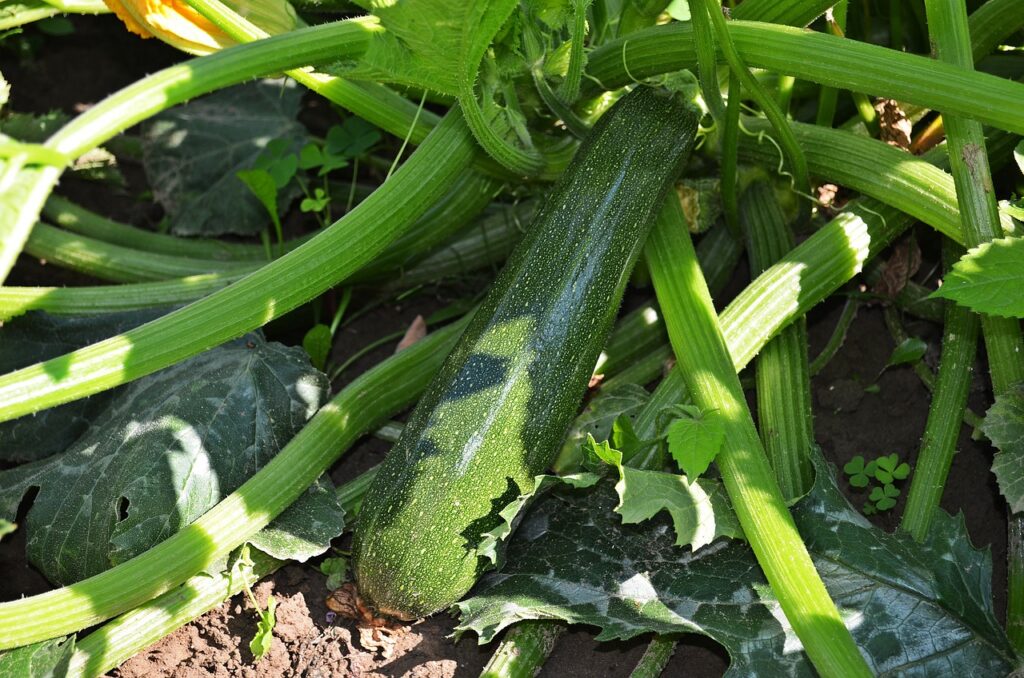
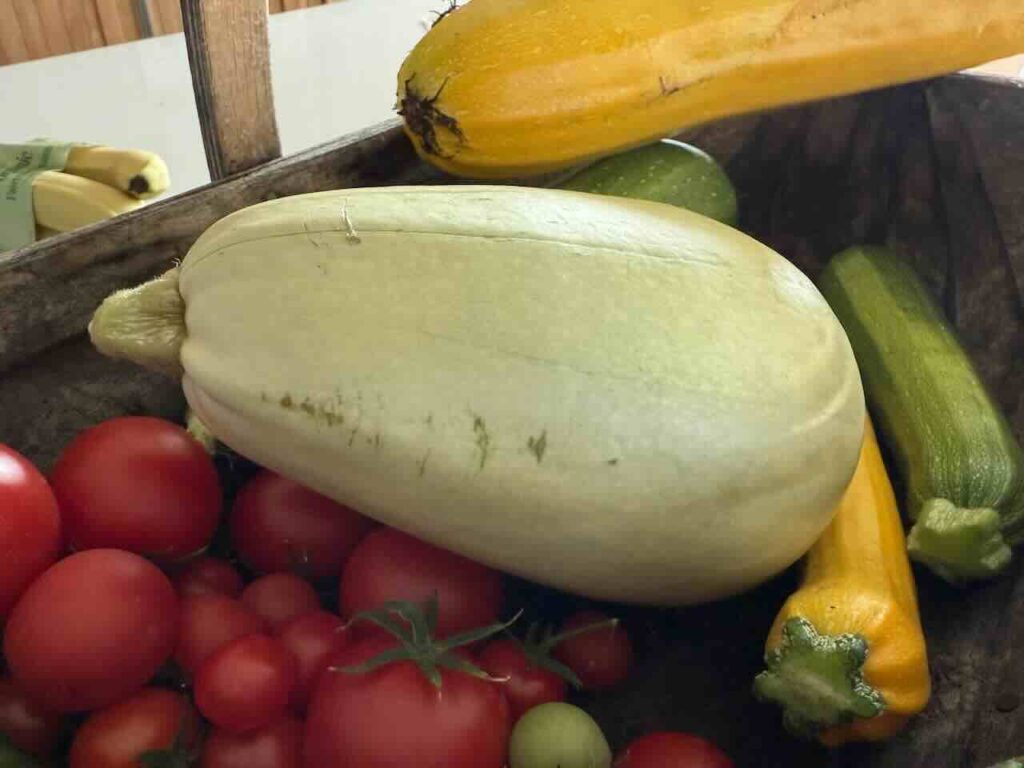
Courgettes
Plant one or two (honestly, two plants produce more than most families can eat), give them sun, regular water, and decent soil, and they’ll absolutely crop like mad. Harvest them small (15-20cm) for the best flavour and to keep plants productive. Easy, prolific, and incredibly versatile in cooking.
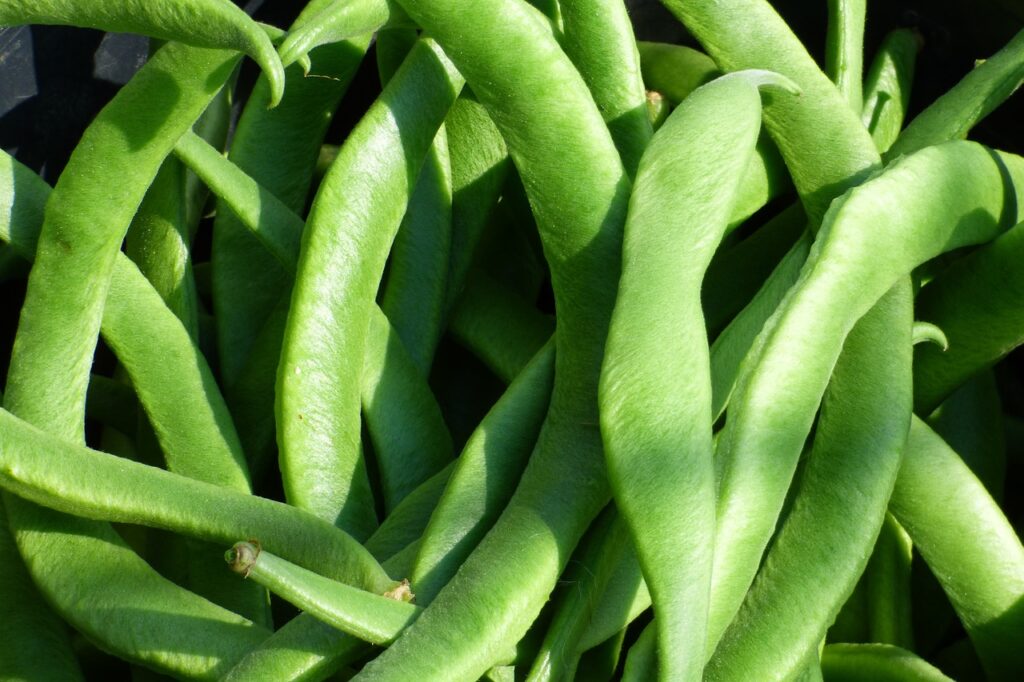
Runner Beans or French Beans
Beans are brilliant beginner’s crops. They’re quick to germinate, grow vigorously, look attractive, and produce loads. They also improve soil by fixing nitrogen. French beans are bushier and don’t need much support. Runner beans climb and need poles or trellis, but produce even heavier crops.
Tomatoes
Cherry tomatoes, especially, are very forgiving. Growing them in pots or growbags often works better than in the ground. They need warmth, sun, and regular feeding, but the flavour of homegrown tomatoes makes them absolutely worth the effort. Start with bush varieties, which require less pinching out and are simpler to manage. Don’t go bonkers; plant one or two tomatoes in your first year, as they can quickly outgrow greenhouses, taking up precious space.
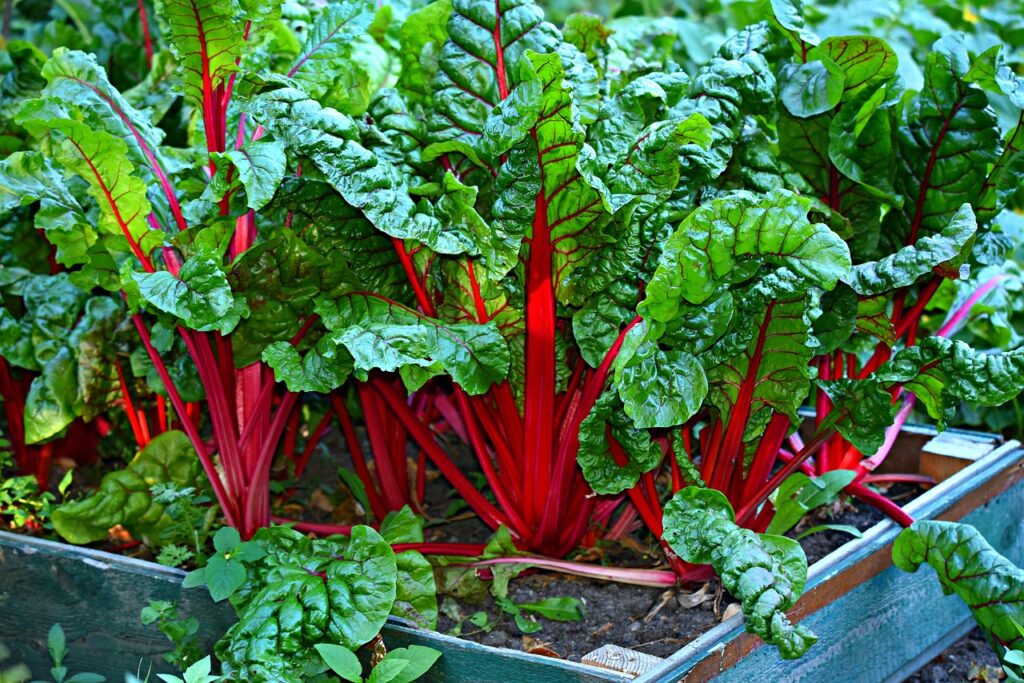
Perpetual Spinach or Chard
Similar to spinach but far easier. It doesn’t bolt (run to seed) in hot weather like true spinach. Pick the outer leaves regularly, and the plants will continue to produce for months. Chard comes in beautiful rainbow colours and is incredibly nutritious.
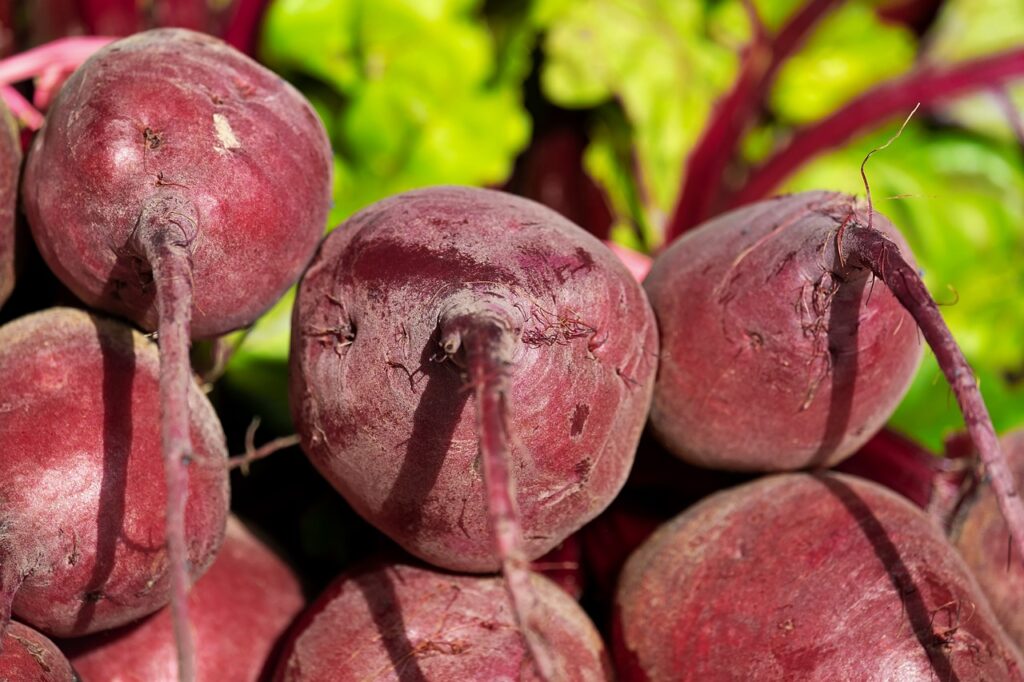
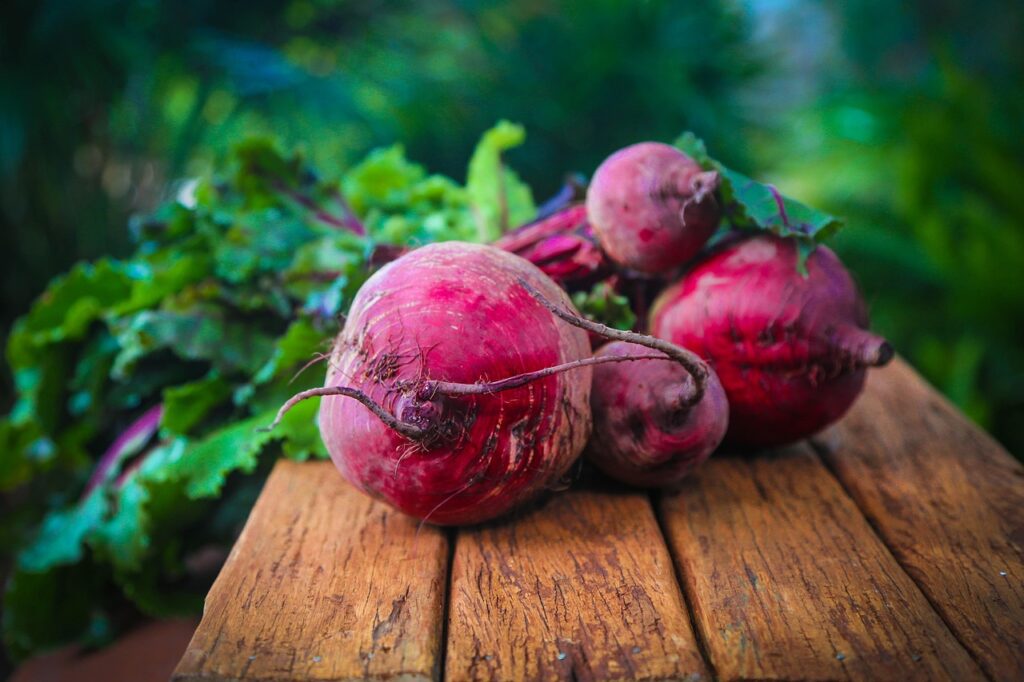
Beetroot
Not just the boring purple stuff you remember from school dinners! Modern beetroot varieties come in gold, striped, and white. They’re easy from seed, don’t need much space, and you can eat both the roots and the leaves. These vegetables are delicious roasted, pickled, or raw in salads as a true superfood!
Peas
Sugar snap or mangetout varieties are easier to eat than traditional peas because you can eat the whole pod (no shelling required!). They’re pretty hardy, tolerate cool weather, and children love them. Support them with pea sticks or netting. Fresh peas straight from the pod are truly out of this world to taste!
Second-Year Veg Crops
Once you’ve gained confidence with the basics, try these slightly more demanding crops. They will take longer to crop, probably require more skill and patience to sow or need additional feeds, but now you’ve got a year under your belt as a new vegetable gardener, that should be no problem!
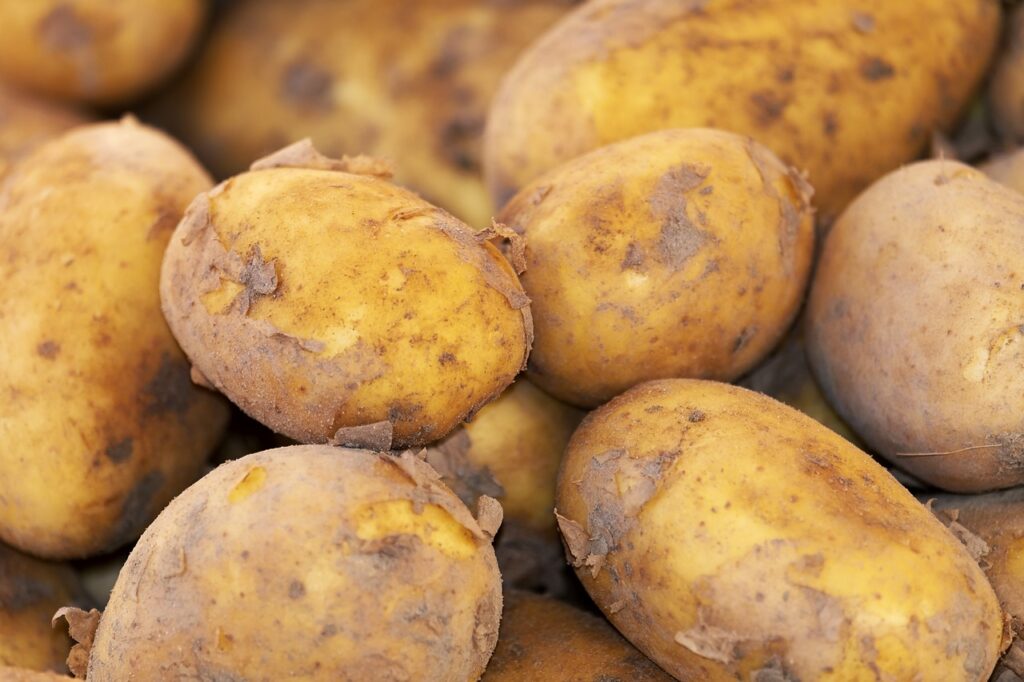
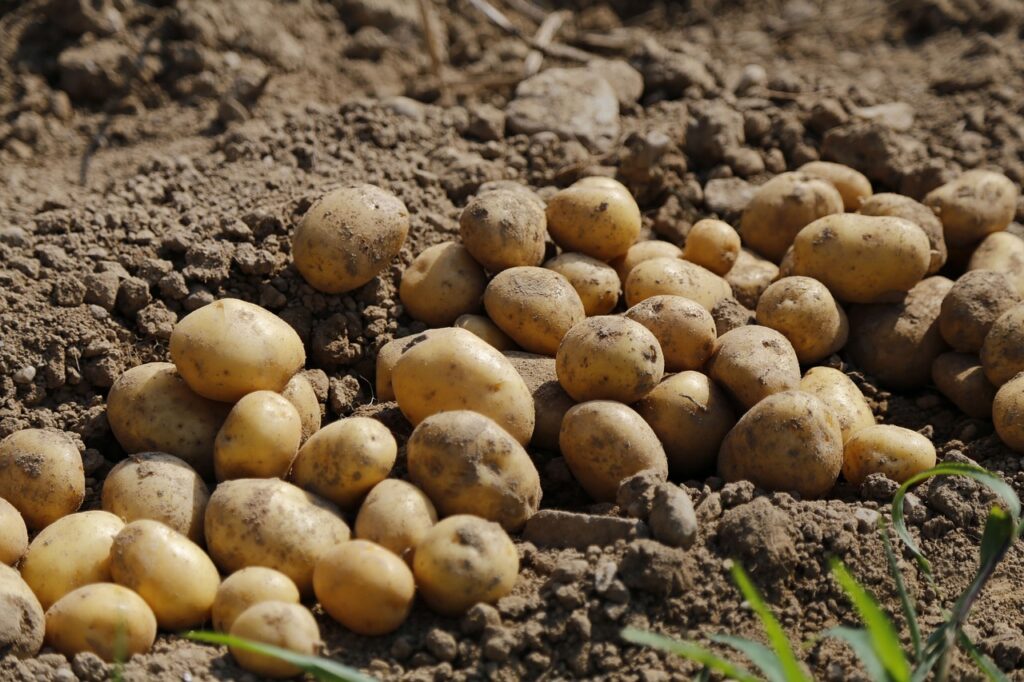
Potatoes
Not difficult, but they require more space and time, so they are not particularly worthwhile in small gardens. Early varieties are faster and easier to grow than maincrop varieties. The joy of harvesting your own spuds is hard to beat! They taste delicious, but don’t waste space in small gardens growing them; choose other, more exotic vegetables instead, Ninjas.
Onions and Garlic
Grow from sets (small bulbs) rather than seed for easier success. They require minimal maintenance once planted and store well. Drying them in the sun once harvested is always a lovely sight, seeing them all lined up on the ground.
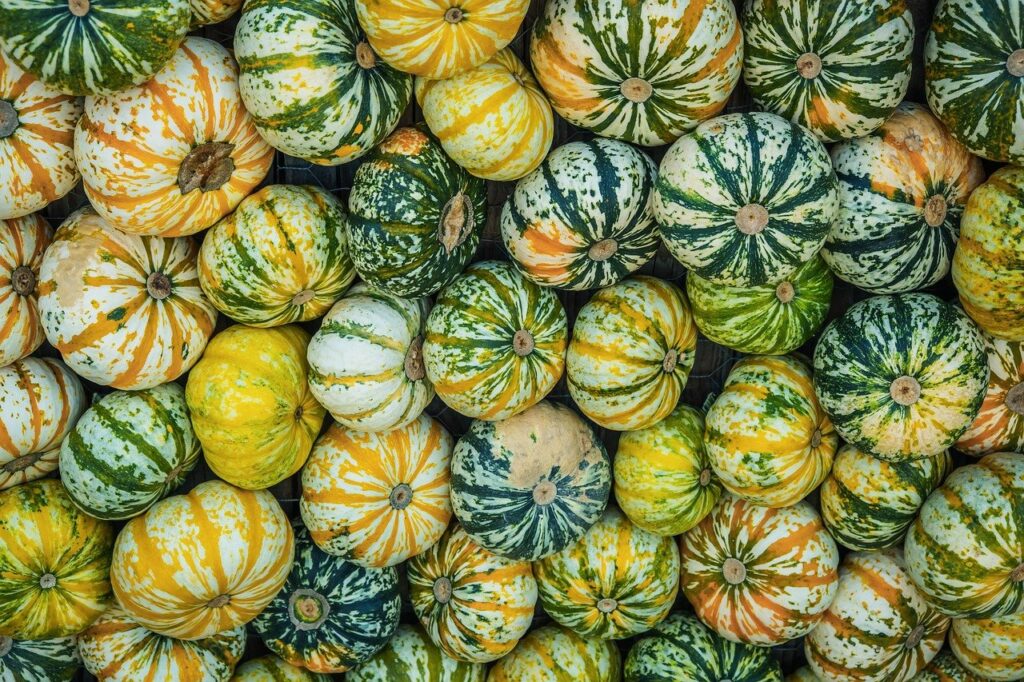
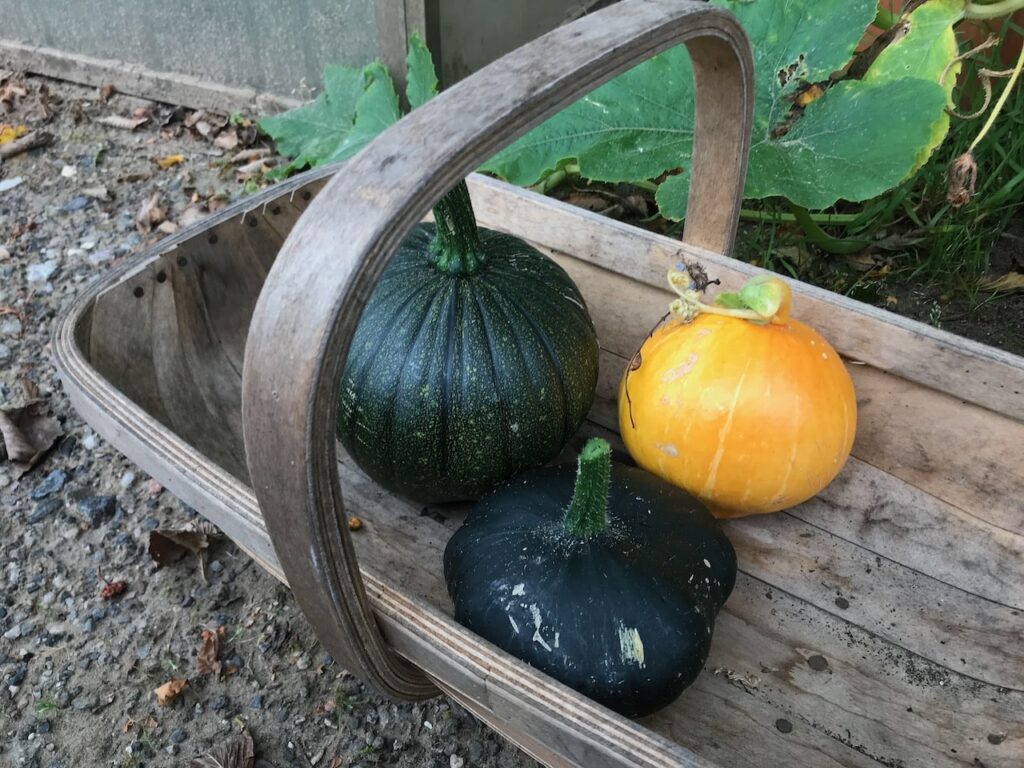
Squash and Pumpkins
Similar to courgettes, but they need more space and take longer to mature. Start these off in April and you’ll have a harvest by late September and October. Incredibly productive and fun to grow, especially with children. My guide on growing pumpkins makes it so easy to grow if you start in early spring.
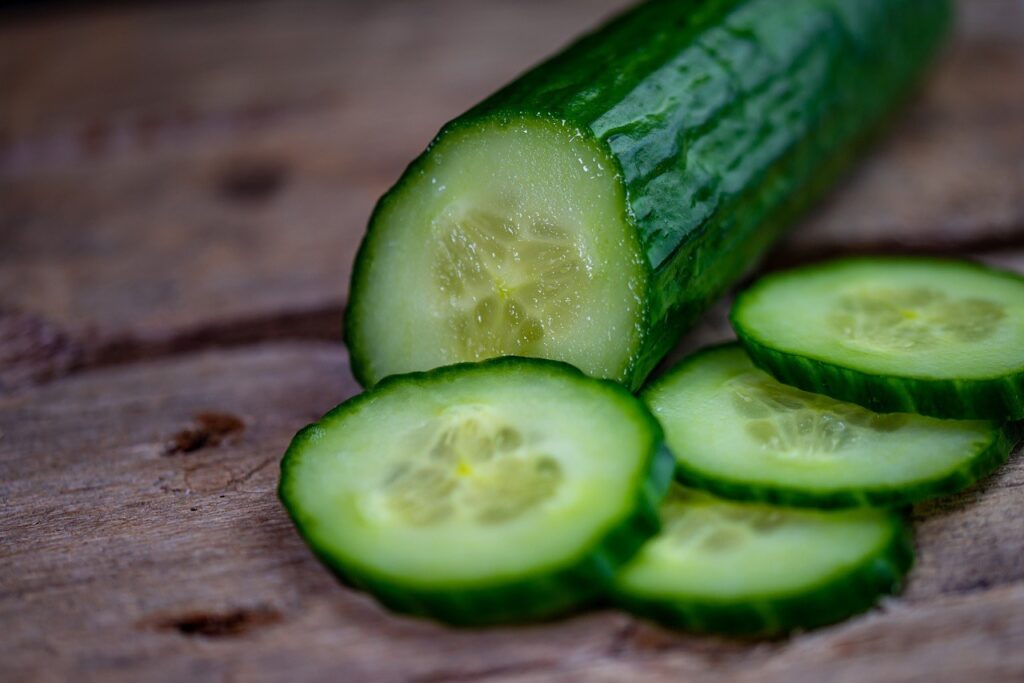
Cucumbers
Prefer warmth and can be sprawling, but outdoor varieties are fairly straightforward. Homegrown cucumbers have far better flavour than supermarket ones, and you’ll quickly avoid eating shop-bought ones once you have grown your own!
Vegetables to Avoid Initially as a Beginner Grower
Some vegetables can be challenging for beginners and are best left until you’ve gained experience. While more advanced gardeners love to grow these, trust me that, as a beginner, they are not worth your effort or frustration and will quickly disappoint you.
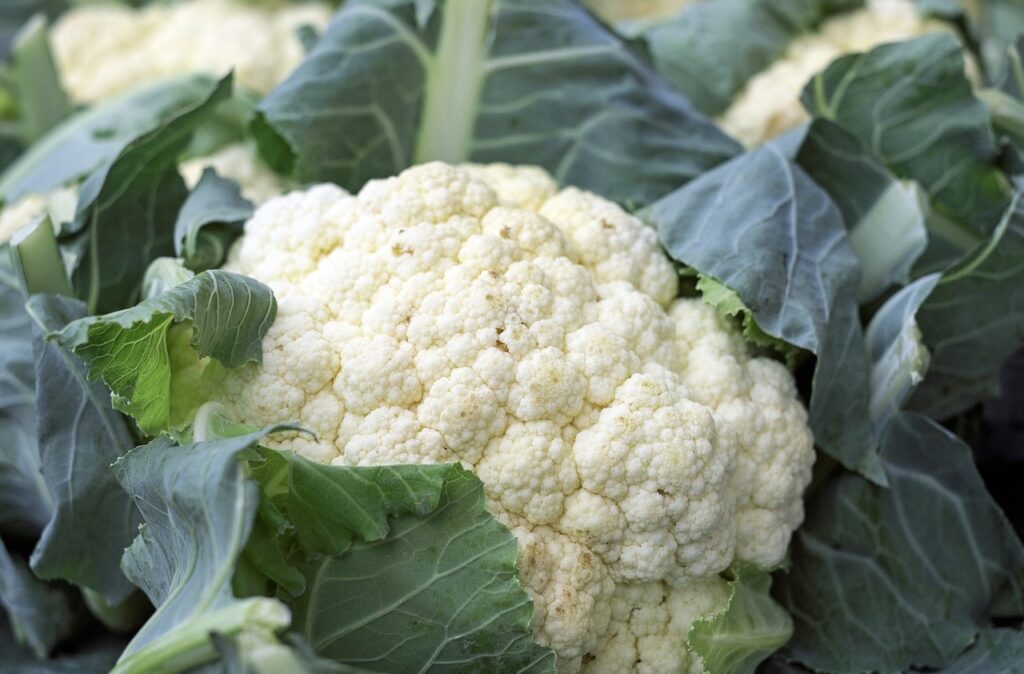
Cauliflower
Fussy, slow-growing, and easily upset by temperature fluctuations. Small harvest for the time and space invested.
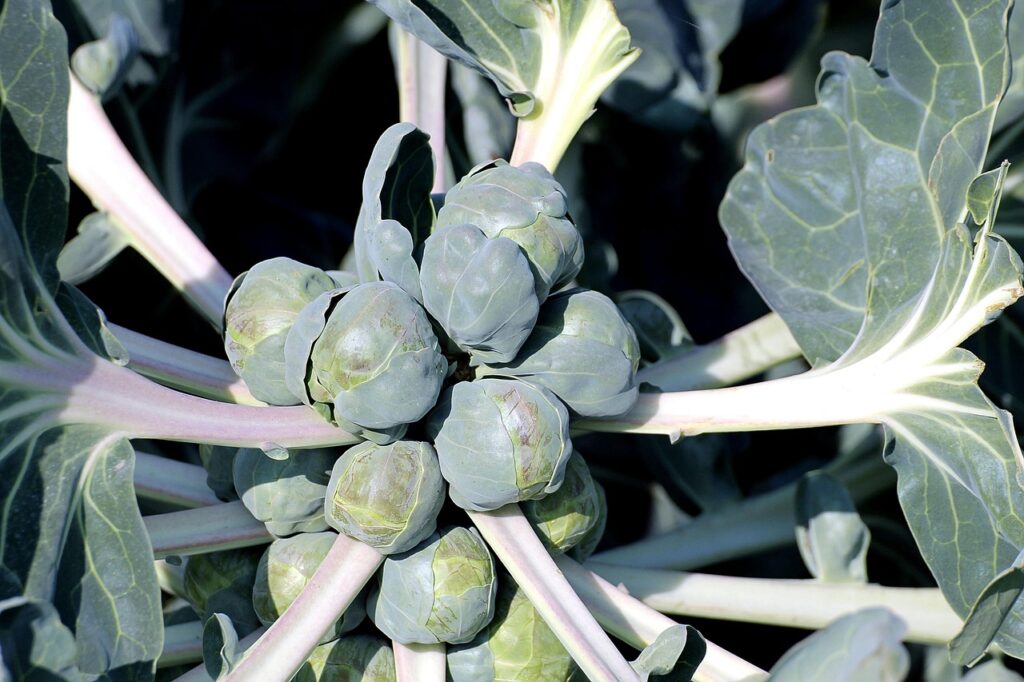
Brussels Sprouts
Take ages to mature (up to 26 weeks!), need firm soil, and occupy space for months. Great crop, but not ideal for learning.
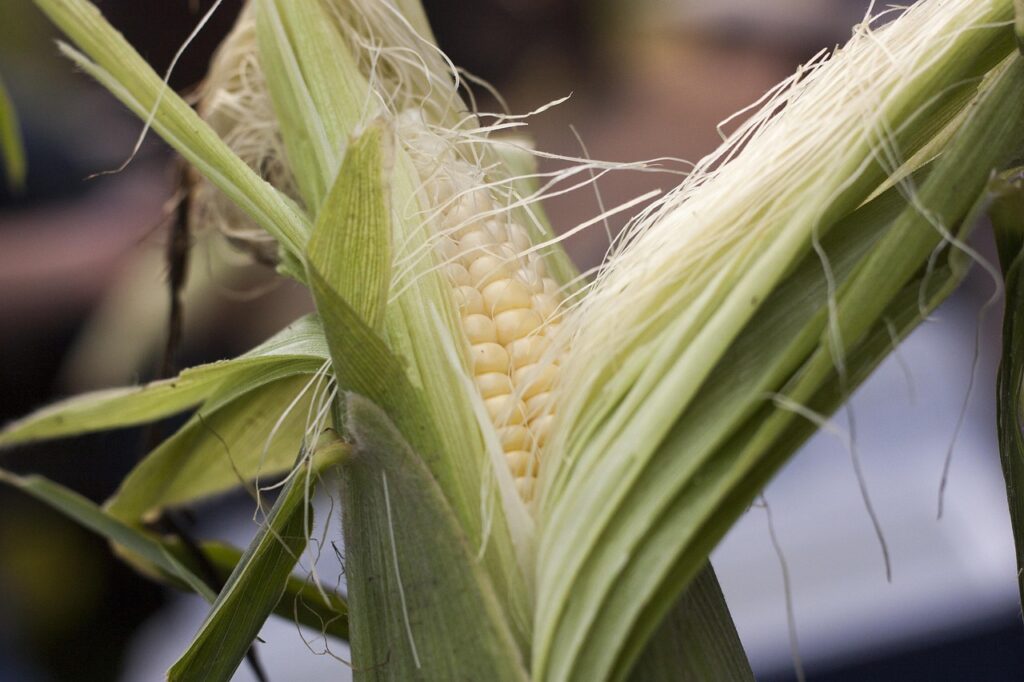
Sweetcorn
Needs perfect weather, lots of space, and must be planted in blocks for proper pollination. One cob per plant doesn’t give beginners the satisfaction they need.
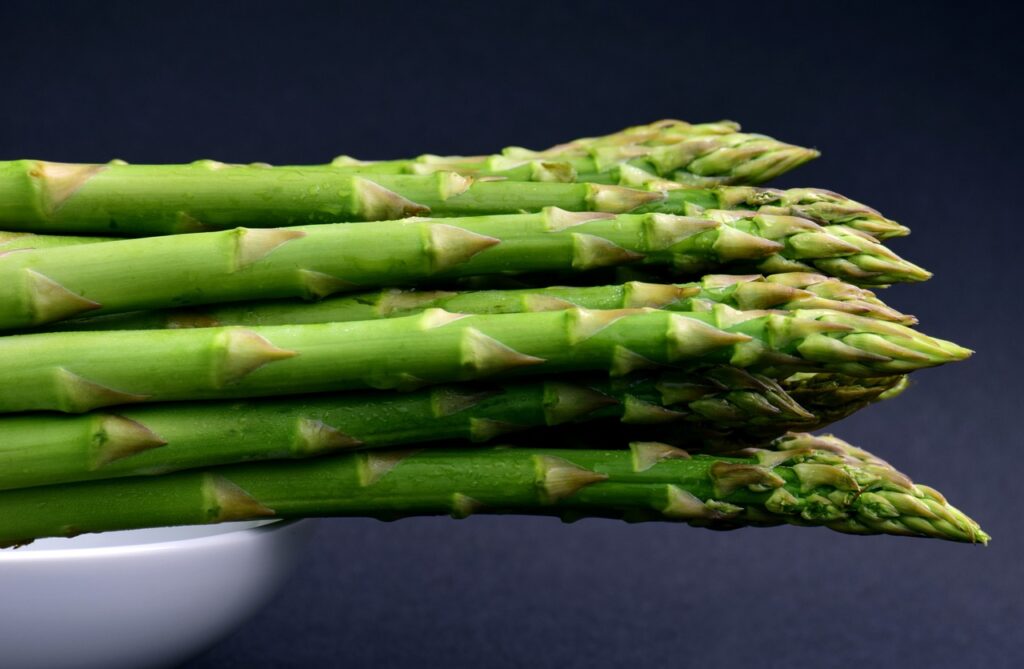
Asparagus
A perennial crop that takes three years before it can be harvested properly and needs all sorts of fuss, like being planted in ditches and mounds. Fantastic once established, but requires patience and commitment.
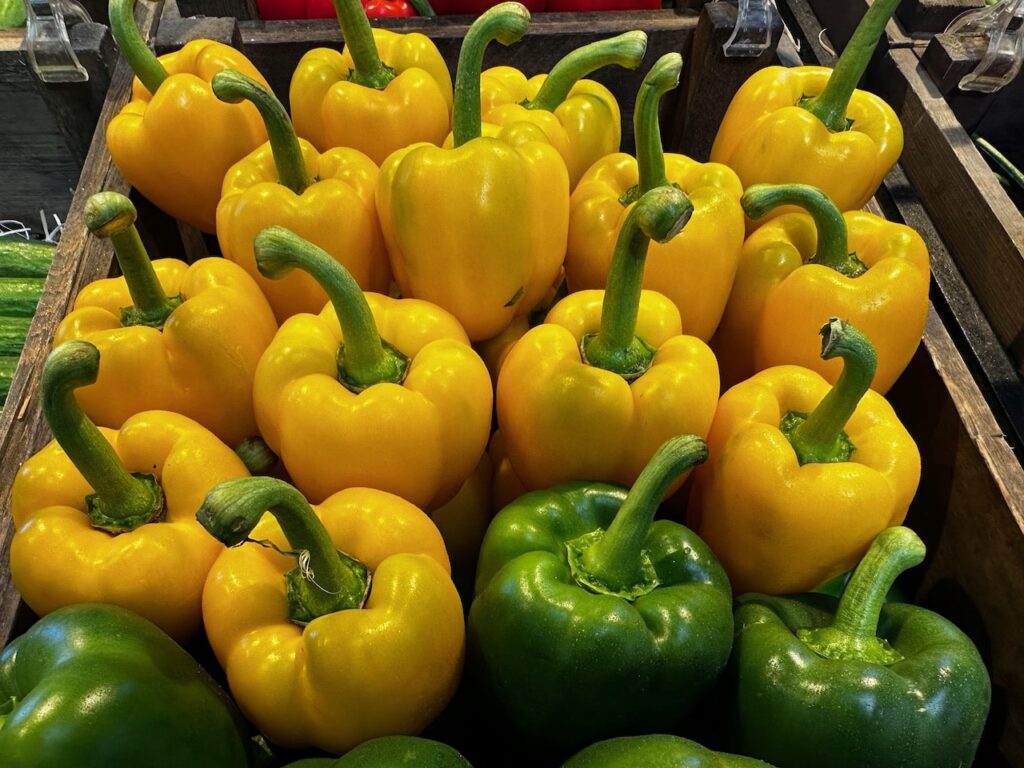
Aubergines and Peppers
Possible, but needs warmth, a long growing season, and perfect conditions. Challenging in all but the warmest, most sheltered UK gardens without a greenhouse.
Grow What You Actually Eat!
This sounds obvious, but it’s frequently overlooked. Don’t grow radishes if you don’t like radishes! There’s no point producing loads of something your family won’t eat.
Make a list of vegetables you regularly buy and enjoy. Prioritise expensive ones (such as salad leaves, herbs, and cherry tomatoes) and those that taste vastly better when homegrown (like peas, beetroot, and courgettes). This ensures your vegetable garden produces things you’ll actually use, making the whole endeavour worthwhile.
UK Planting Calendar: When to Sow and Harvest
Timing is absolutely everything in vegetable gardening. Sow too early and seeds rot or seedlings get frosted. Plant too late and crops don’t mature before winter. The UK’s relatively short growing season means we need to be strategic about timing.
This planting calendar is based on average UK conditions. Your specific location matters enormously. Scotland and northern England will be a couple of weeks behind southern England. Coastal areas often have milder winters but cooler summers than inland locations. Urban areas benefit from the heat island effect.
Spring (March to May): The Main Event
This is the prime vegetable sowing season! The soil is warming, days are lengthening, and everything’s ready to grow.
March
Sow indoors or under cover: tomatoes, chillies, peppers, aubergines (early in the month).
Sow outdoors: broad beans, peas, onion sets, shallots, early potatoes, spinach, rocket, early carrots (under cloches if cold).
Sow: winter crops like spring cabbage, kale, winter cauliflower.
August
Transition to autumn and winter crops.
Sow: winter salads (corn salad, winter lettuce, land cress), spring cabbage, oriental greens, turnips for late harvest. Last chance for quick salads and radishes.
Autumn (September to November): Prepare for Winter
September
Plant: garlic cloves, onion sets (autumn varieties), spring cabbage.
Sow under cover: winter salads, hardy lettuce, rocket.
Final outdoor sowings: hardy salad leaves, spinach.
October
Plant: garlic if you haven’t already, bare-root fruit.
Sow under cover: broad beans for an early crop next year, peas, winter salads.
November
Very limited sowing, but garlic can still go in if the soil isn’t frozen. Mostly a month for tidying, protecting existing crops, and planning next year.
Winter (December to February): Planning and Preparation
December to February
Minimal growing outdoors, but perfect for planning!
Order seeds, plan crop rotation, build raised beds, and enhance soil quality.
Succession Sowing is Your Friend
Rather than sowing entire packets at once, sow small amounts regularly. For salads, radishes, and quick crops, sow every two to three weeks. This gives you continuous harvests rather than a glut followed by nothing. It’s the secret to looking like a proper vegetable gardening expert! My guide to succession planting explains this concept even for beginners, or you can watch my YouTube tour below, where I explain it using my own garden as an example.
Step-by-Step: Creating Your First Vegetable Garden
Right, enough theory! Let’s get our hands dirty and actually create your vegetable garden. I’ll walk you through the complete process, whether you’re creating an in-ground plot or building raised beds.
Step 1: Clear and Prepare the Site
Once you’ve chosen your location, you need to clear it properly. If you’re starting from lawn, you have several options:
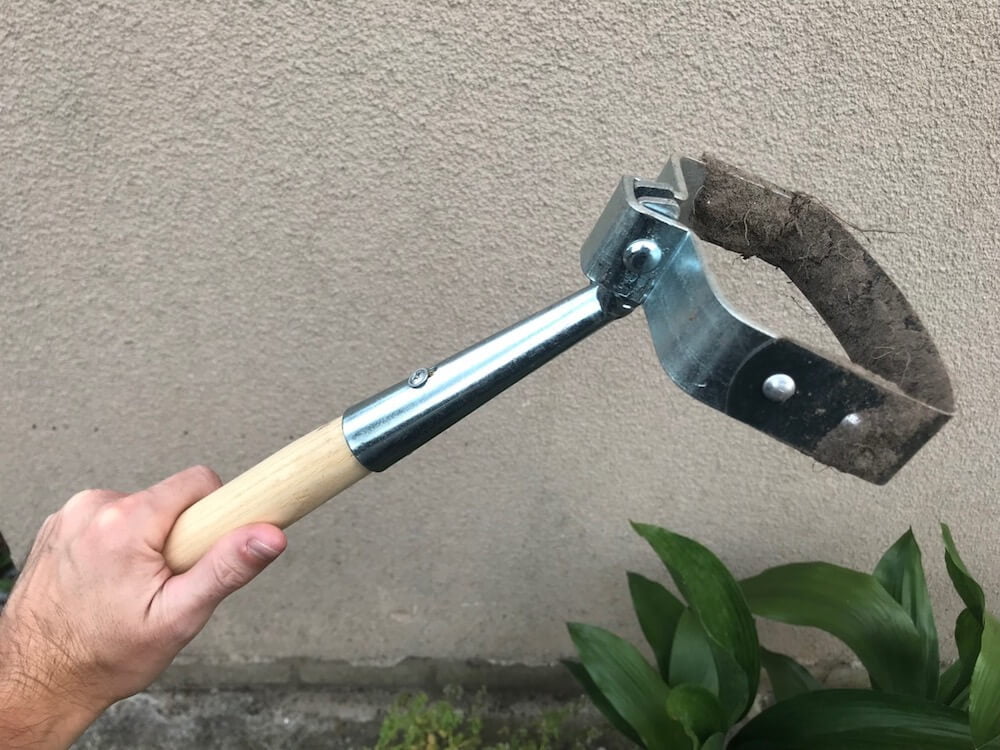
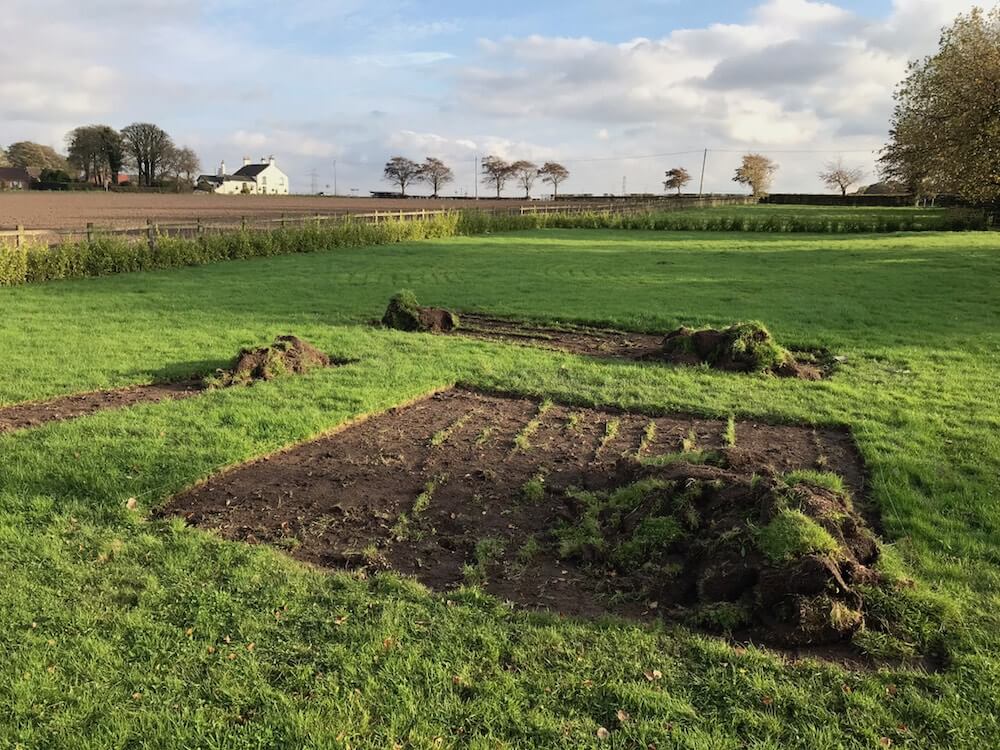
The Quick Method: Cut and remove turf using a sharp spade. Slice horizontally under the roots to keep pieces intact. Stack these grass-side-down in a corner; they’ll decompose into lovely loamy soil over a year.
The Lazy Method (My Favourite): Cover the area with thick cardboard or several layers of newspaper, then top with 10-15cm of compost or quality topsoil. The grass dies, the worms do your digging, and you can plant straight into the compost layer. This is called “lasagna gardening” and it genuinely works brilliantly.
The Chemical-Free Patience Method: Cover the area with black plastic or thick cardboard, weighted down. Leave it for three to six months. Everything underneath dies, and you can then dig it over easily.
If you’re starting from bare soil or an overgrown area, remove all weeds, especially perennial ones like bindweed, couch grass, and dandelions. Get the roots out! Annual weeds can be added to your compost heap, but perennial weed roots should go in your council green waste bin.
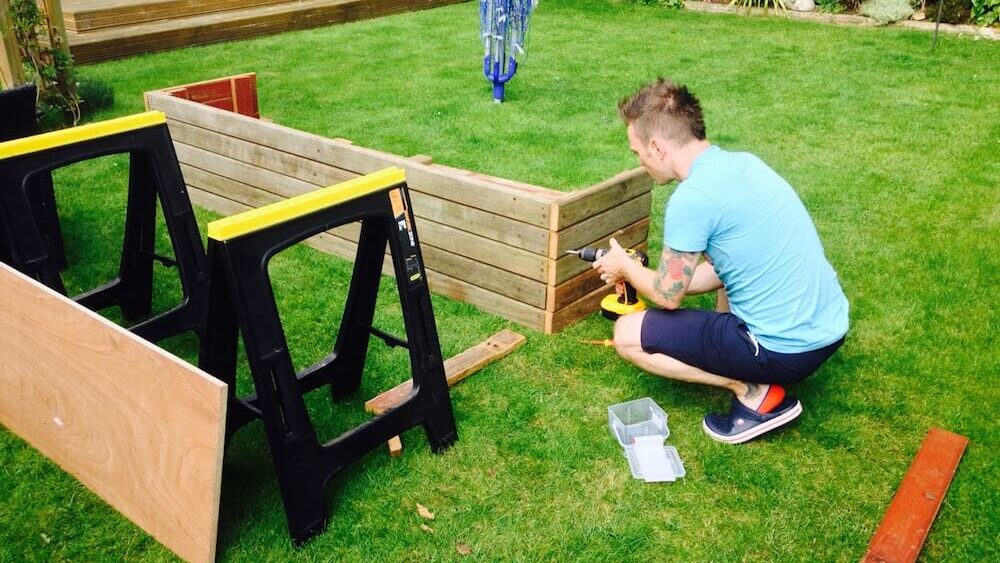
Measure and cut your timber or assemble your chosen materials. For a 1.2m x 1.2m bed with 40cm height, you’ll need boards cut to length with corner braces.
Position your raised bed frame exactly where you want it (moving a filled bed is basically impossible!). Check it’s level using a spirit level. Use a mallet to tap wooden pegs into corners for stability.
If placing on grass, consider the cardboard layer method underneath to suppress weeds. If on hard surfaces, break up one or two sections of paving to allow drainage.
Fill your raised bed with high-quality topsoil mixed with compost (approximately 70% topsoil and 30% compost). Don’t use pure compost; it’s too rich and lacks the structure that vegetables need. You want a blend that’s fertile but well-draining.
Leave a gap of approximately 5cm between the top edge of your raised bed and the soil surface. This prevents water from washing soil out when you water and gives wind protection for young plants.
Raised Bed Soil Calculator
? Raised Bed Soil Calculator
Calculate exactly how much soil you need for your raised bed project
Volume needed:–
20kg bags needed:–
Bulk bags needed:–
Total area:–
? Estimated Costs
20kg bags (£4 each):–
Bulk bag (£45 each):–
Recommended option:–
? Pro Tips
Enter your raised bed dimensions above to get personalised soil advice and money-saving tips!
Step 3: Improve Your Soil
Whether using raised beds or in-ground planting, your soil needs organic matter. Fork or dig the soil over to loosen it, removing stones and breaking up clumps. Spread a 5-10cm layer of compost or well-rotted manure over the surface.
Mix this organic matter into the top 20-30cm of soil. You can do this by digging (a traditional but hard method), by forking it in (an easier option), or by simply mulching the ground with it and letting nature draw it in (my preferred, easy method). The goal is to improve fertility and structure without completely destroying the existing soil ecosystem.
If your soil test revealed pH problems, now’s the time to add lime (for acidic soil) or sulphur chips (for alkaline soil). Follow packet instructions carefully; it’s easy to overdo amendments.
After incorporating amendments, rake the soil surface level. For seed sowing, you want fine tilth (a soil texture similar to breadcrumbs). For planting seedlings, a rougher texture is fine.
Step 4: Set Up Irrigation and Access
Before planting, sort out your watering system. Position water butts, run hoses, or install drip irrigation if you’re being fancy. Having water easily accessible from day one makes life infinitely easier and will be a godsend in summer when the heat wave starts and your vegetables need daily watering!
Ensure you can reach all parts of your vegetable garden comfortably. Add stepping stones or pavers between beds if needed. You’ll be accessing your plot daily during summer, so make it pleasant to navigate.
Step 5: Plan Your First Plantings
Using your planting calendar and crop rotation plan, decide precisely what you’ll plant where. Draw this on paper first! Consider mature plant sizes, not just seedling sizes. That tiny tomato plant becomes a 1.5m tall monster by July.
Group plants by height (tall ones like beans at the back, short ones like lettuce at the front if you have a bed against a wall). Leave proper spacing between plants. It looks empty initially, but they’ll fill in fast.
Mark out areas with string and pegs or scratch marks in the soil so you know exactly where everything goes. This prevents the classic beginner mistake of planting randomly and ending up with odd gaps or overcrowded sections.
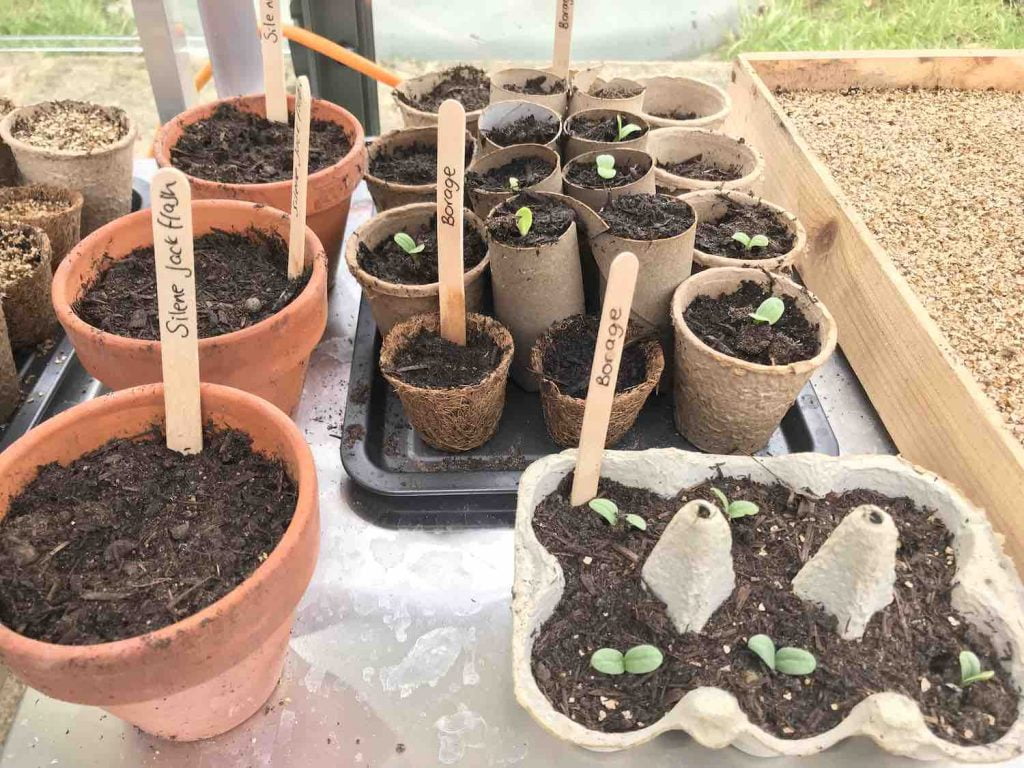
Step 6: Sowing Seeds or Planting Seedlings
For Direct Sowing Seeds: Create drills (shallow trenches) with a hoe or stick edge. Depth depends on the seed size (general rule: cover seeds with soil twice their diameter). Sow seeds thinly along the drill. Cover gently with soil, firm down lightly, and water with a fine rose on your watering can.
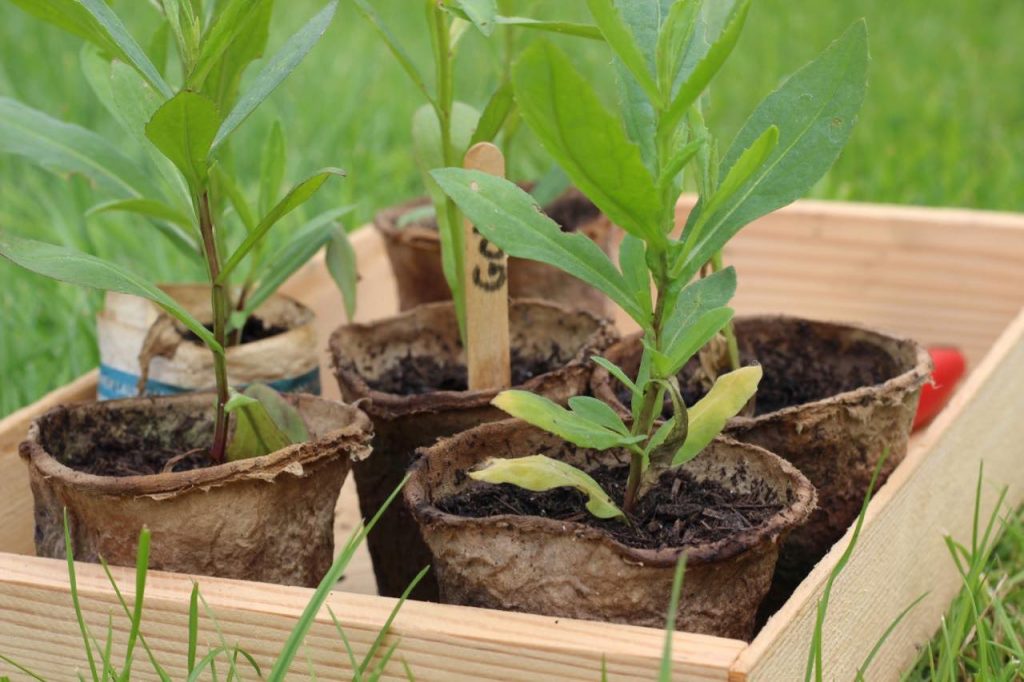
For Planting Seedlings: Dig holes slightly larger than the root ball. Water the planting holes before placing the seedlings in. Remove seedlings from pots carefully, disturbing the roots as minimally as possible. Place seedlings in holes at the same depth they were in their pots (except tomatoes, which can be planted deeper). Firm soil around plants and water in well.
Step 7: Mulch and Protect
Once planted, apply a 5cm layer of mulch around plants (not touching stems). Organic mulches, such as compost, leaf mould, or straw, suppress weeds, retain moisture, regulate soil temperature, and add nutrients as they decompose.
Protect vulnerable seedlings from pests. Collars around brassicas prevent cabbage root fly. Mesh or netting prevents birds and butterflies from passing through and taking a bite! Copper tape deters slugs. Beer traps catch slugs and snails. These preventative measures save heartbreak later!
Step 8: Label Everything
Seriously, label your plantings! You think you’ll remember, but you won’t. Wooden labels and permanent marker, or proper metal labels with embossed names, both work. Include the variety name and planting date.
Watering Your Vegetable Garden Properly
Water is fundamental to vegetable success, yet it’s one of the areas where beginners struggle most. Too much, too little, inconsistent watering, watering at the wrong time—all cause problems. Here’s how to get it right.
How Much Water Do Vegetables Need?
Most vegetables need about 2.5cm of water per week, either from rainfall or irrigation. However, this varies enormously based on weather, soil type, and plant stage.
Sandy soil needs more frequent watering (drains quickly).
Clay soil needs less frequent but deeper watering.
Newly planted seedlings require daily watering until they are established.
Established plants prefer deep, infrequent watering rather than light, frequent watering.
Fruiting crops (tomatoes, courgettes, peppers, beans) need consistent water, especially when flowering and fruiting.
Leafy crops (lettuce, spinach, cabbage) need steady moisture to prevent bolting.
Root crops require even moisture to prevent splitting or becoming woody.
When to Water
Early morning is ideal. Plants have all day to dry, reducing disease risk. The soil absorbs water before evaporation becomes a significant factor. Early watering also ensures plants have moisture available during the hottest part of the day.
Evening watering is adequate, but it leaves foliage damp overnight, potentially encouraging fungal diseases. Avoid midday watering; much of the water evaporates before reaching the roots, and water droplets can scorch leaves in bright sunlight.
How to Water Effectively
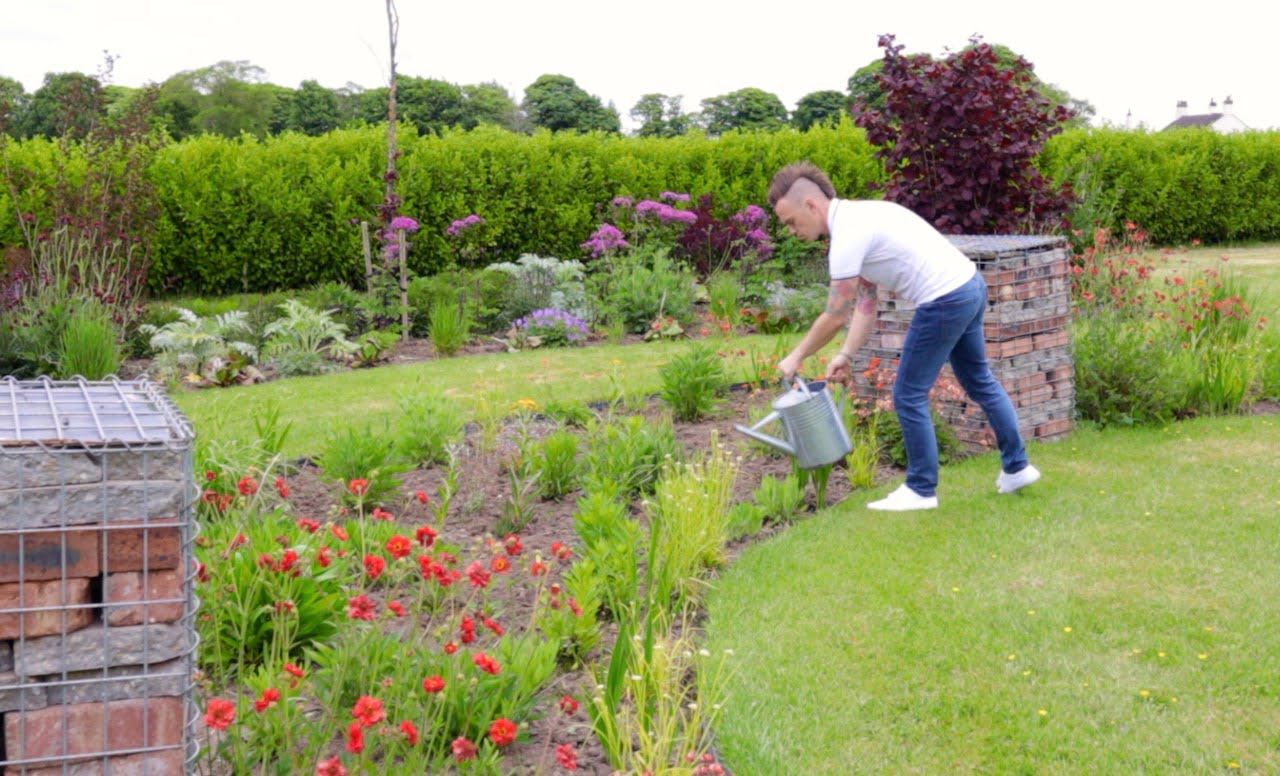
Water the soil, not the leaves! Wet foliage encourages diseases. Direct water at the base of plants using a watering can without the rose or a hose with the nozzle removed.
Water deeply rather than frequently. Light surface watering encourages shallow roots that are vulnerable to drought. Deep watering encourages the development of deep root systems that access moisture lower in the soil, resulting in stronger, more resilient plants.
A good soak, once or twice a week, is better than daily sprinkles. Feel the soil 10cm down; if it’s dry, water deeply until the top 15-20cm is properly moistened.
Watering Systems Explained
Watering Can: Perfect for small plots, containers, and targeted watering. Labour-intensive for larger areas, but gives you complete control.
Hose: Essential for anything larger than a tiny plot. Invest in a quality hose with brass fittings. A trigger nozzle gives you control over water pressure and flow.
Drip Irrigation or Soaker Hoses: Incredibly efficient. Water seeps slowly directly to root zones, minimising waste and keeping foliage dry. Initial setup takes time, but it saves enormous effort during the season. Can be automated with timers.
Conserving Water
Mulch! A 5cm layer of organic mulch reduces evaporation significantly, potentially halving your watering needs.
Water butts are brilliant. They collect free rainwater (which plants prefer to tap water) and reduce water bills. One decent downpour fills a 200-litre water butt.
Improve soil structure with organic matter. Soil rich in compost retains moisture far better than poor soil, meaning less frequent watering.
Group plants by water needs. Thirsty crops together in one area, drought-tolerant crops elsewhere. This prevents wasting water on plants that don’t need it.
Feeding Your Vegetables
Whilst good soil provides baseline nutrition, most vegetables are hungry plants that benefit from supplementary feeding, especially heavy feeders like tomatoes, courgettes, and brassicas. Here’s how to feed effectively without waste or harming plants.
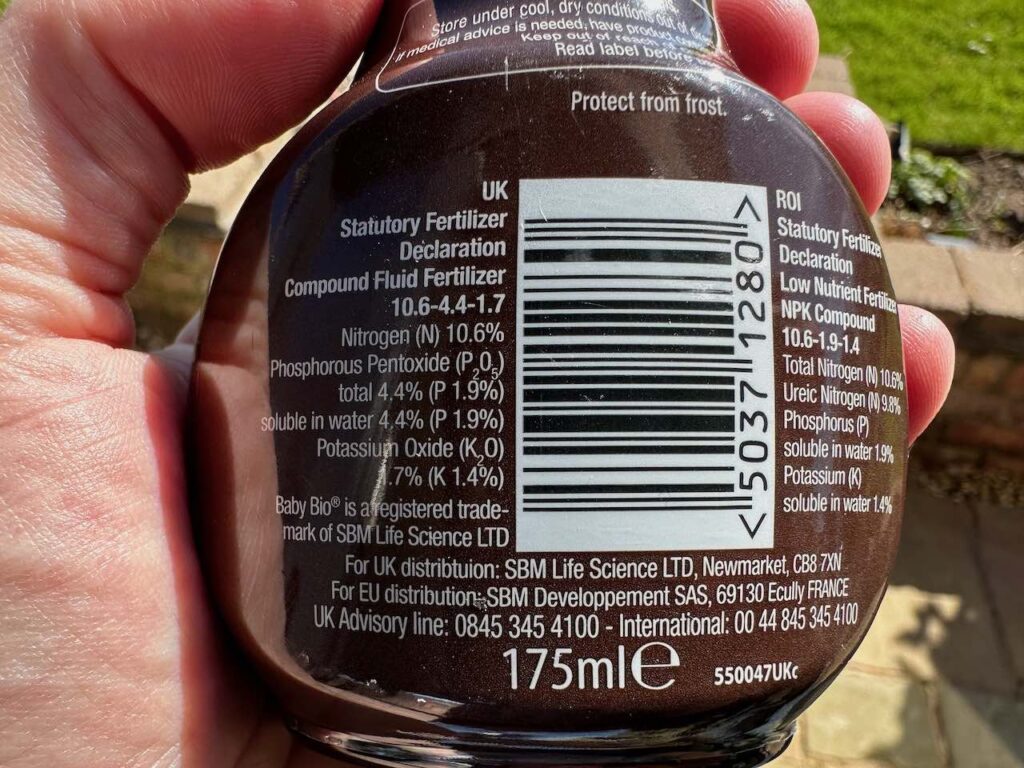
Understanding NPK
Fertilisers display three numbers: NPK ratio (nitrogen-phosphorus-potassium). These are the three primary nutrients plants need. By interpreting the number, i.e 7:7:7, you can work out the ratio of nitrogen, then phosphorus and lastly potassium. Meaning you can pick fertiliser depending on which macronutrient your plants need (or play it safe and use a balanced 7:7:7)
Nitrogen (N): Promotes leafy growth. Essential for lettuce, spinach, cabbage, and other leafy crops. Too much nitrogen on fruiting crops gives lots of leaves but few fruits.
Phosphorus (P): Encourages root development and flowering. Important for root crops and at planting time.
Potassium (K): Promotes flowering, fruiting, and overall plant health. Essential for tomatoes, peppers, beans, courgettes, and any crop you want to produce flowers and fruits.
Types of Fertiliser
Organic Options: Compost, well-rotted manure, blood fish and bone (all-purpose), seaweed extract (potassium-rich), chicken manure pellets (nitrogen-rich). These release nutrients slowly and improve soil structure. My preference for vegetable growing.
Chemical Options: More concentrated, faster-acting, but don’t improve soil structure. Can burn plants if over-applied. Liquid tomato feeds are the main chemical fertiliser most vegetable gardeners use.
Feeding Schedule for Vegetable Gardens
At Planting: Incorporate compost or well-rotted manure into the soil. This provides slow-release nutrients for weeks. There’s no need to liquid feed at this stage, as most of it will wash through and become useless. So organic composts are king here.
Leafy Crops: Feed with nitrogen-rich fertiliser (chicken manure pellets or liquid seaweed) every three to four weeks. You need a high N feed.
Fruiting Crops: Once flowering starts, feed weekly with tomato feed (high in potassium). Continue until harvesting finishes, and this is where liquid feeds like comfrey tea are worth their weight in gold! You need a high K feed.
Root Crops: Generally, they don’t need much feeding if the soil has been properly prepared and compost has been dug in or top-dressed. Excess nitrogen can cause forking in carrots and parsnips. So you want a low N ratio.
Signs of Pests, Disease or Nutrient Deficiency
Even with the best efforts, vegetable gardens will eventually encounter some form of deficiency, illness, or disease. However, don’t assume every problem is a result of a nutrient deficiency. Pests, diseases, water issues, and environmental stress cause similar symptoms. Always check for other causes before adding fertiliser. Below is a handy table covering the main problems your vegetables may encounter during your growing journey, along with some recommended Garden Ninja-approved treatments.
Problem
Symptoms
Treatment
Blight (Tomato & Potato)
Brown patches on leaves, white mould underneath, fruit/tubers rot
Improve air flow. Water at the soil level, not the leaves. Remove affected leaves. Spray with diluted milk solution (1:9 with water).
Powdery Mildew
White powdery coating on leaves, stunted growth
Maintain consistent watering—mulch to retain moisture. Add lime or calcium supplement to the soil.
Blossom End Rot
Water consistently. Provide shade in hot weather. Choose bolt-resistant varieties. Sow at the correct time for the crop.
Dark, sunken patches on the bottom of tomatoes, peppers, and courgettes
Club Root
Swollen, distorted roots on brassicas, wilting, stunted growth
Remove infected plants (don’t compost). Improve drainage. Add lime to raise soil pH. Rotate crops strictly. Use resistant varieties.
Bolting
Premature flowering in lettuce, spinach, rocket, radish
Blast off with a water jet. Squash by hand. Encourage ladybirds. Spray with soapy water solution.
Aphids
Tiny green/black insects clustering on shoots, distorted leaves
Pale yellow leaves, especially older lower leaves, and poor growth
Slugs & Snails
Holes in leaves, slime trails, seedlings eaten overnight
Beer traps. Copper tape barriers. Hand-pick at night. Remove hiding places. Use wool pellets around plants.
Caterpillars
Large holes in leaves, especially brassicas. Green droppings visible
Cover crops with fine mesh. Hand-pick caterpillars. Check under leaves for eggs and squash. Encourage birds.
Carrot Fly
Tunnels in carrot roots, rusty discolouration, leaves turn yellow/red
Erect 60cm barriers around crops. Grow in raised beds. Sow thinly to avoid thinning. Grow resistant varieties.
Damping Off
Use fresh compost and clean pots. Don’t overwater. Ensure good ventilation—thin seedlings to improve airflow.
Yellow leaf edges, poor flowering/fruiting, brown scorching
Apply tomato feed or comfrey tea. Add wood ash to soil (contains potash).
Mosaic Virus
Yellow mottled patterns on leaves, distorted growth, reduced yield
No cure. Remove infected plants immediately. Control aphids (they spread virus). Buy certified disease-free seeds.
Root Rot
No cure. Remove infected plants immediately. Control aphids (they spread the virus). Buy certified disease-free seeds.
Improve drainage. Don’t overwater. Remove affected plants. Add grit or organic matter to heavy soil.
Whitefly
Tiny white insects under leaves, sticky honeydew, sooty mould
Hang yellow sticky traps. Encourage natural predators. Spray with soapy water. Remove badly affected leaves.
Harvesting: Getting the Timing Right
Knowing when to harvest can be tricky for beginners. Pick too early and you miss out on full flavour and size. Pick too late and vegetables become tough, woody, or bitter. Here’s how to harvest each crop at its prime.
Salad Leaves
Harvest outer leaves regularly once plants are 10cm tall. This “cut and come again” method keeps plants producing for weeks. Alternatively, cut entire plants 2-3cm above soil level. They’ll often resprout for a second cut. Best harvested in the morning when leaves are crisp and full of moisture.
Tomatoes
Pick when fully coloured and slightly soft. They should come away from the vine easily. Cherry tomatoes taste their sweetest when left on the vine until they are very ripe. Larger tomatoes can be picked slightly underripe and ripened indoors. At the end of the season, harvest all green tomatoes and ripen them on windowsills or make chutneys.
Courgettes
Harvest small! Courgettes are far tastier when they are 15-20cm in length. Left longer, they become enormous marrows with seeds, bland flesh, and tough skin. Check plants daily once fruiting starts; courgettes grow astonishingly fast! Regular harvesting encourages more production.
Beans
French and runner beans should be tender and snap cleanly. Check the plants every couple of days; beans often hide under the leaves. Regular picking promotes continuous production. Beans left to mature and swell signal to the plant that it has achieved its goal (setting seed), so production slows.
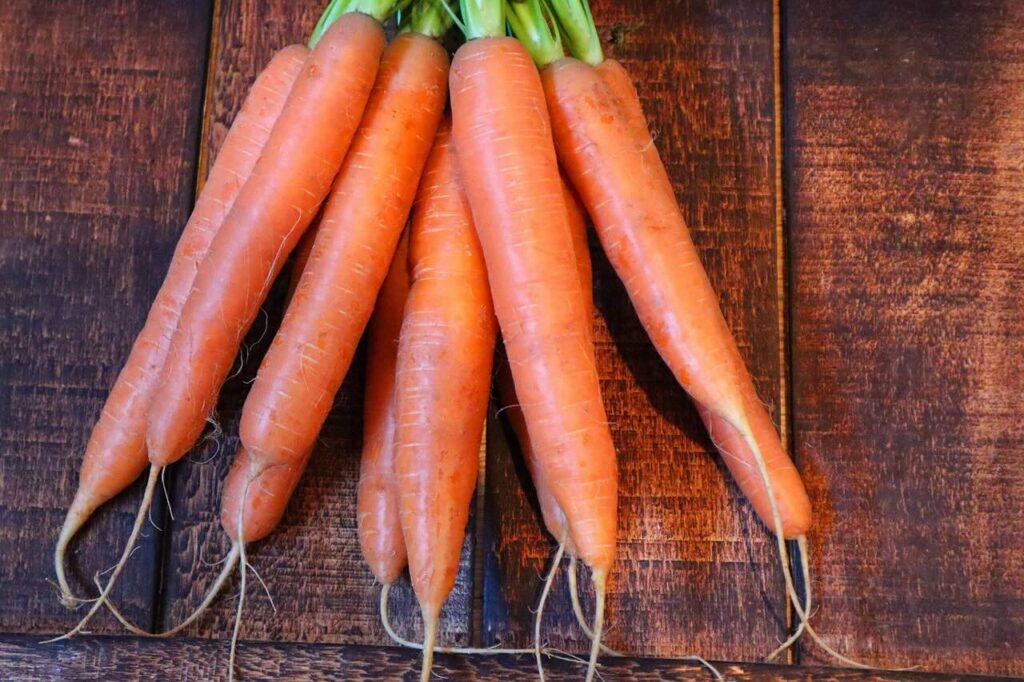
Carrots
Can be pulled at any time once they reach a usable size. Baby carrots are sweeter. Larger carrots store better. Loosen soil with a fork before pulling to avoid breaking roots. Harvest before winter hard frosts, which can damage them, or cover with straw for winter storage in the ground.
Beetroot
Harvest when golf-ball to tennis-ball size for best flavour. Twist off leaves rather than cutting them to prevent bleeding. Both roots and young leaves are edible. Like carrots, can be left in the ground over winter if well-mulched.
Potatoes
Early varieties: ready when plants flower (usually 10-12 weeks after planting). Lift as needed. Maincrop varieties: wait until foliage dies back completely (18-20 weeks). Dig carefully with a fork to avoid spearing tubers. Leave harvested potatoes on the soil surface for a couple of hours to dry before storing.
The Golden Rule
Harvest regularly! Most vegetables taste best when young and tender. Regular harvesting encourages further production in crops like beans, courgettes, and peas. Don’t let produce go to waste because you can’t use it all. Give excess to neighbours, freeze it, or donate to food banks. Your plants will reward consistent harvesting with continuous production.
Extending Your Growing Season
The UK growing season can feel frustratingly short, especially in northern regions. However, clever gardeners can harvest homegrown vegetables nearly year-round using season extension techniques. Here’s how to keep your vegetable garden productive for longer.
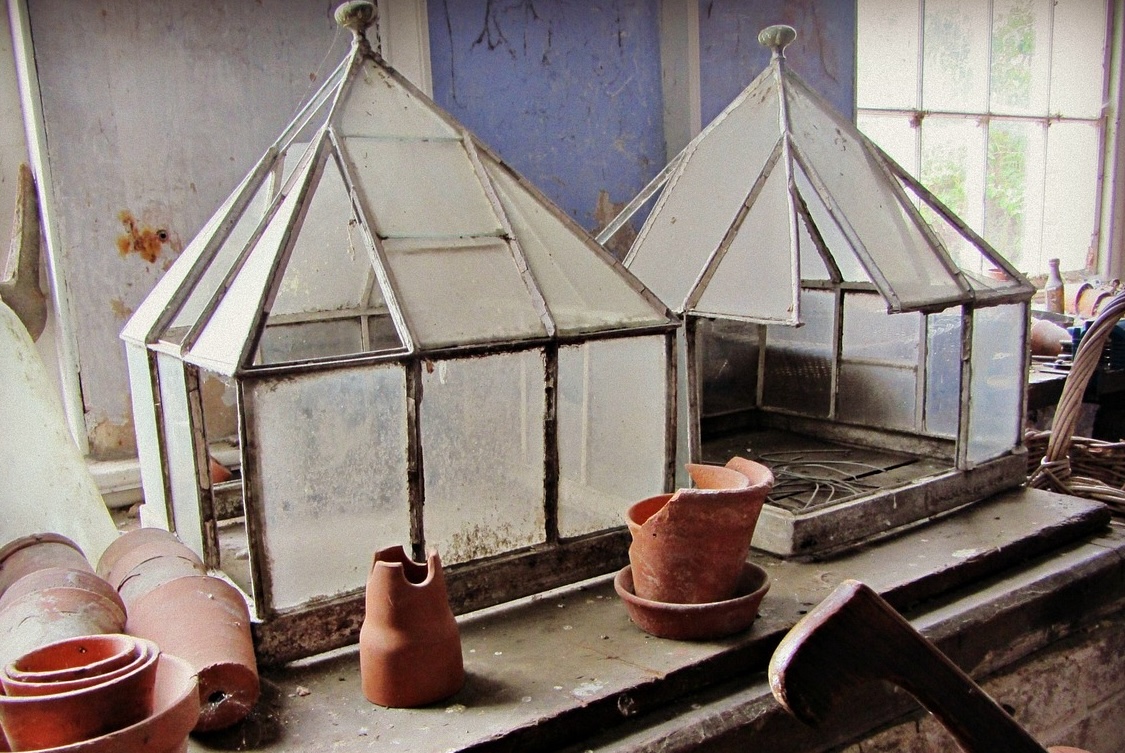
Cloches and Row Covers
These are essentially mini-greenhouses that protect individual rows or plants. They trap warmth, shield plants from wind and frost, and can advance planting by several weeks in spring or extend harvests into autumn.
Traditional glass cloches are gorgeous, but they are also expensive and fragile. See the ones below in need of renovation. Plastic tunnel cloches are more practical. Fleece stretched over hoops works brilliantly for frost protection. Even cutting off plastic bottles over individual plants helps tender seedlings establish.
Use cloches in spring to warm the soil before sowing, protect newly planted seedlings, and give warmth-loving crops like courgettes and tomatoes a boost. In autumn, cover salads, winter greens, and late-sown crops to extend the productive season by weeks.
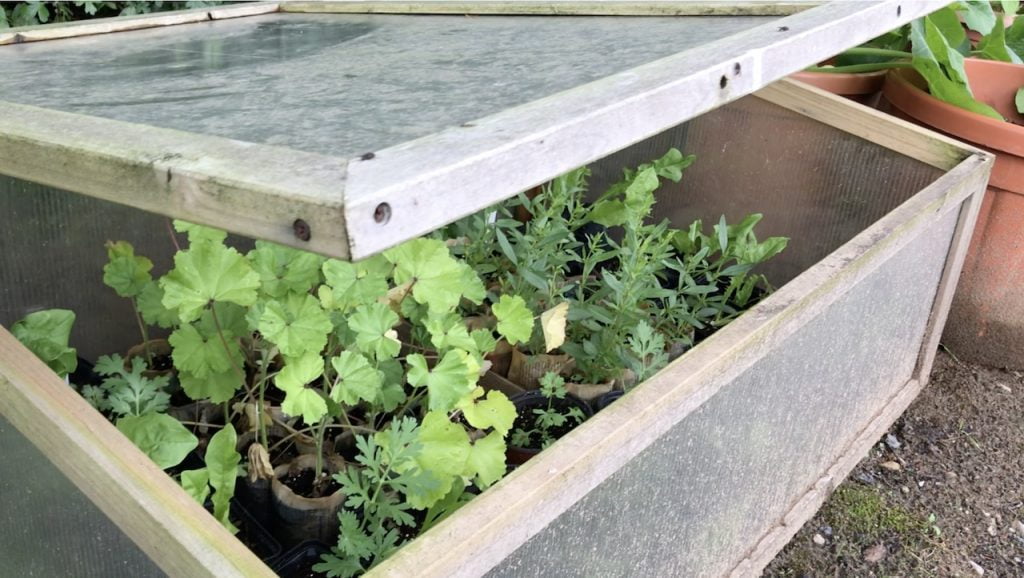
Cold Frames
A cold frame is like a mini-greenhouse without heating. They’re perfect for hardening off seedlings, protecting winter salads, and growing early crops. You can buy them or build them easily from old windows and timber.
Position cold frames in the sunniest spot possible. Open them during warm days to prevent overheating and encourage airflow. Close them at night for frost protection. You can grow lettuce, rocket, corn salad, and winter spinach throughout winter in a cold frame in most UK regions.
Fleece and Netting
Horticultural fleece is cheap, lightweight, and incredibly useful. It provides several degrees of frost protection whilst letting light and water through. Drape it directly over crops or support it on canes. It’s perfect for protecting early sowings, tender crops, and autumn vegetables.
Succession Sowing
We’ve mentioned this before, but it bears repeating. Sowing small amounts regularly rather than everything at once gives you continuous harvests rather than gluts. For salads, sow every two weeks from March through September. For beans, sow every three weeks from May to July. This simple technique dramatically extends your harvest window.
Choose the Right Varieties
Some vegetable varieties are bred specifically for extended seasons. Look for “early” varieties that mature quickly for spring planting. “Late” or “winter” varieties are tolerant of cold and poor light, making them suitable for autumn sowing and winter harvest.
Winter salads, such as corn salad, winter lettuce varieties, land cress, and mizuna, tolerate frost and continue to produce leaves throughout the winter. Hardy herbs like rosemary, thyme, and sage provide year-round harvests.
Winter Vegetables
Many vegetables are actually at their best after frost! Parsnips, kale, Brussels sprouts, winter cabbage, leeks, and swedes all tolerate or even improve with cold weather. Plant these in mid-summer and you’ll be harvesting fresh vegetables throughout winter.
Year Two and Beyond: Building on Success
Congratulations! You’ve made it through your first vegetable-growing season. Whether it was a roaring success or had a few hiccups, you’ve learned enormous amounts. Here’s how to build on that experience and make next year even better.
Keep a Garden Journal
This is genuinely one of the best things you can do. Record what you planted, when you planted it, how it performed, problems you encountered, and solutions that worked. Note weather patterns, first and last frost dates, and harvest dates.
Next year, this journal will become your personalised growing guide. You’ll know exactly when to sow, based on your specific conditions, rather than relying on general advice. You’ll remember which varieties performed brilliantly and which were disappointing. You’ll avoid repeating mistakes.
Review and Reflect
What worked well? What didn’t? Were your initial choices too ambitious or too cautious? Did you enjoy the whole process or find parts tedious? This reflection helps you plan next year’s garden to better suit your preferences and lifestyle.
Perhaps you’ve discovered that you hate staking tomatoes, so bush varieties make more sense. Perhaps beans grew brilliantly whilst lettuce bolted in your hot spot, suggesting a shadier location for salads. Use these insights to refine your approach.
Improve Your Soil Continuously
Soil improvement never stops! Each autumn or early spring, add more organic matter. Compost, well-rotted manure, leaf mould—keep building that soil fertility and structure. Vegetables are hungry plants that deplete soil, so consistent replenishment is essential for long-term success.
Consider growing green manures (cover crops) in empty beds during winter. Plants like winter field beans or phacelia protect the soil, suppress weeds, and add nutrients when they are incorporated into the soil during the spring. They’re like free fertiliser!
Expand Gradually
If your first vegetable patch was successful and you enjoyed it, consider expanding. But do it gradually! Add another raised bed, try a few different vegetables, or experiment with season extension techniques. Build on success rather than overwhelming yourself.
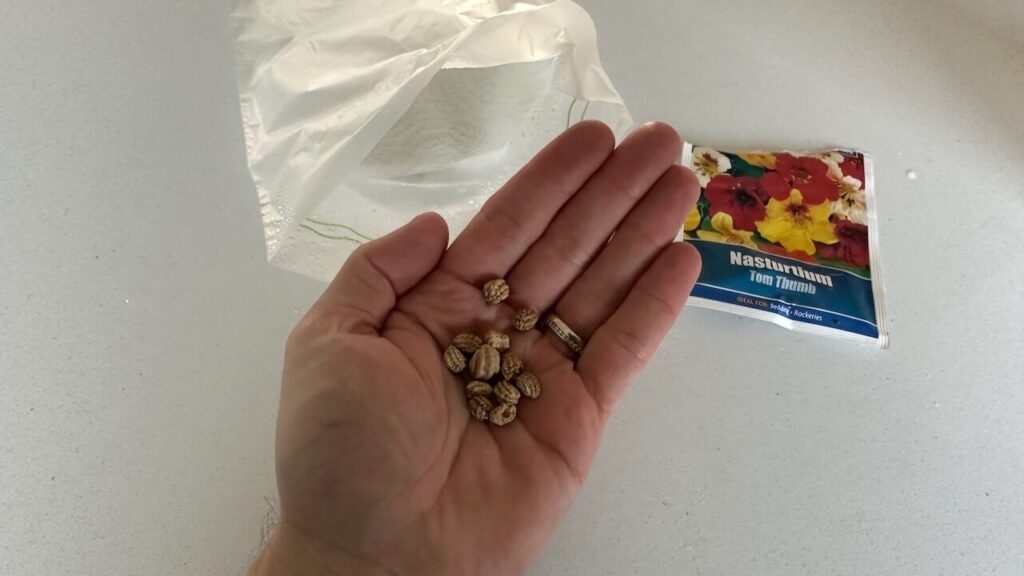
Save Seeds
Many vegetables produce seeds that you can save for next year, significantly reducing costs. Tomatoes, beans, peas, lettuce, and many others are easy for beginners. Ensure plants are open-pollinated varieties (not F1 hybrids) for seeds that come true to type.
Let plants flower and set seed; then collect the dried seed heads, clean the seeds, and store them in paper envelopes in a cool, dark place. Label everything carefully with the variety name and collection date. Home-saved seeds often develop adaptation to your specific conditions over the years.
Join the Community
Vegetable gardening has a wonderfully supportive community. Join local allotment groups, gardening clubs, or online forums like the Garden Ninja one. The knowledge sharing is invaluable. Experienced growers often have surplus seeds and seedlings to share with others. You’ll pick up techniques that books never mention.
Troubleshooting Common Problems
Even experienced vegetable gardeners encounter problems. Here’s how to diagnose and solve the most common issues beginners face.
Problem: Seeds Don’t Germinate
Soil too cold, seeds too old, sown too deeply, soil too dry or too wet, seeds eaten by mice or birds.
Solutions: Check the seed packet for optimal germination temperature. Most vegetable seeds need soil temperatures of at least 7-10°C. Use fresh seeds (germination rates decline with age). Follow the packet instructions for sowing depth precisely. Keep soil consistently moist but not waterlogged. Protect sowings with netting if birds are a problem.
Problem: Seedlings Are Thin, Weak, and Pale
This is called “legginess” or etiolation. It’s caused by insufficient light.
Solutions: Move seedlings to the brightest possible location. If growing on windowsills, rotate pots daily so plants don’t lean towards the light. Consider investing in LED grow lights if you are unable to provide sufficient natural light. Ensure seedlings aren’t too crowded; thin them out.
Problem: Plants Are Growing Slowly or Look Stunted
Multiple possible causes include poor soil, nutrient deficiency, pest damage to roots, incorrect pH levels, or simply too cold.
Solutions: Check for root pests, such as vine weevil larvae or root aphids. Test soil pH and adjust if necessary. Add fertiliser (blood, fish, and bone for general feeding). Ensure plants receive sufficient warmth (use cloches if temperatures are low).
Problem: Leaves Are Yellowing
It could indicate nitrogen deficiency, overwatering, underwatering, or root problems.
Solutions: If only the lower leaves yellow whilst new growth is green, it’s likely a nitrogen deficiency. Feed with high-nitrogen fertiliser. If all leaves yellow and the soil is waterlogged, improve drainage. If the soil is bone dry, water more consistently.
Problem: Plants Flower Prematurely (“Bolting”)
Many vegetables bolt (run to seed) when stressed, especially lettuce, spinach, arugula (also known as rocket), and radishes.
Solutions: Ensure consistent watering. Provide shade during hot spells for cool-season crops. Choose bolt-resistant varieties—plant cool-season crops at the right time (spring or autumn, not midsummer heat).
Problem: Fruits Fail to Form
Familiar with tomatoes, courgettes, and other fruiting crops.
Solutions: For tomatoes and peppers, ensure warm enough temperatures and adequate feeding. For courgettes and squash, poor pollination is usually the culprit. Encourage pollinators by growing flowers nearby. Hand-pollinate if necessary (transfer pollen from male to female flowers with a paintbrush).
Why not Learn How to Design Your Own Veg Garden?
Why not consider expanding your plant and garden design knowledge with one of my online gardening courses? My Garden Design for Beginners Course is here to help you transform your garden from average to extraordinary with an affordable online course, no matter how little your experience with plants.
My courses offer step-by-step guidance from me, Lee Burkhill, award-winning garden designer and presenter on BBC1’s Garden Rescue. In this course, you’ll go from a garden design novice to a confident designer equipped to tackle any green space.
Planting Techniques – Select and arrange plants like a pro.
Design Styles & Layout Options – Explore different styles to suit every garden.
Course Features:
Hours of Online Study Time
Flexible Online Learning
Engaging Video Lessons & Quizzes
Real-World Case Studies
Certification upon Completion
Taught by Award-Winning Designer Lee Burkhill
Enrol now from just £29 and start your journey toward garden design mastery!
29
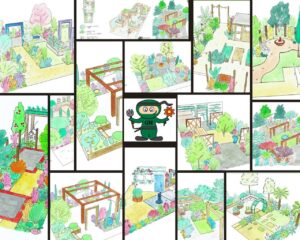
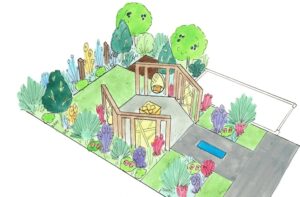
Garden Design Examples for Small Gardens: 30 Design Templates & Planting Plans
Garden Design Examples for Small Gardens: 30 Design Templates & Planting Plans: In this online gardening course, I’ll walk you through 30 fantastic garden designs, explaining the logic behind the layout, the plant choices, and take-home tips for applying them in your own garden.
Weekend Garden Makeover: A Crash Course in Design for Beginners
Learn how to transform and design your own garden with Lee Burkhills crash course in garden design. Over 5 hours Lee will teach you how to design your own dream garden. Featuring practical design examples, planting ideas and video guides. Learn how to design your garden in one weekend!
Garden Design for Beginners: Create Your Dream Garden in Just 4 Weeks
Garden Design for Beginners Online Course: If you want to make the career jump to becoming a garden designer or to learn how to design your own garden, this is the beginner course for you. Join me, Lee Burkhill, an award-winning garden designer, as I train you in the art of beautiful garden design.
Starting a vegetable garden from scratch might feel daunting initially, but I promise you it’s one of the most rewarding things you’ll ever do. Yes, you’ll make mistakes. I’ve been gardening professionally for years, and I still get things wrong regularly! The key is to learn from those mistakes and keep going.
Every single one of the vegetables you successfully harvest is a genuine achievement. That first tomato you grow will taste better than any you’ve ever bought, not just because of the flavour (though that’s phenomenal), but because of the effort, care, and love you’ve invested in growing it.
Don’t aim for perfection. Aim for progress. Start small, build your confidence with easy crops, and gradually expand as your knowledge and enthusiasm grow. Before you know it, you’ll be the one advising nervous beginners!
Now, what are you waiting for? Get out there and start your vegetable gardening adventure!
Lee Burkhill, known as the Garden Ninja, is an award-winning garden designer and horticulturist with over 30 years of gardening experience and 15 years as a professional garden designer. A qualified RHS (Royal Horticultural Society) professional, Lee specialises in sustainable garden design and practical horticultural advice. He designs and presents on BBC1’s Garden Rescue and in leading gardening publications. Lee combines three decades of hands-on gardening knowledge with professional design qualifications to help gardeners create beautiful, functional outdoor spaces.