What to Prune in January: UK Winter Pruning Calendar
Lee Burkhill: Award Winning Designer & BBC 1's Garden Rescue Presenters Official Blog
Beginner level
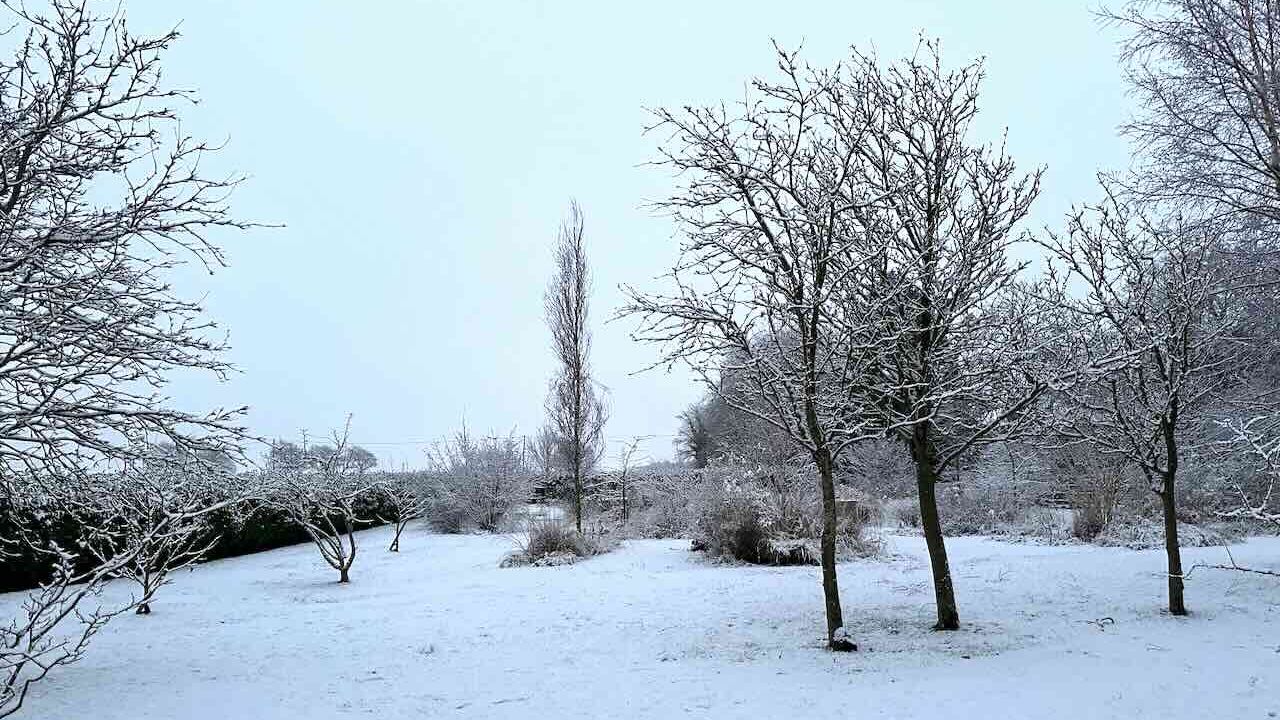
January might seem like a quiet month in the garden, with frosty mornings and bare branches dominating the landscape, but experienced gardeners know this dormant period is absolutely crucial for getting ahead with essential pruning tasks.
Quick Answer: What Can You Prune in January?
January is prime time for pruning apple and pear trees, wisteria, roses, soft fruit bushes (gooseberries, blackcurrants, redcurrants), grapevines, and most deciduous trees whilst they’re dormant. The bare branches make it easy to see the structure, and plants won’t bleed sap or suffer from disease as readily as when actively growing. Avoid pruning spring-flowering shrubs, stone fruits like plums and cherries, and evergreens until later in the year.
Whilst others are hiding indoors with their seed catalogues, I’m outside in my Liverpool garden with secateurs in hand, taking advantage of this golden window to prune the plants that will reward me with spectacular displays come spring and summer.
This page contains affiliate links for products I use and love if you take action (i.e. subscribe, make a purchase) after clicking a link, I may earn some gardening commission, which helps me keep the Garden Ninja Blog free for all.
Why Pruning in January Works
The beauty of January pruning lies in the clarity it provides. With leaves fallen and plants fully dormant, you can finally see the skeletal framework of your trees and shrubs without the distraction of foliage. This naked structure reveals exactly which branches need removing, where crossing stems are causing problems, and how to shape the plant for optimal health and productivity. The cold weather also means fewer active diseases and pests, making clean cuts less vulnerable to infection.
However, January pruning isn’t a free-for-all. Getting the timing wrong can eliminate an entire season’s flowers or leave plants vulnerable to disease.
Some plants absolutely thrive on winter pruning, responding with vigorous growth and abundant flowers or fruit. Others should be left well alone until after they’ve flowered in spring or early summer. This comprehensive guide will show you exactly what to prune in January, how to do it properly, and which plants to avoid until later in the year.
Why January is Perfect for Pruning
January’s position in the gardening calendar makes it uniquely suited for certain pruning tasks. Understanding why this month works so well helps you appreciate the timing and apply these principles to your specific conditions. Let me explain why it’s the best month for nearly all deciduous plants and trees.
A) Dormancy Advantages
Deciduous plants enter true dormancy in January, having completely shut down their growth processes to conserve energy through winter. This dormant state means several crucial advantages for pruning work.
Sap flow reduces to minimal levels, preventing the bleeding that can weaken plants pruned at other times. Trees like grapevines, walnuts, and birches famously bleed profusely if cut when sap is rising in spring, but January pruning avoids this completely. The plant isn’t trying to heal wounds or produce new growth, so it can simply wait until spring to respond to your cuts.
Disease pressure drops dramatically in cold January weather. Fungal spores and bacterial infections struggle to establish in freezing conditions, meaning your pruning cuts are far less likely to introduce problems. This makes January ideal for plants susceptible to specific diseases like silver leaf on cherries (though you should still avoid pruning Prunus species completely).
B) Structural Visibility
Without leaves obscuring your view, the entire branch structure becomes visible for the first time since autumn. This clarity is invaluable for making correct pruning decisions.
You can easily identify crossing branches that rub together, causing wounds and potential disease entry points. Dead wood becomes obvious, appearing brittle and brown rather than showing the slight green tinge of living cambium beneath the bark.
The plant’s overall shape and balance become clear, allowing you to visualise how it will look after pruning and plan your cuts accordingly.
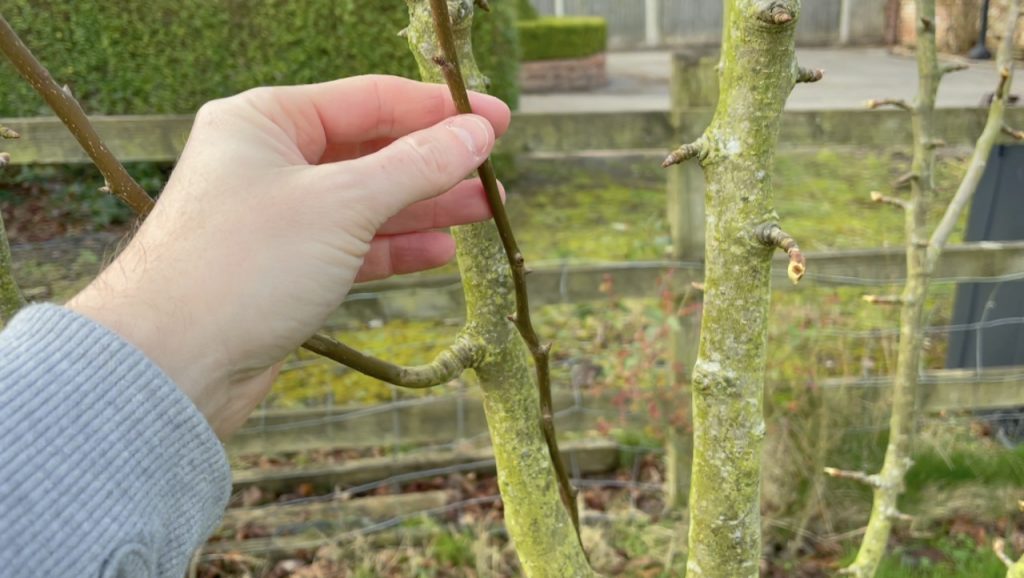
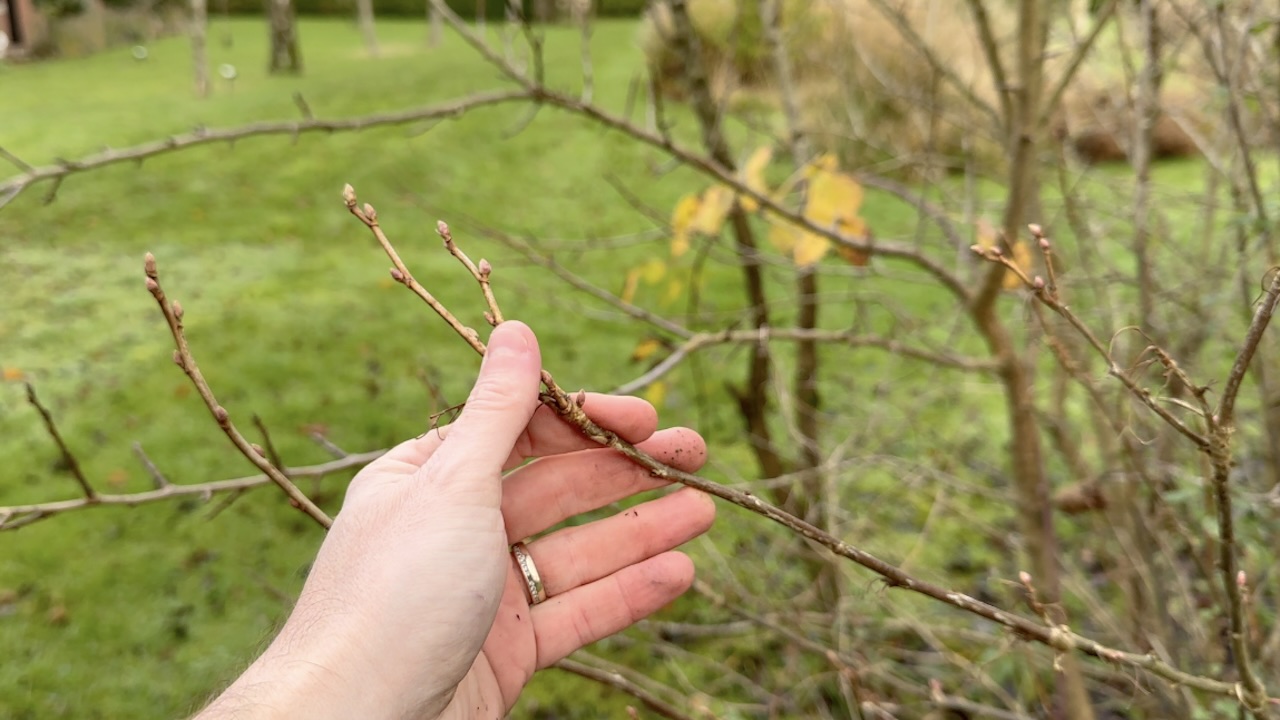
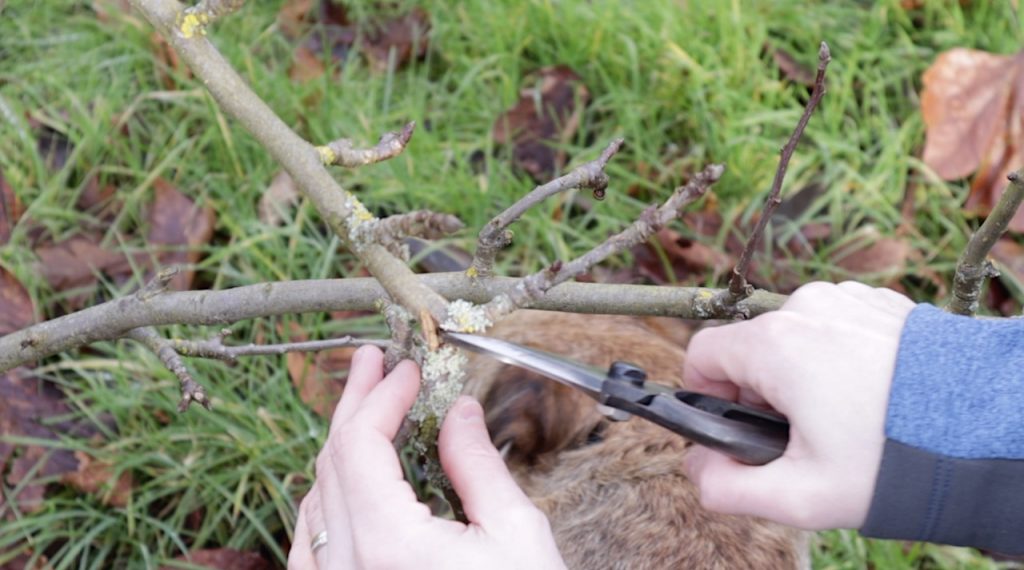
For fruit trees, January’s bare branches allow you to spot the difference between vegetative buds (slim and pointed) and fruit buds (fat and round). This distinction helps you preserve next season’s crop whilst removing unproductive wood.
C) Weather Windows
January typically offers enough mild days between cold snaps to complete substantial pruning. Whilst we occasionally experience harsh weather, most of the UK sees temperatures hovering around freezing rather than staying deeply frozen for weeks.
Choose your pruning days wisely by watching the forecast. Aim for dry, frost-free days when temperatures stay above zero. Wet conditions spread fungal spores, whilst hard frost can damage freshly cut stems. A crisp, bright January morning with temperatures just above freezing provides perfect conditions for several hours of productive pruning work.
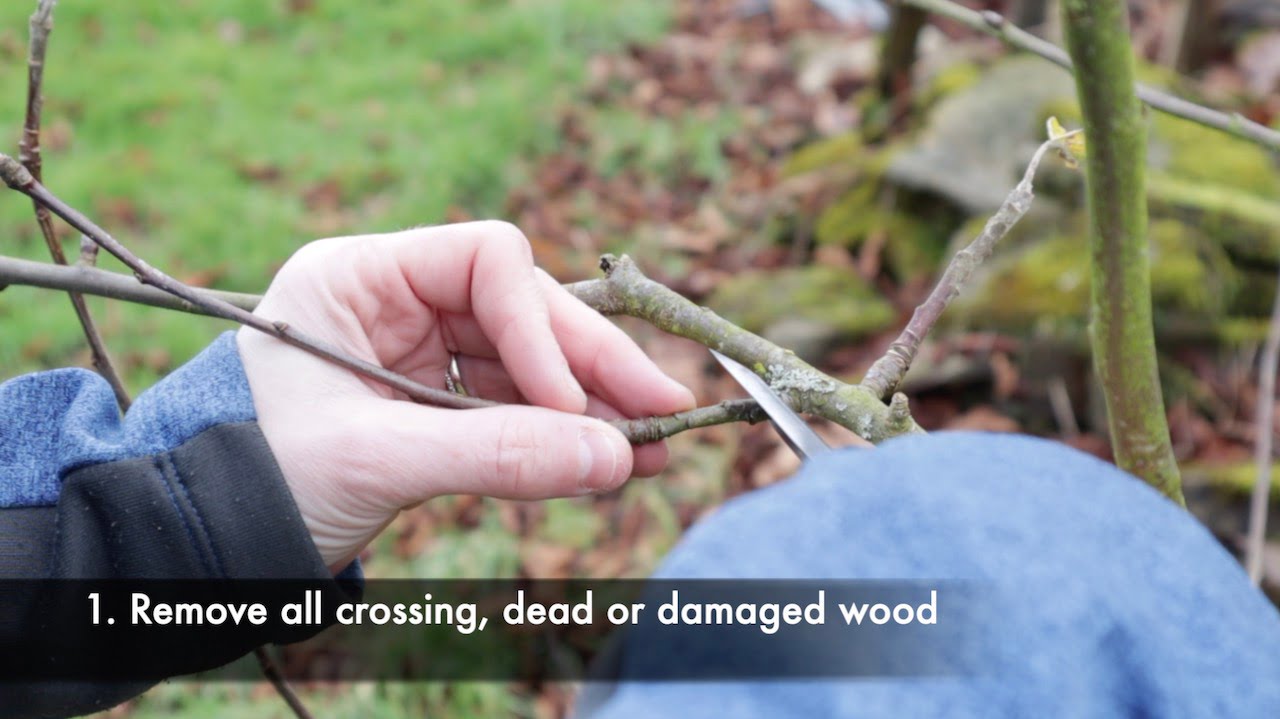
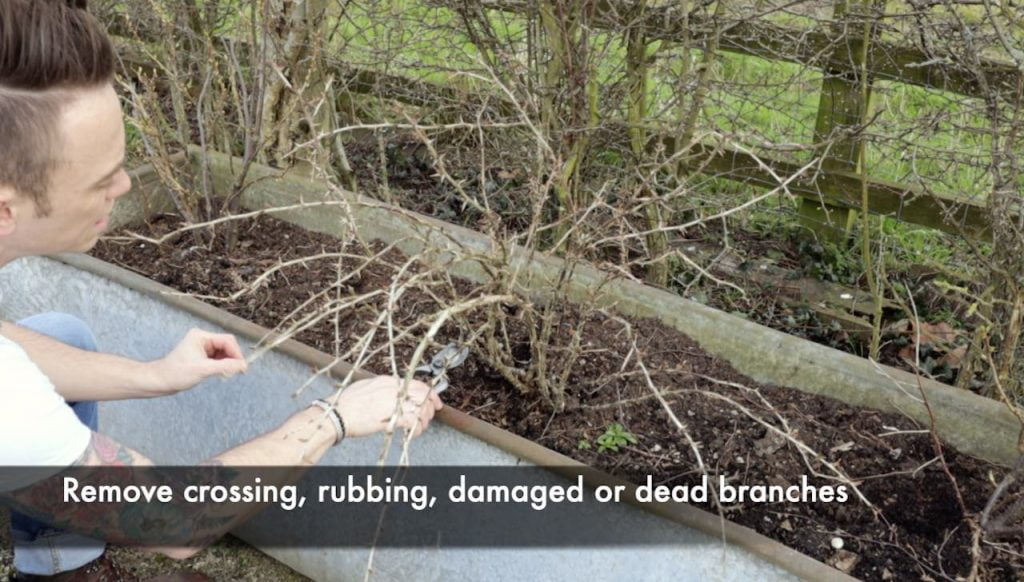
The Three Ds: Your Pruning Starting Point
You may have heard about the three d’s (or 4 d’s if like me your specific) in pruning and every gardener has a slightly different set of words for removing these offending stems and branches. In a nutshell the 3 d’s of pruning are removing, dead, damaged, diseased or disordered stems (which I know is 4 d’s but damaged and diseadsed are sometimes lumped together!)
What are the 3 d’s of pruning?
Begin every single pruning job with this fundamental health check:
1)Remove Dead Wood – Cut back to living tissue or remove entirely. Dead stems appear brown or black, feel brittle when bent, and show no green cambium when scratched.
2) Cut Out Diseased or damaged Material – Remove wood displaying unusual discoloration, cankers, or fungal growth. Cut well back into healthy tissue and dispose of diseased material away from the garden. Remove broken branches, split stems, or bark wounds. These injuries provide disease entry points and should be cut back to healthy growth.
3) Eliminate Disordered Stems – Lastly remove any branch or stem thats in hte wrong place, about to cross or rub another or generally in the way of other better branches.
Essential Pruning Tasks for January
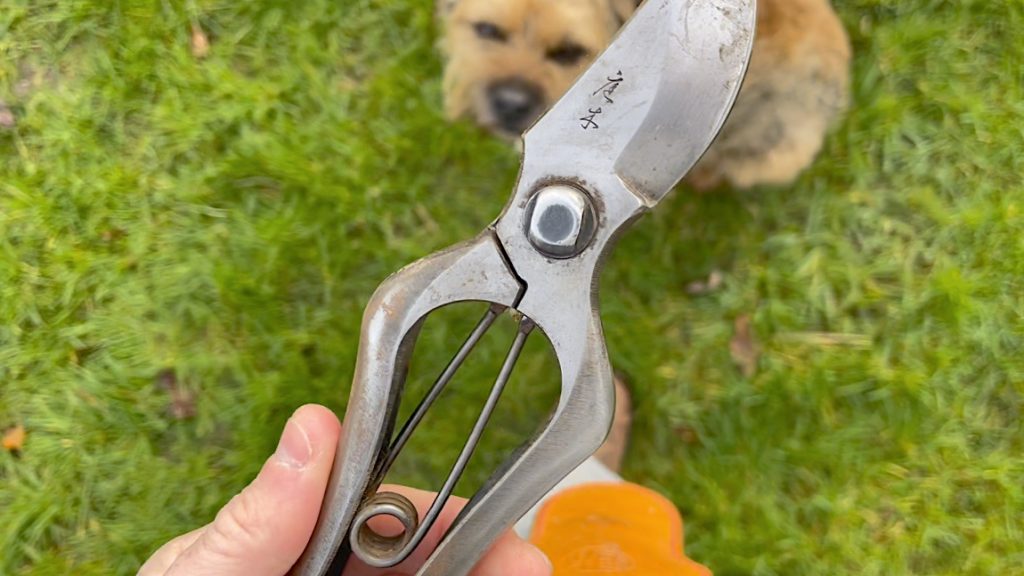
Ok Ninjas, now you know why pruning in January is favoured by so many expert gardeners let me walk you through the main tree and shrub types that love to be pruned this month. If you haven’t already seen my top garden tools needed for pruning and gardening, then do check that out and always make sure your secateurs, loppers and pruning saws are clean before you begin any pruning.
If you wouldn’t peel an apple with your tools and eat it, then don’t prune with them until theyre clean enough to do so!
1) Apple & Pear Trees: The Winter Priority
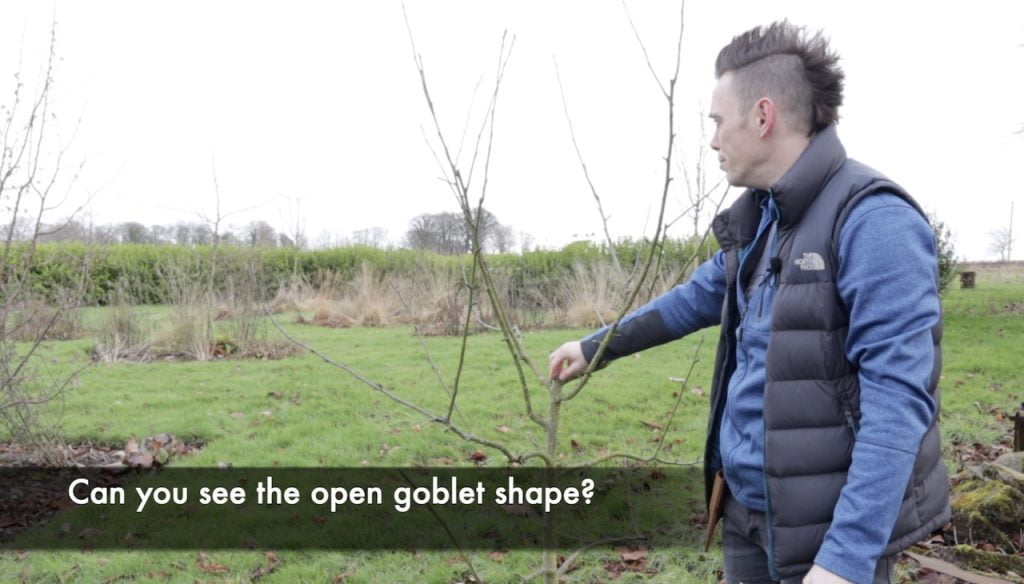
Apple and pear trees absolutely dominate the January pruning schedule, and for excellent reasons. Winter pruning of these fruit trees encourages vigorous spring growth, removes unproductive wood, and creates the open goblet shape that maximises fruit production.
Timing Specifics
Apple trees can be prunedany time between November and early March, whilst fully dormant. However, January hits the sweet spot between early winter (when you might still see late autumn growth) and late winter (when sap starts rising and birds begin nesting). Pear trees follow identical timing, though they tend to grow more vigorously and benefit from slightly harder pruning than apples.
Young trees under five years old can wait until February or early March if preferred, as this reduces winter damage to tender growth. Established trees from five years onwards should be tackled in January for best results.
1. Remove the Three Ds First – Cut out all dead, diseased, and damaged wood back to healthy tissue or completely at their point of origin. Dead wood appears brown and brittle, whilst diseased wood shows cankers, unusual discolouration, or fungal growth.
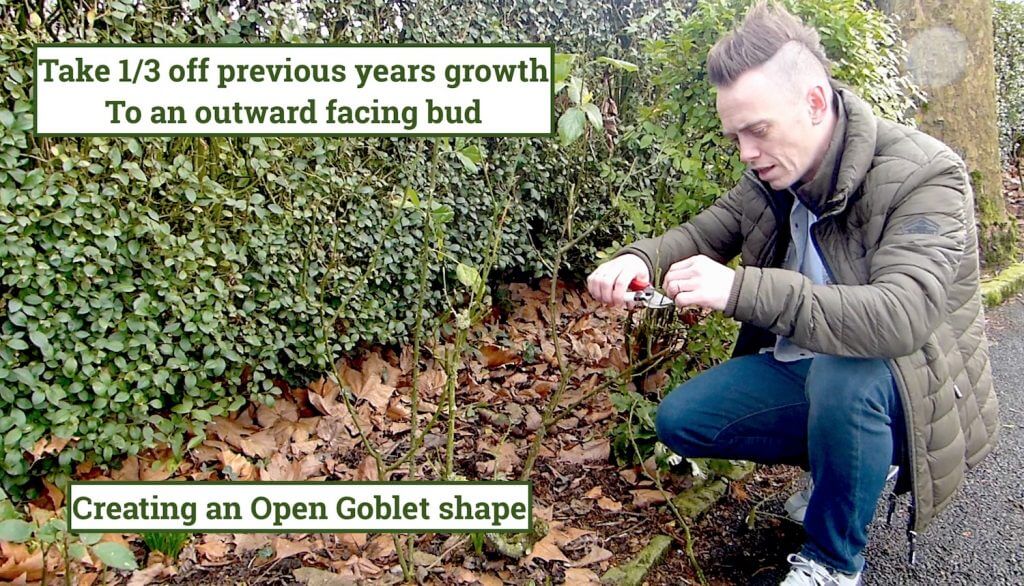
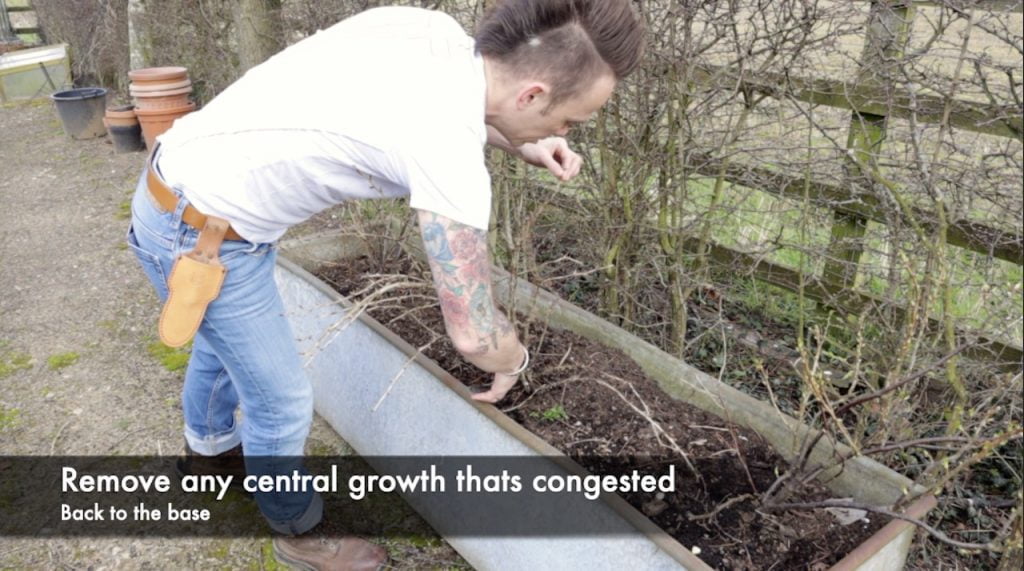
2. Create the Goblet Shape – Remove branches growing into the centre of the tree to create an open structure. The ideal form features a central trunk rising to waist height, then four to six main branches radiating outwards, with the centre kept clear. This open structure allows light and air penetration, improving fruit quality and reducing disease.
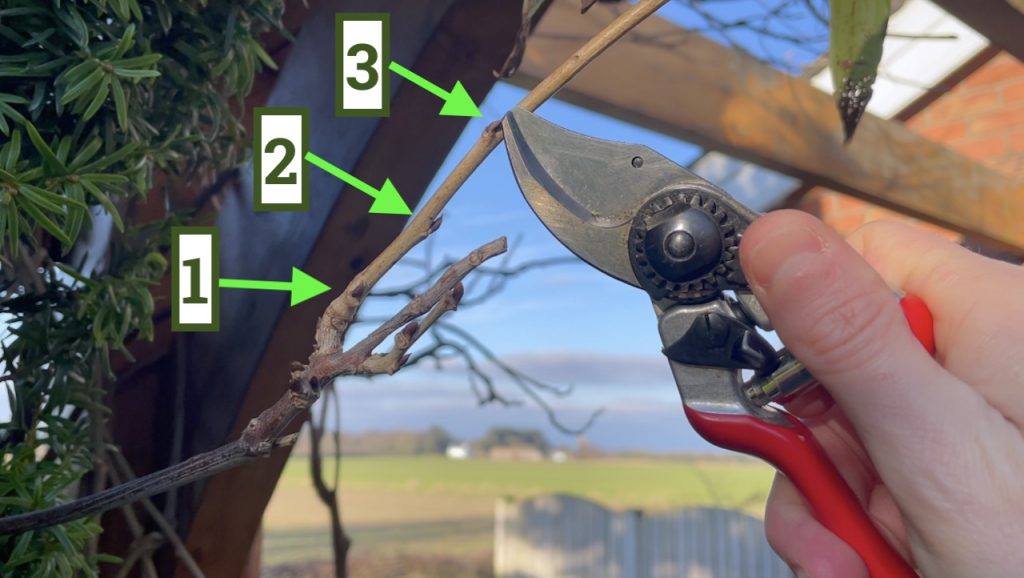
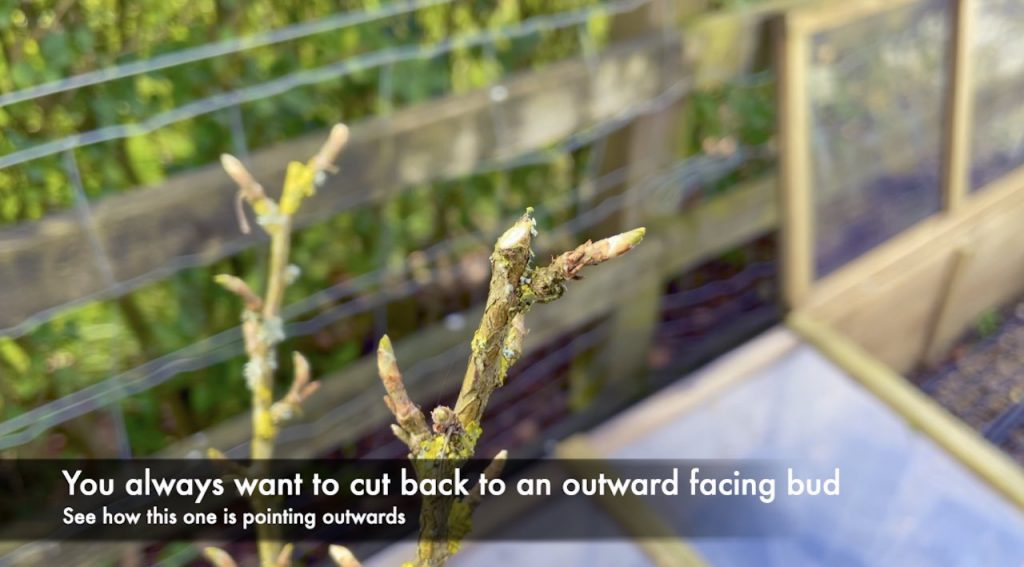
3. Shorten Last Year’s Growth – Reduce the previous year’s growth by about one third, cutting just above an outward-facing bud. Make cuts at a slight angle, sloping away from the bud to shed water and prevent rot. This shortening encourages fruiting spur formation whilst keeping the tree manageable.
4. Remove Crossing Branches – Where branches rub together, keep the stronger, better-positioned stem and remove its competitor completely.
5. Thin Congested Areas – Remove shoots competing for space in crowded zones. Aim for evenly spaced branches with adequate room for each shoot to develop without overcrowding.
For detailed techniques on different pruning cuts and specific apple varieties, I’ve covered the complete process in my comprehensive buddleja pruning guide, which demonstrates the same principles of hard winter pruning that apply to fruit trees.
Avoiding Common Mistakes
Never remove more than one-third of the canopy in a single season, as this stresses the tree and triggers excessive water shoot production. Those vigorous, vertical shoots contribute nothing to fruiting and create maintenance headaches.
Don’t make flush cuts tight against the trunk. Leave the branch collar (the slightly swollen area where the branch meets the trunk) intact, as this contains cells that seal the wound. Cutting into this collar prevents proper healing and invites disease.
Avoid leaving long stubs when removing branches. Cut back to a main stem or healthy outward-facing bud, not midway along a branch where the stub will die back and cause problems.
2) Wisteria: The Two-Stage System
Wisteria’s vigorous growth demands pruning twice yearly, and January provides the crucial second pruning that sets up spectacular spring flowering. This winter pruning follows the summer pruning completed in July or August and works in concert with it to control growth and maximise flower production.
Understanding the System
Summer pruning (July/August) involves cutting back the long whippy shoots produced during the growing season to about five or six leaves. This initial reduction opens up the plant, allows sunlight to ripen the wood, and prevents excessive growth.
January’s winter prune takes those summer-shortened shoots and reduces them further to just two or three buds from the main framework. This severe cutting creates the short flowering spurs that produce wisteria’s magnificent flower racemes in late spring.
Think of it as a two-stage reduction system. Summer pruning provides rough control and prepares the plant. Winter pruning provides the finishing touches to ensure flowers appear on short spurs rather than being hidden among masses of leafy growth.
The January Pruning Technique
Follow this systematic approach to winter wisteria pruning:
1.Identify Summer-Pruned Shoots – Work around your wisteria systematically, finding the shoots you shortened in July or August. These appear as shortened stems coming off the main framework of permanent branches.
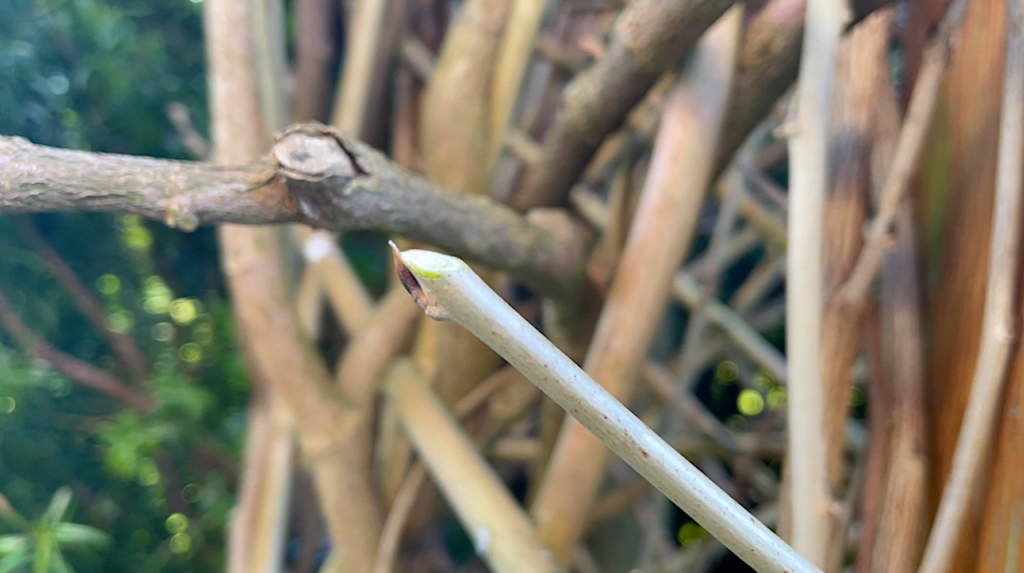
2. Cut to Two or Three Buds – Reduce each shoot to just two or three buds from the old wood. The buds appear as small swellings along the stem, typically spaced every few centimetres. Cut just above the second or third bud, leaving shoots only 5-8cm long.
3. Remove Dead Wood – Cut out any dead tips on older branches. Wisteria can develop dead material over winter, making it an ideal time to remove it cleanly.
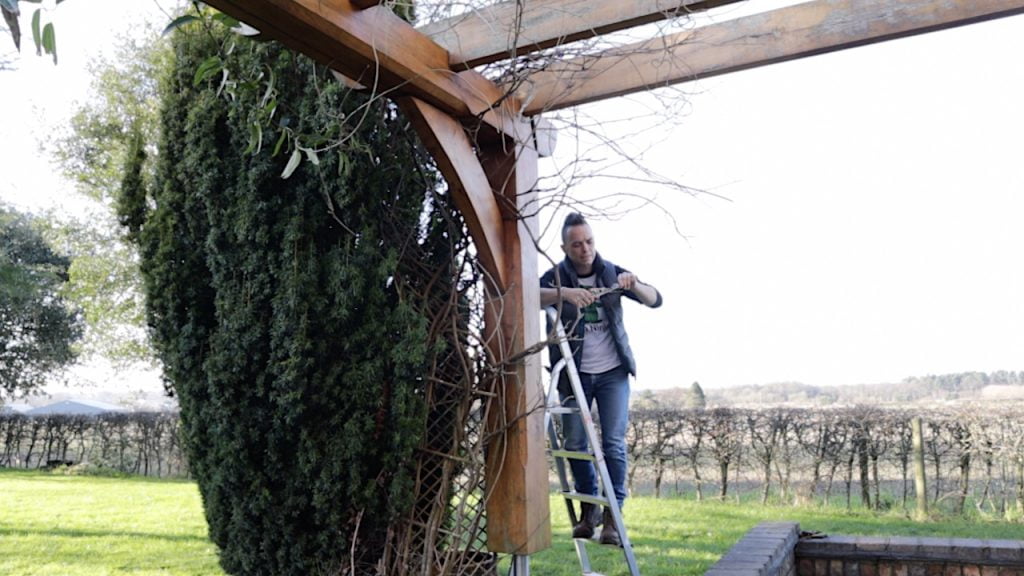
4. Tie In New Growth – Secure any new shoots needed to extend the framework or fill gaps. Wisteria grown against walls or on pergolas benefits from training main stems horizontally, as this promotes better flowering than vertical growth.
5. Check Overall Structure – Step back and ensure you’ve maintained the balanced framework with short flowering spurs distributed evenly across the plant.
What Happens Next
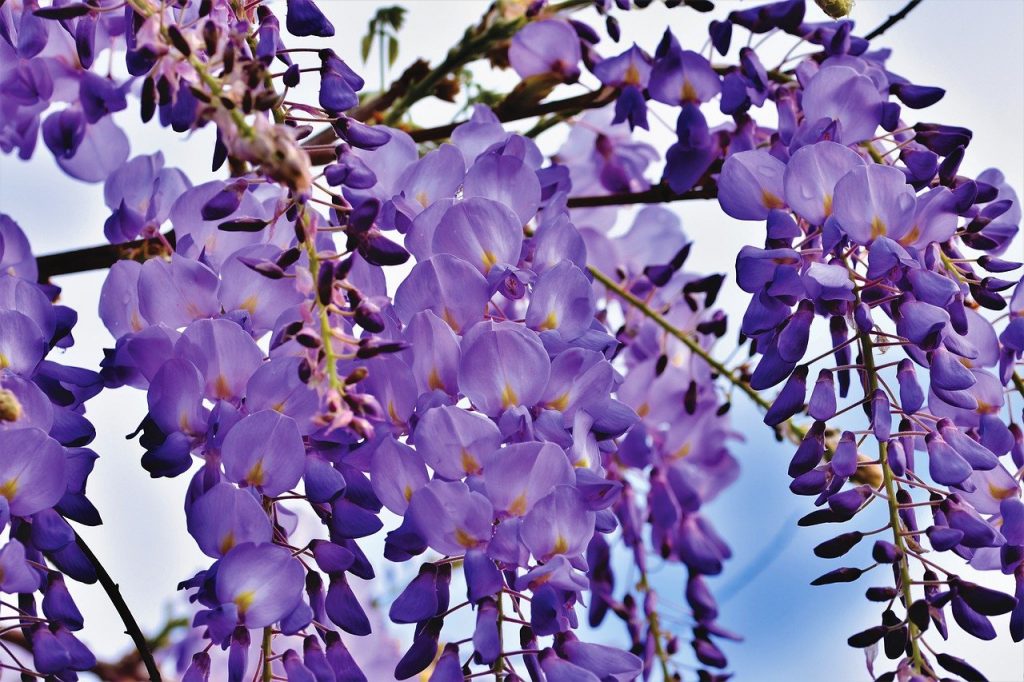
Those shortened spurs you’ve created will produce flower buds that swell through late winter and early spring before bursting into bloom in May or June. The flowers appear on these short spurs before the leaves fully develop, creating the dramatic cascades of blooms wisteria is famous for.
Without this January pruning, wisteria produces fewer, smaller flower clusters hidden amongst excessive leafy growth. The plant allocates energy to vegetative growth rather than flower production, resulting in a green monster rather than a floral spectacular.
3) Roses: Setting Up Summer Glory
Rose pruning dominates late winter gardening advice, and whilst many gardeners wait until February or March, January works perfectly well for bush roses, shrub roses, and climbing roses in most of the UK. The traditional advice is to prune roses when forsythia blooms, but in practice, pruning anytime from January through early March, whilst they’re dormant, yields excellent results.
Bush and Shrub Roses
Bush and shrub roses are the easiest to prune and I love spending a day in January systematically pruning my 30 or so roses. It’s like a neat hair cut and because roses are so hardy its hard to get it wrong. Following the simply advice of cutting to an outward facing bud makes it childs play. Prune hybrid tea and floribunda roses using these steps:
• Hard Prune Main Stems – Cut back to 15-30cm above ground level, depending on rose size and preference. Make cuts just above an outward-facing bud at a 45-degree angle, sloping away from the bud.
• Remove Weak Growth – Cut out all thin, weak, twiggy stems entirely. These spindly shoots never produce good blooms and just create congestion.
• Eliminate Dead Wood – Prune dead stems back to healthy green tissue. Dead rose stems appear brown and feel hollow when squeezed, whilst living stems show green cambium when scratched lightly.
• Treat Old Roses Differently – Remove one third of the oldest stems completely at ground level, then reduce remaining stems by one third of their length. This maintains natural habit whilst encouraging new basal growth.
Climbing Roses
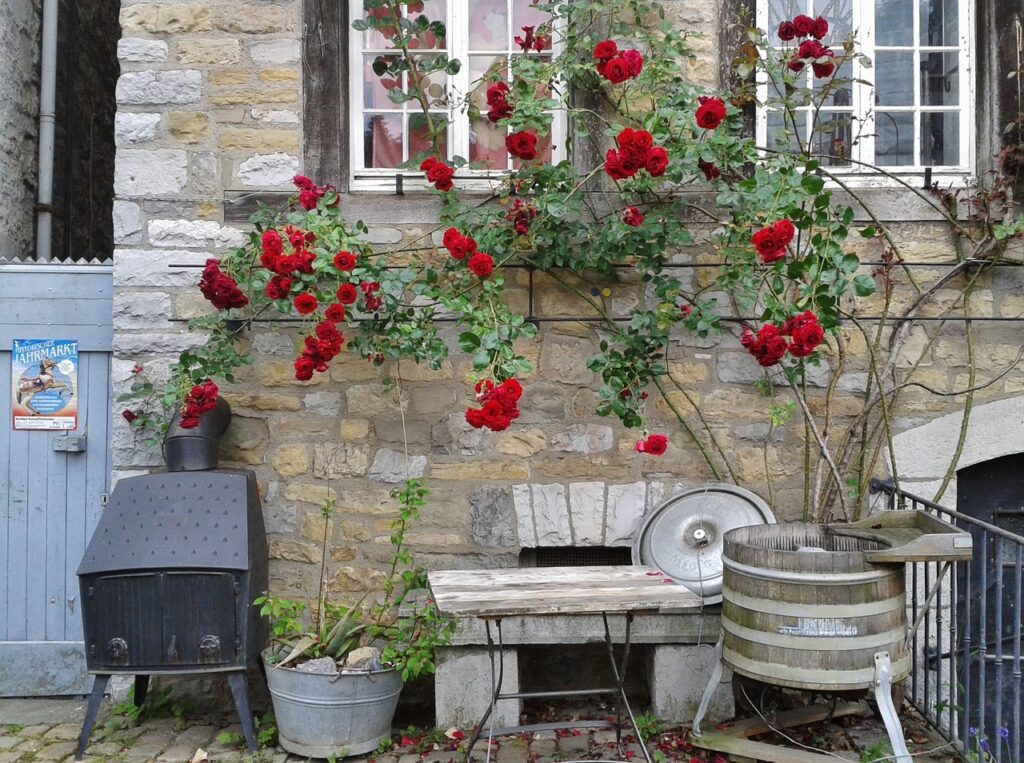
Climbers need different handling to preserve their framework. This involves trimming back leggy long growth, bending shoots horizontally and then pruning them back so these horizontals then send up vertical flowering growth this spring. Climbing roses are probably the hardest to prune because it feels counter intutitve removing the long side growth and bending over stems but this is the best way to get them to flower like the example below.
• Remove Problem Wood First – Cut out all dead, damaged, and diseased stems back to healthy growth.
• Create Flowering Spurs – Identify stems that flowered last year and shorten their side shoots to two or three buds from the main stem, similar to wisteria pruning.
• Train New Shoots – Tie in new stems to fill gaps or extend coverage. Train stems as horizontally as possible to restrict sap flow and encourage more abundant flowering along the entire length.
• Rejuvenate Old Climbers – Remove one or two of the oldest main stems annually if congestion develops. Cut back ancient stems to ground level to stimulate fresh basal growth.
Rambling Roses Caveat
Rambling roses (as opposed to climbing roses) flower on wood produced the previous year, so they should NOT be pruned in January. Ramblers need pruning in late summer immediately after flowering finishes. January pruning of ramblers eliminates the entire year’s flower display, so make absolutely sure you know which type you have before making any cuts.
4) Soft Fruit Bushes: Productivity Through Pruning
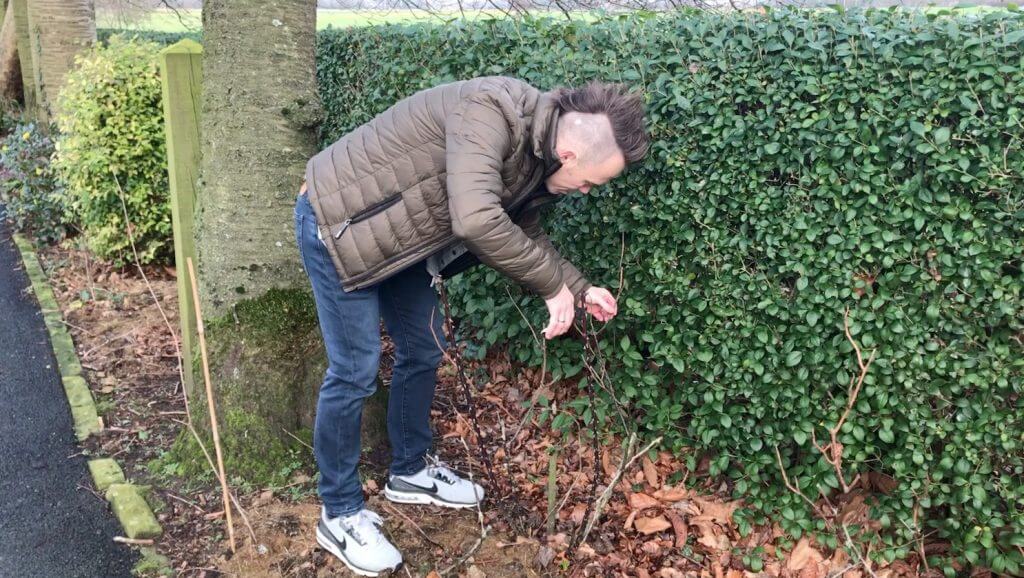
Gooseberries, blackcurrants, and redcurrants all benefit from January pruning whilst dormant. The bare branches make it easy to see the bush’s structure and identify which wood should be retained for fruiting. However, you do need to understand on which branches your fruit bushes will fruit, as usually it’s either one or two-year-old wood that fruits. If you cut back everything, you’ll remove this year’s fruit. I’ll explain below how to work this out to make it easy for you!
Blackcurrants
Blackcurrants fruit best on two-year-old wood, meaning that you do need to have your notepad with you to take notes once you’ve planted a Blackcurrant, as to which stems to remove or prune. If you have no idea and have inherited a straggly or overgrown blackcurrant, then taking out 1/3 back to the ground of the oldest growth is the best option, otherwise follow this simple renewal system:
1. Remove Oldest Stems – Cut one-third of the oldest, darkest stems right down to ground level. These ancient stems lose productivity, and removing them stimulates new basal growth.
2. Preserve Young Wood – Leave all healthy young shoots from the previous year completely unpruned. These bright, greenish stems will fruit heavily in their second year.
3. Create Age Balance – Aim for a continuous supply of productive wood by maintaining this cycle. Each year, remove the oldest third, leaving middle-aged wood to fruit and young wood developing for future crops.
Gooseberries and Redcurrants
These fruit on both old and new wood but produce better quality berries on younger stems that are 2 years old and younger. As a rule of thumb I leave last years growth and about half of the years before pruning out anything older or more gnarled than this.
1.Create Open Structure – Remove branches growing into the center to form an open goblet shape. This improves air circulation and reduces mildew problems.
2. Shorten New Growth – Cut the previous year’s growth by about half to an outward-facing bud, encouraging fruiting spur formation whilst controlling size.
3. Remove Low Branches – Cut out stems that will touch the ground when laden with fruit. These pick up soil borne diseases and create harvest difficulties.
4. Thin Congestion – Remove crossing branches and open up crowded areas for better air flow and light penetration.
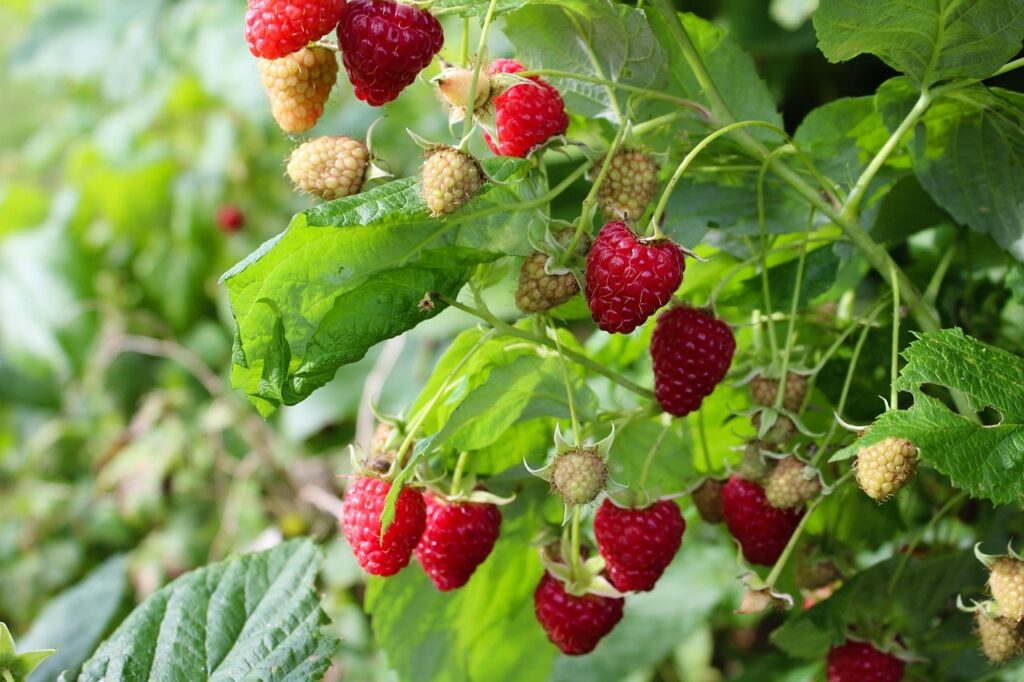
Raspberries: Understanding the Two Types
Raspberries fall into two distinct categories that require completely different January pruning approaches. Getting this wrong eliminates your entire crop, so identification is crucial before making any cuts. Summer raspberries should be pruned in January and Autumn after they have fruited the same year.
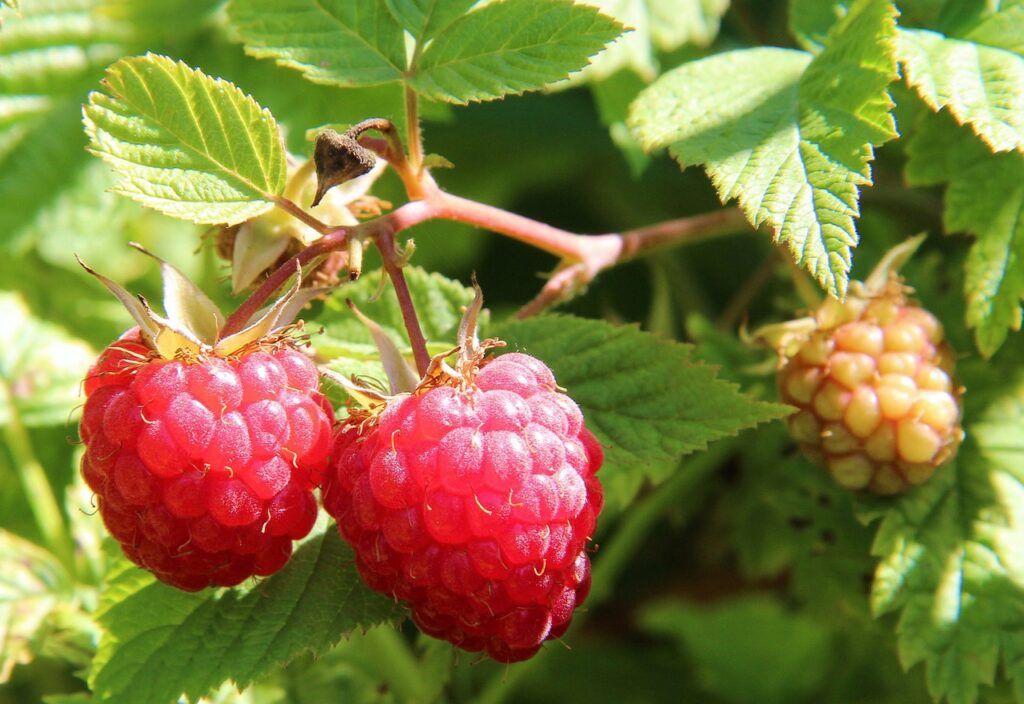
Summer Fruiting Raspberries
These traditional varieties fruit on canes grown the previous year, typically producing berries in June and July. Popular varieties include ‘Glen Ample’, ‘Tulameen’, and ‘Glen Moy’. January is the perfect time to complete their annual pruning.
Follow these steps for summer fruiting types:
1.Remove Fruited Canes – Cut all canes that bore fruit last summer right down to ground level. These old canes have finished their productive life and won’t fruit again. They should be brown and woody compared to last year’s new growth.
2. Identify New Canes – Locate the fresh canes that grew last summer but didn’t fruit. These appear greener and more vigorous than the old fruited canes. These are your fruiting canes for the coming summer.
3. Tie In New Canes – Secure last year’s new canes to support wires, spacing them about 10cm apart along the wire. This spacing prevents overcrowding whilst ensuring good air circulation.
4. Shorten Tall Growth – If canes exceed the top wire height, cut them back to just above it (typically around 1.5-1.8 metres). This prevents wind damage whilst maintaining productive length.
5. Remove Weak Canes – Thin out any spindly, weak canes that won’t produce good crops. Aim for strong, healthy canes with good spacing.
Autumn Fruiting Raspberries
These varieties fruit on the current year’s growth, producing berries from August through October and sometimes into November. Popular varieties include ‘Autumn Bliss’, ‘Polka’, and ‘Joan J’. Their pruning is dramatically simpler than summer types, but the timing differs.
Important: Do NOT prune autumn fruiting raspberries in January like above. Wait until February for these varieties. The late January to February timing allows you to clearly identify which canes to remove after they’ve completely finished fruiting and died back naturally.
When you do prune autumn raspberries in February:
Cut Everything Down – Simply cut all canes right down to ground level, leaving just 2-3cm stubs. Every single cane gets removed, unlike summer types where you preserve some growth.
Remove All Material – Clear away the cut canes completely. This removes any overwintering pests or diseases and provides a fresh start.
Expect New Growth – Fresh canes will emerge from ground level in spring, grow through summer, and fruit on their tips in autumn. This simple cycle repeats annually.
How to Tell Them Apart
If you’ve inherited raspberry canes and aren’t sure which type you have:
Check Fruiting Time – Summer fruiting produces berries June to July. Autumn fruiting produces August to November.
Observe Growth Patterns – Summer types have clearly different aged canes (brown old ones and green new ones). Autumn types look more uniform as everything is the same age.
Look for Labels – Check if any plant labels remain that indicate the variety name, then research that variety’s fruiting habit.
Wait and Watch – If completely uncertain, wait until the plants fruit and note the timing. You can then prune correctly for next season.
Why the Difference Matters
Summer fruiting raspberries fruit on “old wood” (previous year’s canes), so you must preserve last year’s new growth for this year’s crop. Cutting everything down would eliminate your entire harvest.
Autumn fruiting raspberries fruit on “new wood” (current season’s canes), so cutting everything down simply prompts fresh growth that will fruit the same year. Leaving old canes would create congestion without improving yields.
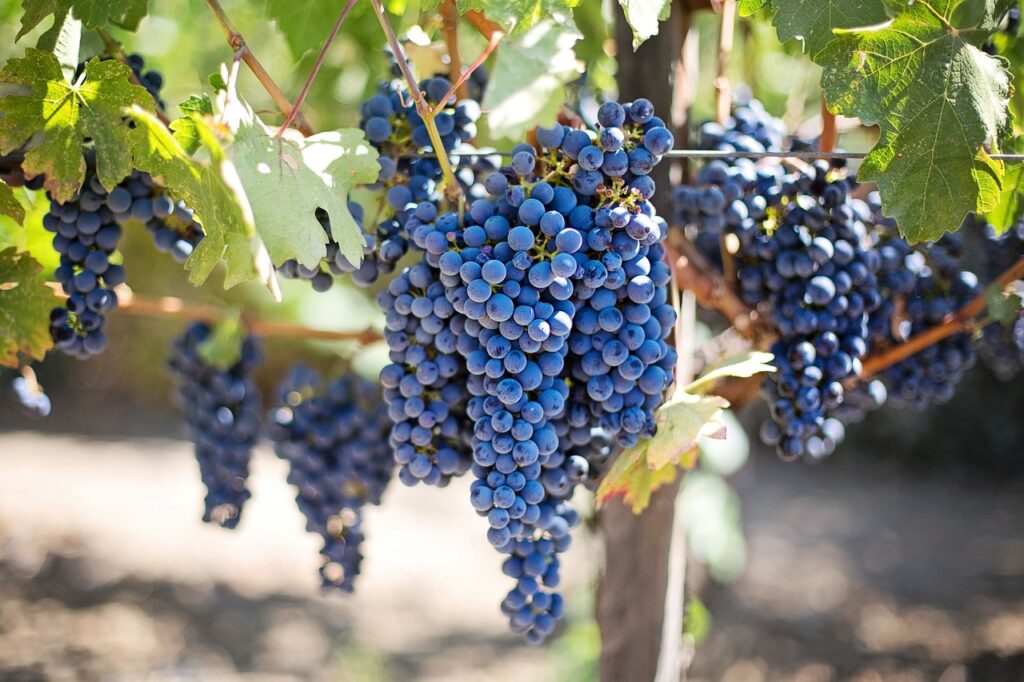
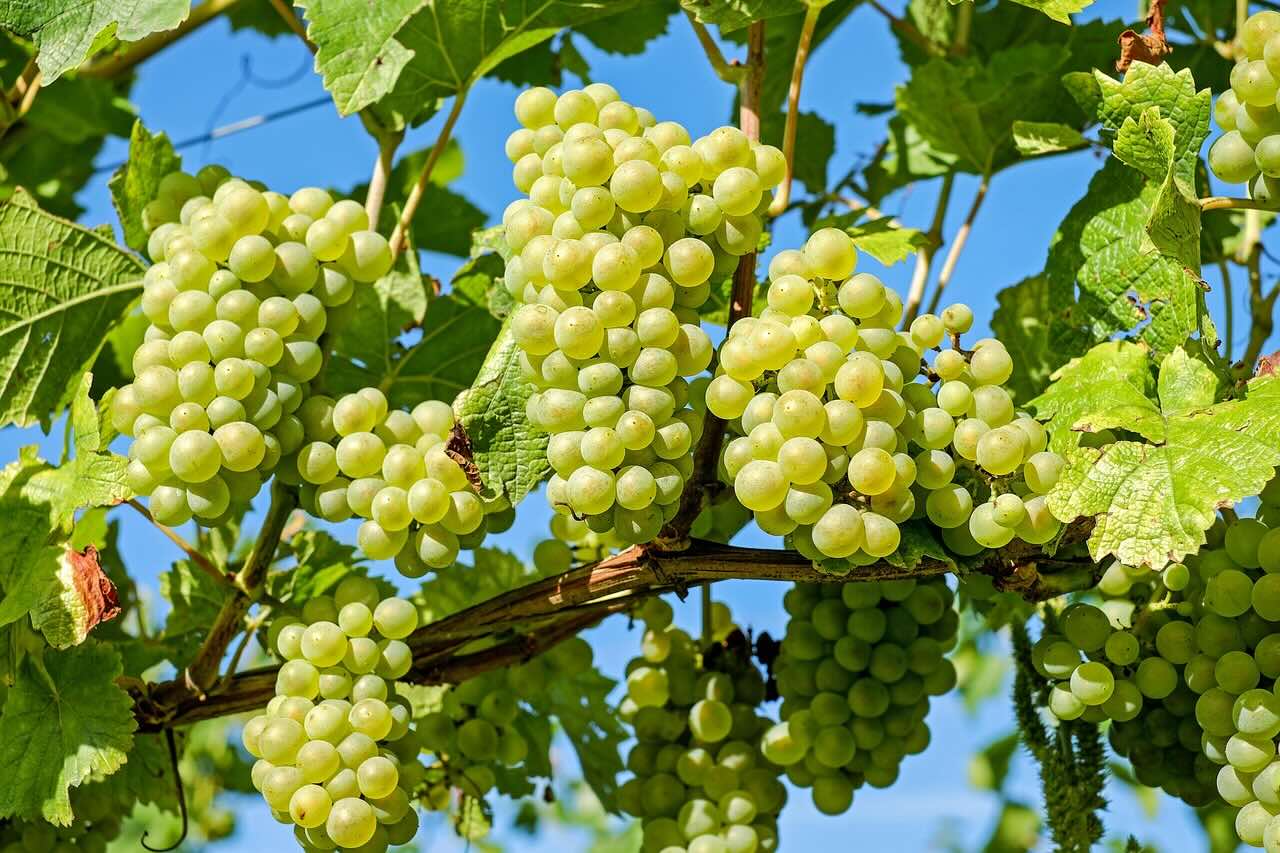
5) Grapevines: Avoiding the Bleed
Grapevines must be pruned in deep midwinter to avoid bleeding sap, making January the perfect month for this task. Leave it any later, and you risk the vine weeping copiously from pruning wounds as sap begins rising in February. Grapevines can be tricky for the very beginner, but they bounce back quickly if you make the wrong cuts, so I always advise that the wrong cuts are better than no cuts on vines. If not, you just end up with loads of foliage that gets EVERYWHERE!
Understanding Bleeding
Grapevines, along with birches, walnuts, and maples, produce enormous quantities of sap in spring. Pruning cuts made when sap is rising bleed profusely, creating a distressing (though not necessarily fatal) situation. This sap loss weakens the plant and makes it more vulnerable to disease.
January pruning happens when sap flow remains minimal, allowing cuts to dry without bleeding. The plant isn’t stressed by sap loss and can focus its energy on the spring growing season.
Pruning Trained Vines
Grapevines are typically trained on a rod system with horizontal wires. The tricky thing with grapevine pruning is being brutal enough and bold enough to create the lateral (horizontal) structure when they are young. If not, you just end up with vines everywhere and very few grapes. Grapes fruit better on short spurs of growth, a bit like wisteria pruning.
1. Shorten Lateral Shoots – Cut back lateral shoots (branches growing off the main rod) to just two or three buds from the main framework, creating short fruiting spurs.
2. Clean the Main Rod – Remove any shoots growing from the main rod between lateral branches. The rod should remain clean with only horizontal laterals at regular intervals.
3. Consider Climate – For outdoor UK grapevines, this simple spur system provides the best combination of fruit production and frost protection, as short spurs are less vulnerable to damage than longer shoots.
Young Vine Development
For newly planted Grape Vines under three years old focus on framework building. This is the hardest step as it often feels counterproductive removing lateral (side shoots to just a few) but this is essential Ninjas!
• Extend the Leader – Reduce the main rod by one third to encourage strong vertical growth whilst building the permanent structure.
• Select Lateral Branches – Choose well-placed lateral shoots for training along support wires, spacing them about 40cm apart up the rod.
• Remove Excess Growth – Cut out all other lateral growth to concentrate the vine’s energy into the permanent framework branches.
Plants to Avoid Pruning in January
Understanding what NOT to prune is just as important as knowing what should be cut. Several plant categories must be left alone in January to avoid problems.
Spring Flowering Shrubs
Any shrub that flowers before June is flowering on wood grown the previous year. January pruning removes all those flower buds, eliminating the entire spring display.
Forsythia, with its bright yellow early flowers, must be left until after flowering. The same applies to flowering currants (Ribes sanguineum), winter jasmine (though this can be tidied after flowering finishes), and early flowering spiraea.
Magnolias absolutely should not be touched in January. Aside from removing their spring flowers, magnolias are prone to bleeding when pruned in winter dormancy. Wait until after flowering finishes in late spring, then prune lightly only if absolutely necessary.
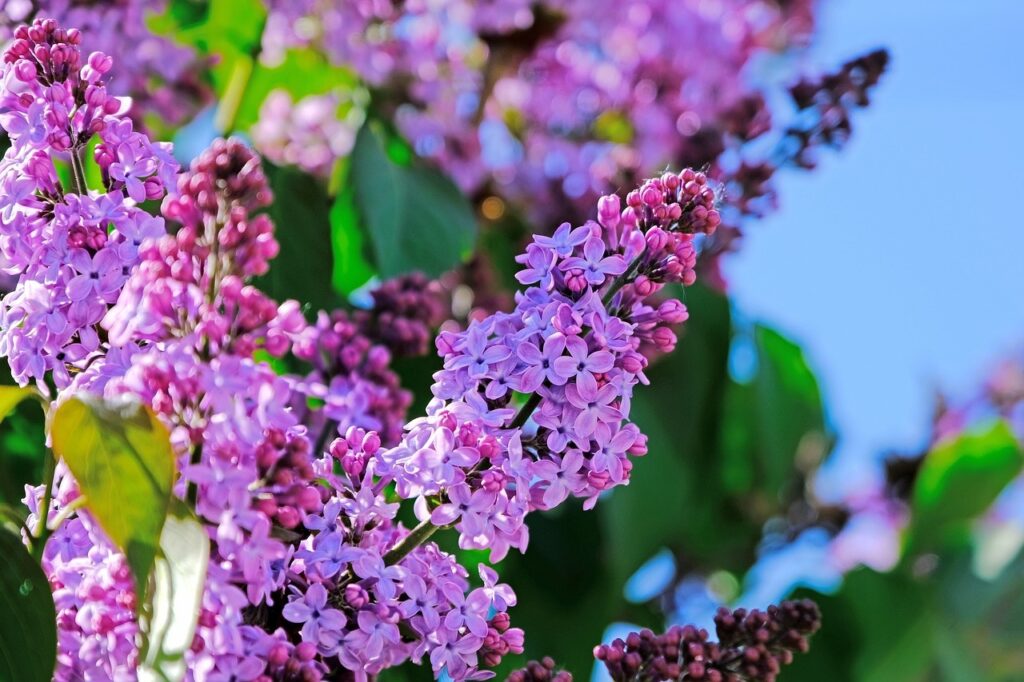
Lilacs flower on old wood and should be pruned immediately after flowering in May or June. January pruning eliminates the flower display and potentially harms the plant.
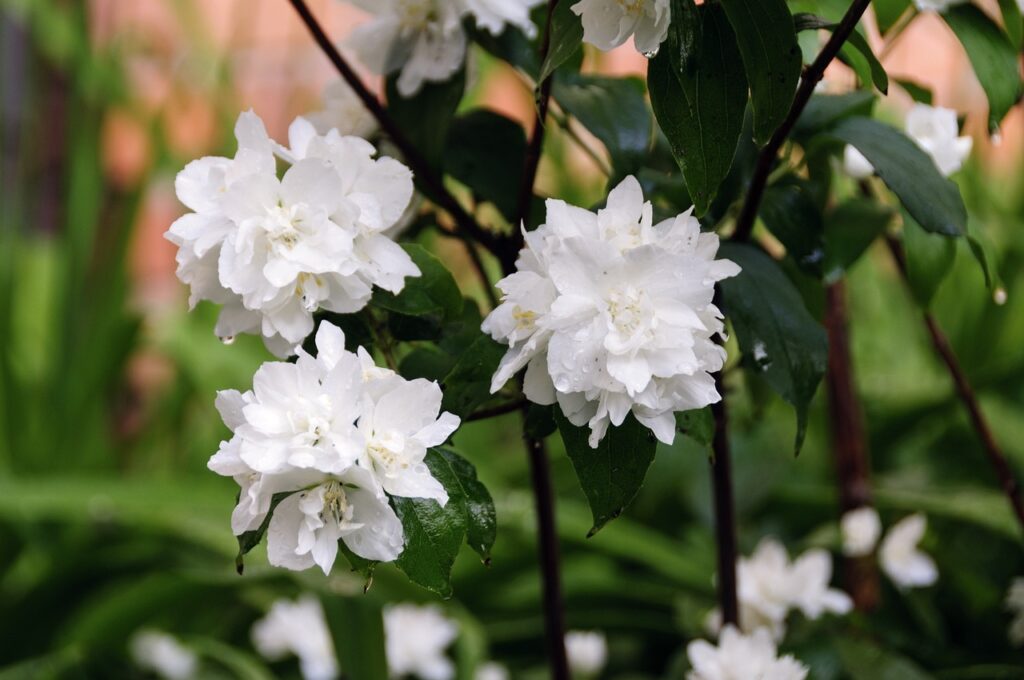
Philadelphus (mock orange) flowers on wood from the previous year and needs pruning in summer after flowering. January cuts remove all the flowers and create an unattractive bare shrub.
Stone Fruits and Prunus Species
This family is particularly susceptible to silver leaf disease, which spreads through pruning wounds made in autumn and winter. The spores are most active in cool, damp conditions, making January pruning a recipe for disaster.
Plum trees should never be pruned between October and April. If pruning is necessary, wait until late spring or summer when the tree is in full growth. The flowing sap helps prevent silver leaf spores from establishing, and wounds heal rapidly in warm weather.
Cherry trees follow identical timing. Avoid winter pruning completely and tackle any necessary work in late spring after flowering or in midsummer.
Apricot and peach trees are less commonly grown in the UK but follow the same principles. These Prunus species share the vulnerability to silver leaf and should be pruned only in summer.
Ornamental cherries often need minimal pruning, but any work should happen in summer, not January. The same timing applies to flowering almonds and other ornamental Prunus species.
Most Evergreens
Evergreen plants generally dislike winter pruning. Unlike deciduous plants that store food reserves in their roots whilst dormant, evergreens maintain active foliage year-round and rely on their leaves for energy production.
January pruning of evergreens removes active foliage during the time when plants have minimal ability to replace it. Cold weather prevents new growth responding to pruning, leaving the plant unbalanced and stressed until spring.
Conifers should be left completely alone in winter. Most conifers won’t regenerate from old wood, so winter damage compounds pruning errors. Wait until late spring when growth is active.
Rhododendrons and camellias should be tackled after flowering in late spring, not in January. Winter pruning removes flower buds and stresses these relatively tender evergreens.
Holly can tolerate light pruning for Christmas decorations, but major pruning should wait until late spring when new growth is emerging. The same applies to other broad-leaved evergreens.
Box (Buxus) is occasionally shaped in late winter, but January is generally too early. Wait until late February or March when the worst weather has passed.
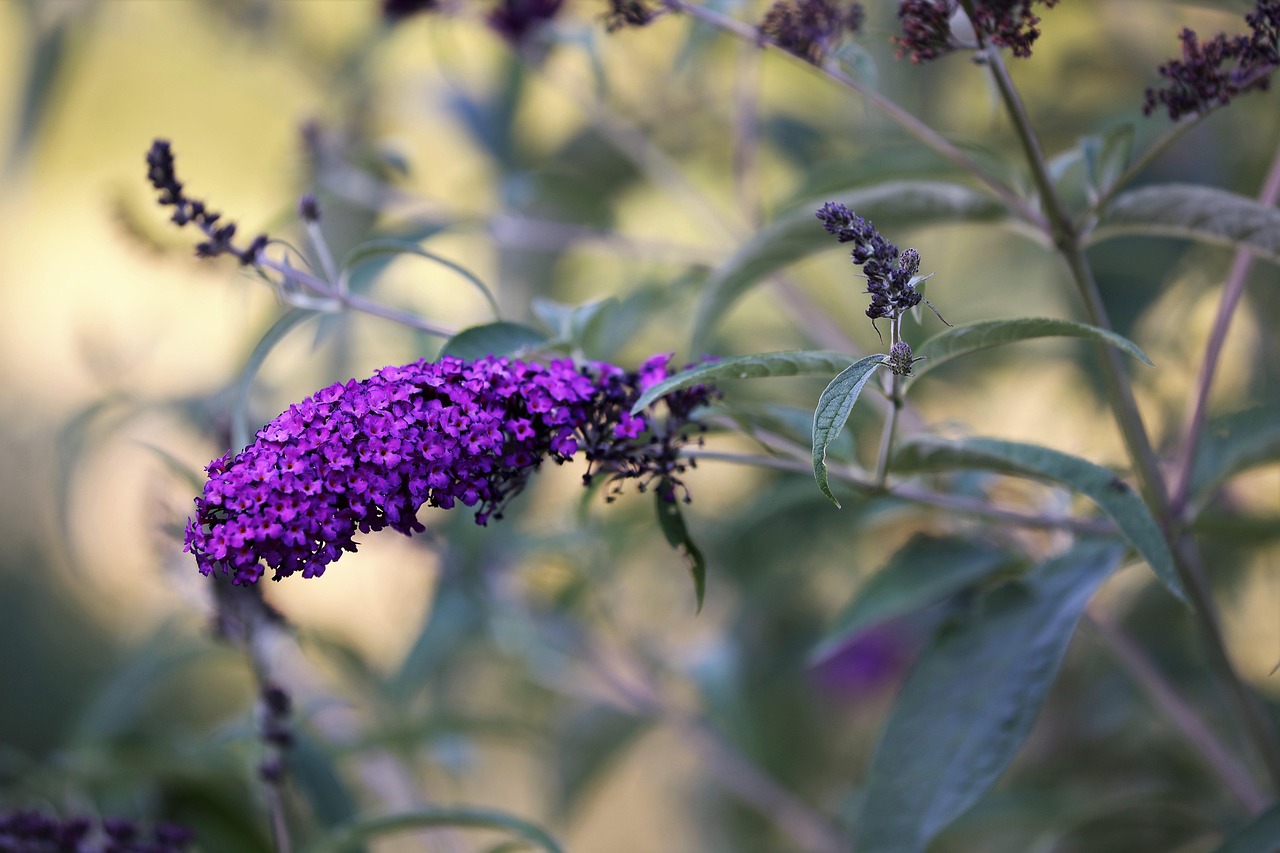
Buddleja and Late Summer Shrubs
Whilst buddleja is deciduous and technically could be pruned in January, waiting until late February or early March gives better results. The old growth provides some frost protection for the crown through the coldest weeks of winter.
January pruning exposes the plant’s crown to potential frost damage. Whilst buddleja is hardy, waiting until late winter reduces risk without any downside. I’ve covered the complete buddleja pruning system in my comprehensive guide which explains why March proves optimal.
Late flowering shrubs like caryopteris, perovskia, and hardy fuchsias should similarly wait until late February or early March. These plants are marginally tender and benefit from the frost protection their old stems provide.
Hydrangeas should absolutely not be pruned in January. The old flower heads protect emerging buds from frost damage, and premature pruning can eliminate the entire flowering display. Wait until March or April when you can see new growth emerging.
Essential Tools for January Pruning
Having the right equipment makes January pruning safer, more efficient, and more enjoyable. Quality tools also produce cleaner cuts that heal better, reducing disease risk. Let me show you the essential tools for successful pruning in January.
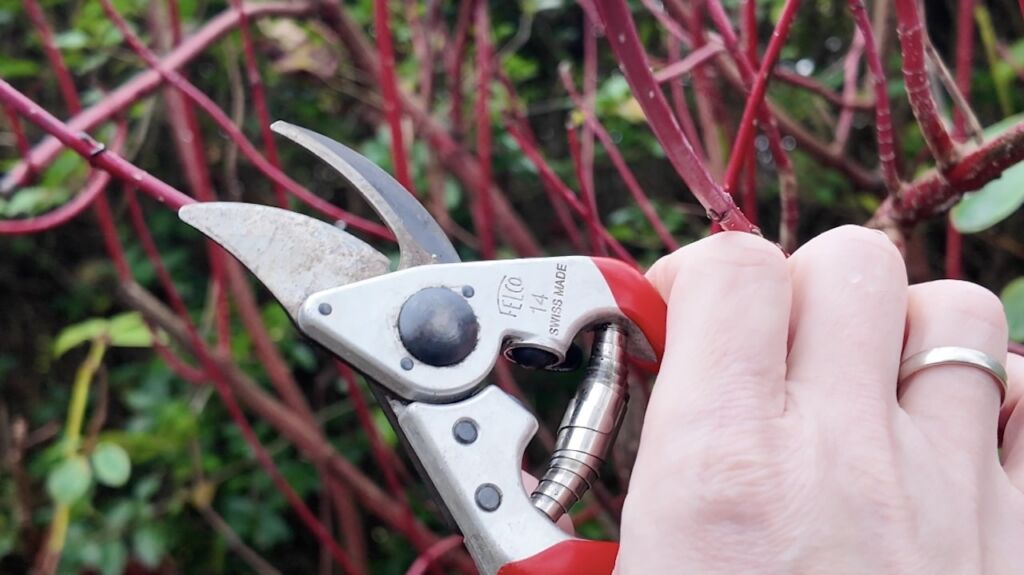
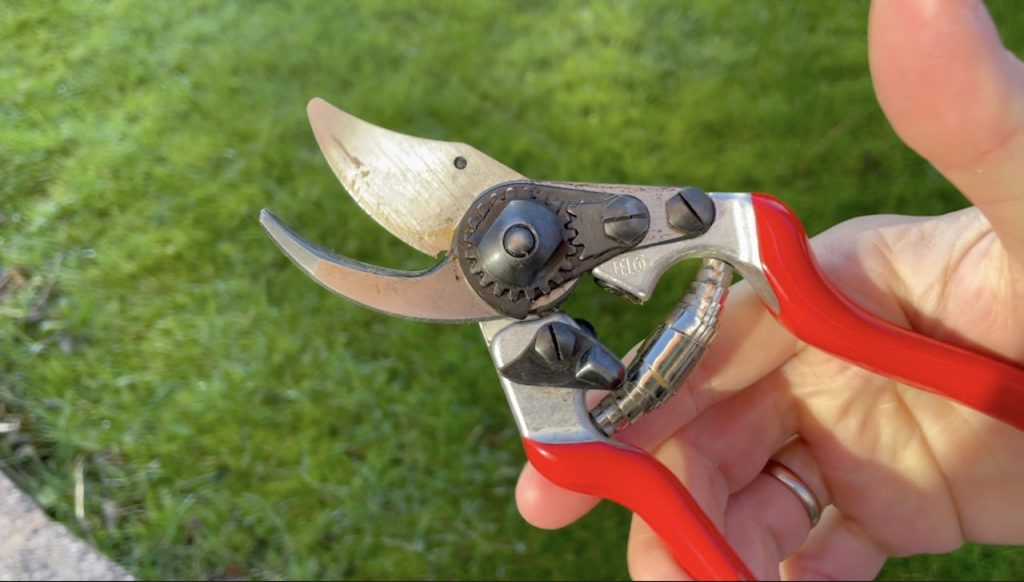
Sharp Bypass Secateurs
Invest in quality bypass secateurs like Felco for cuts up to about 2cm in diameter. I’ve used Felco and Okatsune secateurs for years, and they’re still going strong. The key features are sharp blades that can be maintained and adjusted, comfortable handles that don’t cause hand fatigue, and quality steel that holds an edge.
Clean your secateurs before starting work and between plants if you’re removing diseased material. A quick wipe with disinfectant prevents spreading problems through your garden.
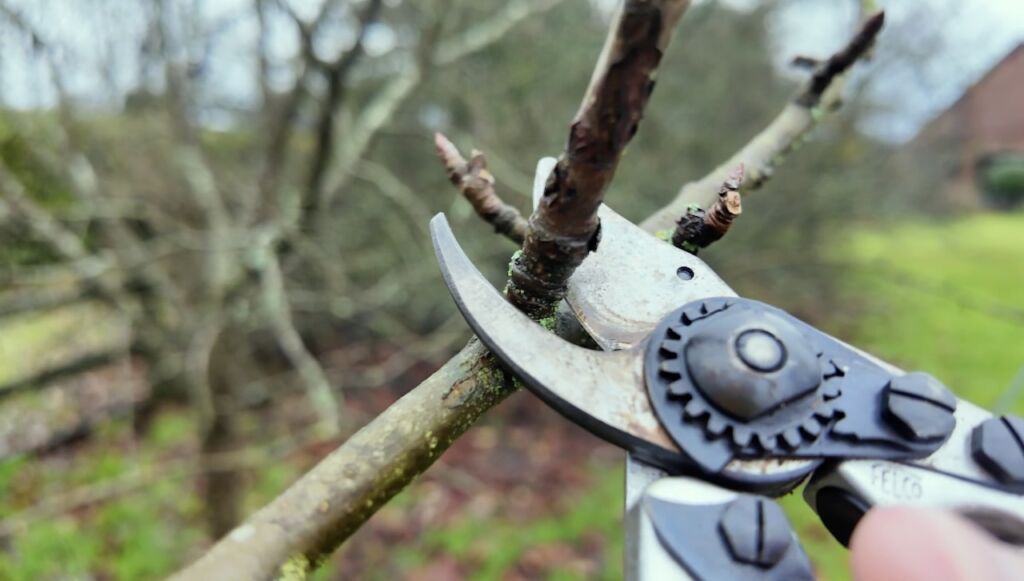
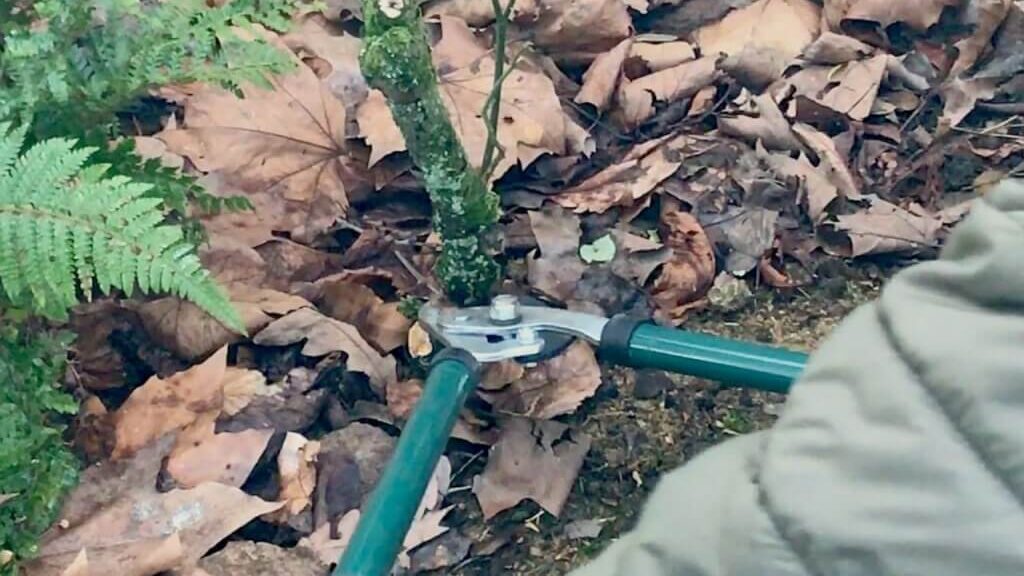
Long Handled Loppers
Loppers handle branches between 2cm and 5cm in diameter, providing the leverage needed for clean cuts without excessive effort. Choose loppers with comfortable grips and decent reach.
Again, bypass loppers (where two curved blades pass each other) give cleaner cuts than anvil types on living wood. Save anvil loppers for dead wood where a crushing cut doesn’t matter.
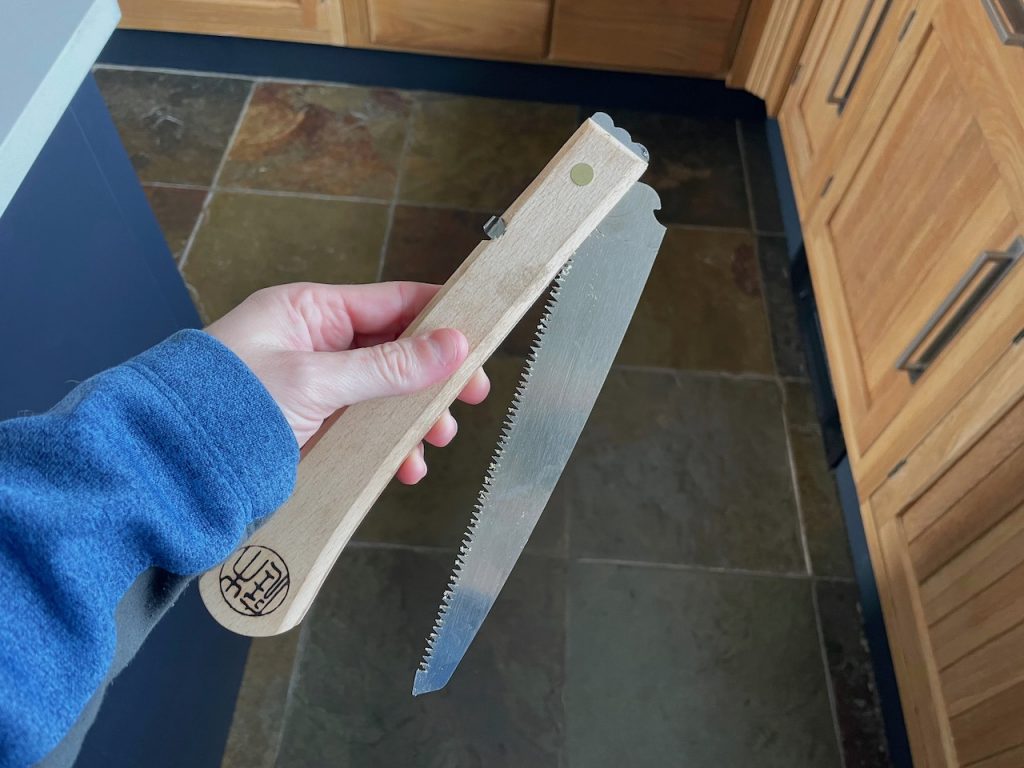
Pruning Saw
For larger branches over 5cm, a sharp pruning saw becomes essential. Folding saws are convenient and safe to carry in a pocket. Look for aggressive teeth designed for living wood rather than carpentry saws.
Curved blade pruning saws cut on the pull stroke and work well in confined spaces. Straight blade saws suit more open situations but need more space to work.
Stepladder or Tripod Ladder
Safe access to fruit trees requires a stable ladder. I’ve recently switched to a Henchman tripod ladder after testing one in my garden, and it’s transformed how confidently I work at height. The three legs provide stability on uneven ground, and the platform design allows hands-free working.
For lower work, a regular stepladder suffices, but ensure it’s stable before climbing. Never overreach or lean excessively to one side.
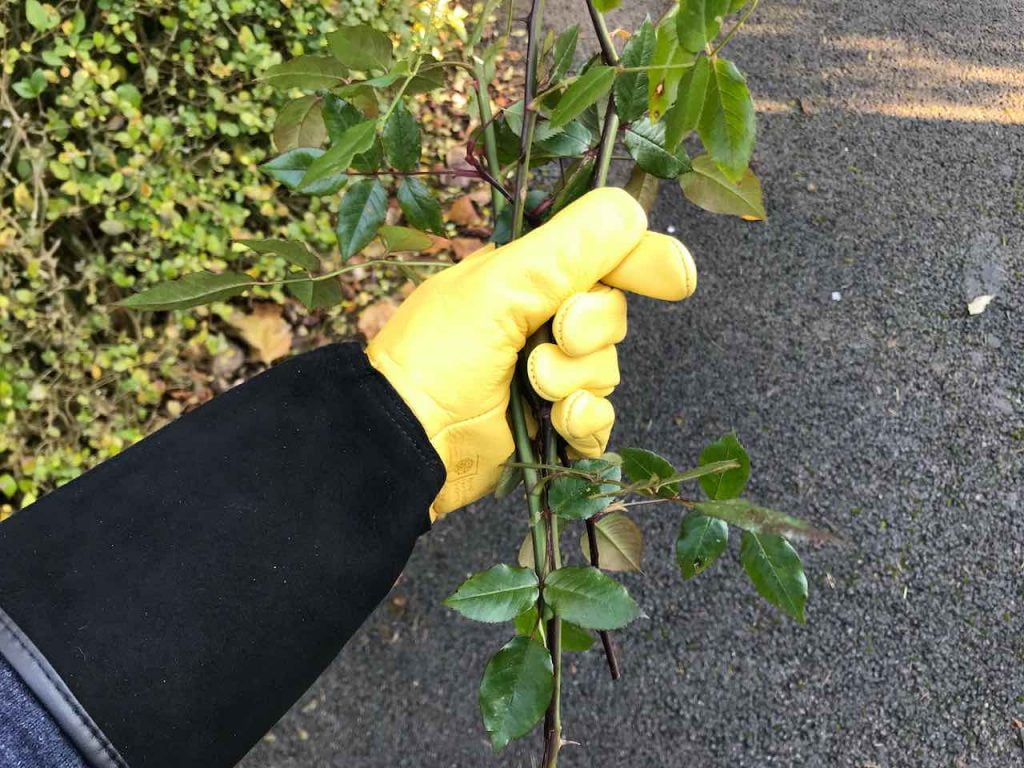
Sturdy boots with good ankle support help on uneven ground, especially when working from ladders. A thick jacket protects against scratches from thorny plants.
Store tools in a dry place to prevent rust. A simple tool bucket filled with oily sand provides both cleaning and protection between uses.
Regional Variations Across the UK
The UK’s varied climate means January pruning timing varies slightly depending on location.
Scotland and Northern England
In the coldest regions, late January often proves safer than early January for tender plants. The worst winter weather typically occurs in January and early February, so waiting until late in the month reduces frost damage risk to freshly pruned plants.
Hard fruit like apples and pears can be tackled any time through January, as they’re fully hardy. More tender subjects like figs and outdoor grapevines benefit from late January or early February pruning to minimize cold exposure.
If snow lies on branches, wait for it to melt before attempting pruning. Working in snowy conditions is uncomfortable and potentially dangerous, whilst the extra weight on branches makes accurate cutting difficult.
Midlands and Wales
These regions enjoy moderate conditions where January pruning can proceed throughout the month. Watch for occasional cold snaps and avoid pruning on days when temperatures remain below freezing.
Fruit trees and hardy subjects can be tackled any time. More tender plants like outdoor vines and late flowering shrubs can wait until late January or early February if severe weather is forecast.
Southern England and Mild Coastal Areas
In the warmest parts of the UK, January pruning can often begin in late December for fully hardy subjects. Mild winters mean less risk of severe frost damage to pruned plants.
However, don’t rush into very early pruning simply because conditions are mild. Plants still benefit from maximum dormancy when pruned, so waiting until mid to late January often gives better results even in mild regions.
Coastal gardens face specific challenges from salt-laden winds. These maritime conditions can cause tip dieback on pruned stems, so consider leaving slightly more length on pruned branches to allow for some natural dieback without compromising the plant.
Common January Pruning Mistakes
Even experienced gardeners can make errors that reduce pruning effectiveness or harm plants. Avoiding these common pitfalls ensures better results.
Over-Enthusiastic Pruning
Removing more than one third of a plant’s canopy in a single season stresses it severely. The plant struggles to balance its reduced top growth with its existing root system, often responding with excessive water shoot production.
Hard renovation pruning sometimes requires removing more than one third, but this should be a conscious decision on plants in good health, not accidental over-cutting.
Wrong Timing
Pruning spring flowering shrubs in January eliminates the entire flower display. Make absolutely certain you know a plant’s flowering season before making cuts in winter.
Similarly, pruning stone fruits in January invites silver leaf disease. These timing errors cause problems that could easily be avoided with basic knowledge.
Poor Cut Placement
Leaving long stubs creates dieback problems and looks unsightly. Always cut back to a bud or main stem, not midway along a branch.
Flush cuts tight against the trunk prevent proper wound healing. Leave the branch collar intact when removing entire branches.
Cuts made at the wrong angle allow water to sit on wounds, increasing disease risk. Slope cuts gently away from buds.
Dirty Tools
Using dirty, contaminated tools spreads diseases between plants. This is particularly problematic when moving from diseased plants to healthy ones.
Clean tools between plants as a minimum, and disinfect them whenever you’ve been working on diseased material. A bucket of dilute disinfectant makes this quick and easy.
Blunt Tools
Blunt secateurs crush stems rather than cutting cleanly, creating ragged wounds that heal poorly and are more vulnerable to disease. The extra effort required also increases hand fatigue and reduces accuracy.
Sharpen tools before each pruning season and maintain them regularly during heavy use. Quality tools that can be sharpened make this straightforward.
Ignoring Plant Health
Pruning severely stressed plants often makes them worse rather than better. If a plant is struggling with drought, waterlogging, pest infestation, or disease, address these underlying problems before attempting major pruning.
Light pruning to remove dead wood is always appropriate, but hard pruning should wait until the plant has recovered and is growing vigorously again.
Working in Poor Conditions
Pruning during hard frost can damage fresh cuts, whilst wet weather spreads fungal spores. Choose your pruning days carefully for the best results.
Working in poor light leads to mistakes and accidents. Clear, bright January days provide ideal conditions, whilst dull, overcast weather makes accurate work difficult.
Creating Your Personal January Pruning Schedule
Rather than attempting everything in one exhausting weekend, spread January pruning across the month in manageable chunks.
Week One: Fruit Trees
Start with apple and pear trees whilst you’re fresh and enthusiastic. These large jobs require concentration and often need several hours per tree.
Tackle the largest trees first whilst you have maximum energy. Smaller trees and young specimens can wait until later in the month if necessary.
Week Two: Wisteria and Climbers
Wisteria’s January pruning is relatively quick once you understand the system. Allow an hour or two per plant depending on size.
Climbing roses growing on the same structures can be tackled whilst you’re working at height with your ladder already positioned.
Week Three: Soft Fruit
Gooseberries, currants, and raspberries make satisfying, quick jobs. A reasonable fruit cage can be completely pruned in a long morning.
This is also good timing for grapevines if you have them, ensuring they’re done well before sap starts rising in late February.
Week Four: Bush Roses
Leave roses until late January to ensure they’re fully dormant and to reduce frost damage risk to fresh cuts. In mild winters, early February is equally suitable.
Use this final week to catch up on any jobs delayed by weather or to complete routine maintenance like tool sharpening and equipment checks ready for February’s tasks.
Frequently Asked Questions
Can I prune fruit trees if the weather is frosty?
Light frost isn’t a problem for hardy fruit trees like apples and pears, but avoid pruning during hard freezes when temperatures remain below minus five. Wait for a milder day if possible. The main issue is working comfort rather than plant damage.
What if I accidentally prune a spring flowering shrub in January?
Unfortunately, you’ve removed this year’s flowers. The plant itself will be fine and will flower again next year, but you’ll have to wait twelve months for blooms. Learn from the mistake and make absolutely certain of a plant’s flowering time before pruning in future.
Should I paint pruning cuts with wound sealant?
Modern advice suggests leaving cuts unpainted. Trees and shrubs have evolved to heal wounds naturally, and research shows sealants can actually trap moisture and diseases rather than preventing problems. The exception is specific diseases like fire blight where paint may help, but for routine pruning, leave cuts bare. I never seal pruning cuts.
Can I prune in February instead of January?
Absolutely. The dormant period extends from November through early March, and February often provides equally good conditions. The only caution is completing grapevine pruning before sap rises, which typically begins in late February.
How do I know if a plant needs pruning or can be left alone?
Not every plant needs annual pruning. Trees and shrubs growing well, flowering abundantly, and fitting their space comfortably can be left alone apart from removing dead wood. Prune when plants outgrow their space, flowering declines, or the structure becomes congested and unhealthy.
What should I do with all the prunings?
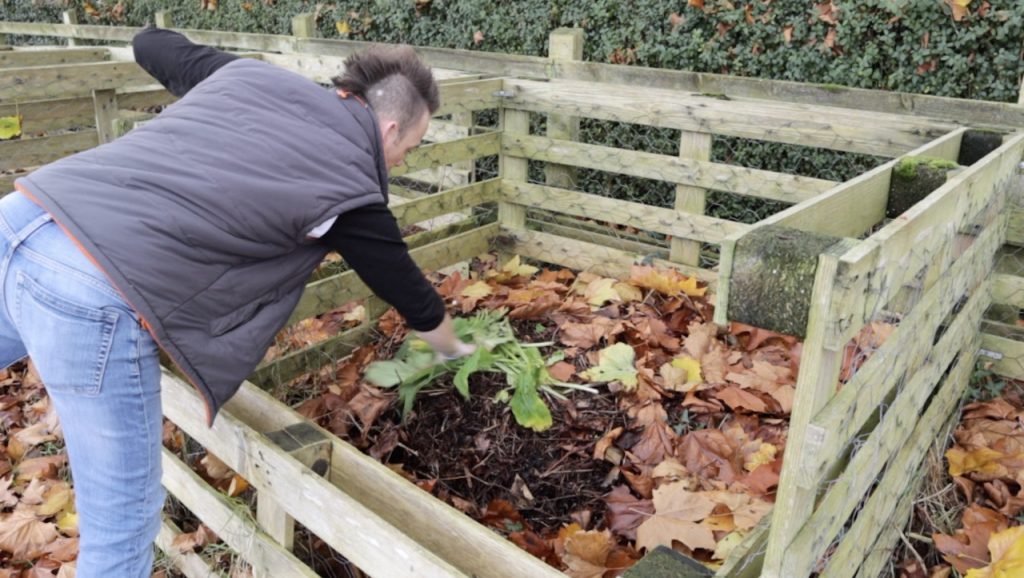
Most woody prunings can be chopped up and composted, though they break down slowly. Alternatively, chip them for mulch, dry them for kindling, or use your council’s green waste collection. Diseased material should be disposed of separately or burned rather than composted.
Transform Your Garden This January
Ready to take your garden design knowledge to the next level? My online courses provide comprehensive training in everything from small garden design to complete landscape transformations. With courses starting from just £29, you can access professional garden design expertise without traditional education expense. Check out my course offerings to see how I can help you create the garden you’ve always wanted.
29
Garden Design Examples for Small Gardens: 30 Design Templates & Planting Plans
Garden Design Examples for Small Gardens: 30 Design Templates & Planting Plans: In this online gardening course, I’ll walk you through 30 fantastic garden designs, explaining the logic behind the layout, the plant choices, and take-home tips for applying them in your own garden.
Weekend Garden Makeover: A Crash Course in Design for Beginners
Learn how to transform and design your own garden with Lee Burkhills crash course in garden design. Over 5 hours Lee will teach you how to design your own dream garden. Featuring practical design examples, planting ideas and video guides. Learn how to design your garden in one weekend!
Garden Design for Beginners: Create Your Dream Garden in Just 4 Weeks
Garden Design for Beginners Online Course: If you want to make the career jump to becoming a garden designer or to learn how to design your own garden, this is the beginner course for you. Join me, Lee Burkhill, an award-winning garden designer, as I train you in the art of beautiful garden design.
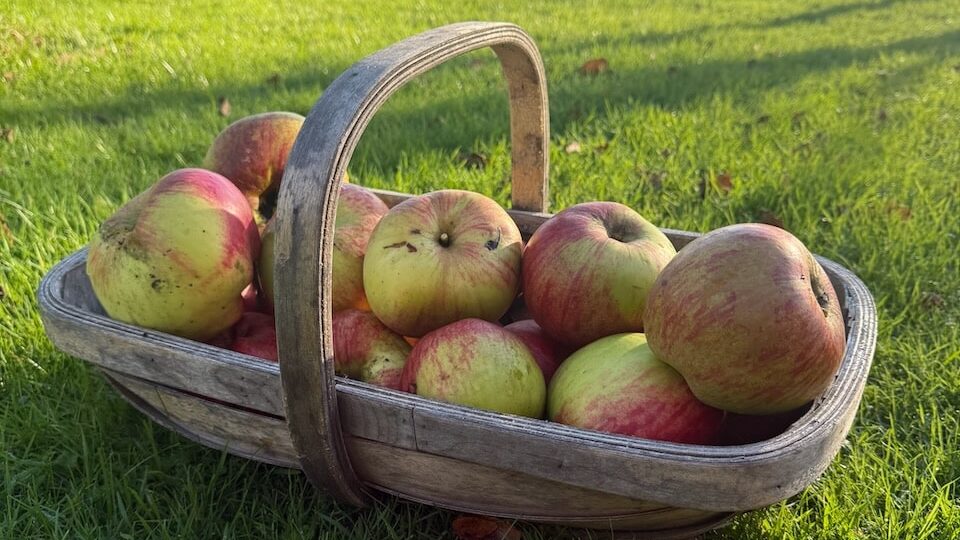
The January pruning window closes as February arrives and plants begin stirring from dormancy. Make the most of this crucial month, and your garden will reward you with the vigorous growth, abundant flowers, and heavy crops that make all the effort worthwhile. After all, there’s nothing quite like the taste of your own apples, the scent of wisteria in full bloom, or the sight of roses absolutely smothered in flowers to remind you why January pruning matters so much.
The satisfaction of standing back from a freshly pruned apple tree, seeing its clean structure and visualising the blossom and fruit to come, is one of gardening’s genuine pleasures. The cold January air, the physical work keeping you warm, and the knowledge you’re making real progress with essential tasks all combine into something special.
Don’t be intimidated by pruning. Start with straightforward jobs like soft fruit bushes to build confidence, then progress to more complex tasks like fruit trees as your understanding develops. Each plant you prune successfully teaches you lessons applicable to others, building a body of practical knowledge that books alone cannot provide.
Lee Burkhill, known as the Garden Ninja, is an award-winning garden designer and horticulturist with over 30 years of gardening experience and 15 years as a professional garden designer. A qualified RHS (Royal Horticultural Society) professional, Lee specialises in sustainable garden design and practical horticultural advice. He designs and presents on BBC1’s Garden Rescue and in leading gardening publications. Lee combines three decades of hands-on gardening knowledge with professional design qualifications to help gardeners create beautiful, functional outdoor spaces.