Winter Plant Pruning Guide: Everything You Need to Know to Cut Back in Winter
Lee Burkhill: Award Winning Designer & BBC 1's Garden Rescue Presenters Official Blog
Intermediate level
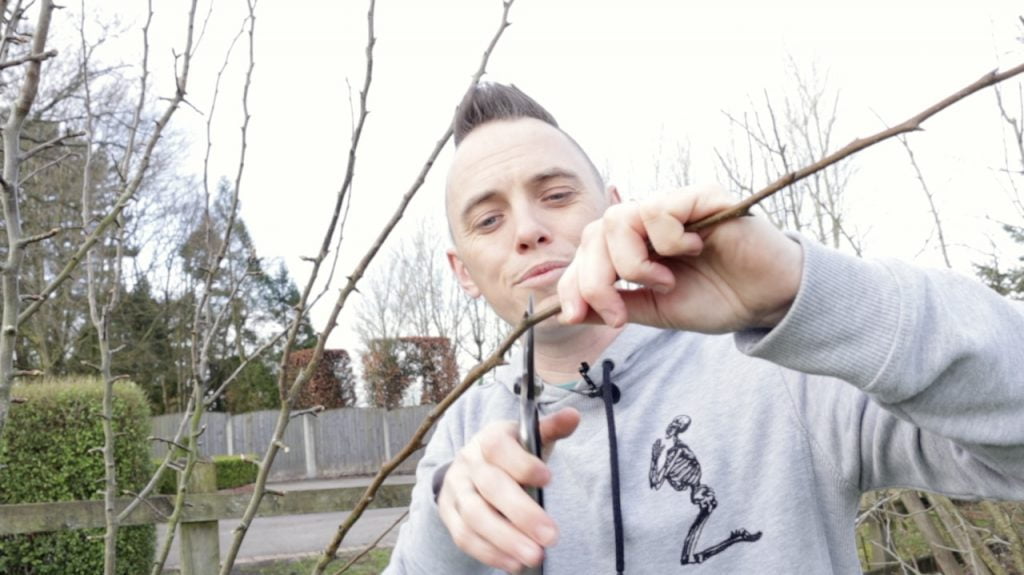
Winter pruning is one of those gardening tasks that separates the confident gardeners from those who stand in their gardens, secateurs in hand, absolutely terrified they're about to murder their plants. I completely understand that fear because I've been there myself, staring at a rose bush wondering which bits to chop and which to leave. The good news? Winter pruning is actually far more forgiving than most gardeners realise, and once you understand the basics, you'll wonder what all the fuss was about.
Quick Answer: Winter pruning is best carried out from November to March on dormant deciduous plants. Prune fruit trees, roses, wisteria, and deciduous shrubs during this period to encourage vigorous spring growth, better flowering, and improved fruit production. Never prune spring-flowering shrubs, evergreens, or stone fruits in winter.
Over my many years of gardening and 15 years as a professional designer, I’ve pruned thousands of plants. Some have been pristine specimens in show gardens, others have been neglected monsters that hadn’t seen secateurs in a decade.
Through all that experience, I’ve learned that winter pruning isn’t just about making plants look tidy. It’s about understanding plant biology, encouraging the growth you want, and preventing problems before they start. This guide will show you exactly how to approach winter pruning with confidence, which plants to tackle, and crucially, which ones to leave well alone until spring or summer!
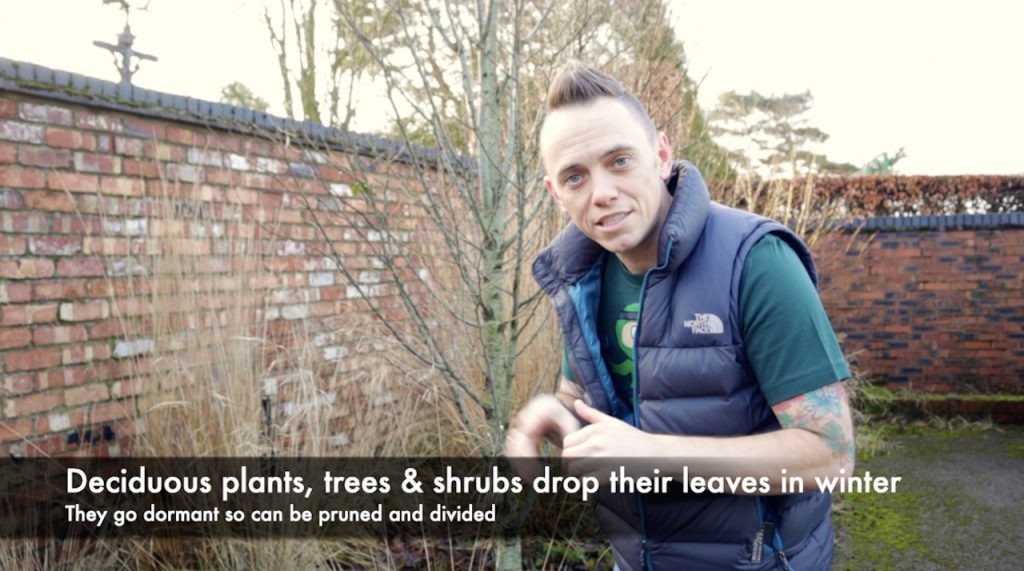
Winter pruning works because deciduous plants are dormant during the colder months. They’ve dropped their leaves and stored all their energy reserves in their roots, ready to burst into growth come spring. When we prune during dormancy, we’re redirecting where that stored energy will go when the growing season begins.
It’s like telling the plant, “Don’t bother with those bits, focus your efforts here instead.”
The visibility factor is enormous. Without leaves cluttering your view, you can actually see the plant’s structure, identify crossing branches, spot dead wood, and understand the overall shape.
I remember tackling a client’s ancient apple tree one January morning. With all the leaves gone, the mess of crossing branches and dead wood was immediately obvious. In summer, that same tree looked like a green blob, and working out what needed removing would have been nearly impossible.
There’s also the disease prevention angle that often gets overlooked. Many fungal diseases spread through airborne spores, and these are far less active in winter’s cold temperatures. Fresh pruning cuts made in winter have time to start healing before spring arrives with its increased disease pressure. It’s one of the reasons I always recommend winter pruning for fruit trees rather than leaving it until later in the year.
Winter pruning encourages vigorous growth. That might sound counterintuitive because you’re removing parts of the plant, but here’s what happens. When you prune in winter, those stored root reserves get concentrated into fewer buds come spring.
The result? Stronger, more vigorous shoots that produce better flowers and more fruit.
Summer pruning does the opposite, restricting growth by removing the green leaves that are actively producing energy. Both techniques have their place, but winter versus summer pruning serves completely different purposes.
The Golden Rules of Winter Pruning
Before we dive into specific plants, let’s establish the fundamental rules that apply to all winter pruning. These aren’t suggestions or guidelines; they’re the principles that separate successful pruning from plant-damaging disasters.
i) Only Prune Dormant Deciduous Plants
Winter pruning is exclusively for plants that have lost their leaves and entered dormancy. Evergreens are still actively growing in winter, just more slowly, and pruning them in cold weather leaves them vulnerable to frost damage and disease.
Spring-flowering shrubs set their flower buds in the previous growing season, so winter pruning removes all those buds you’ve been waiting months to see open. Stone fruits like cherries, plums, and damsons are susceptible to silver leaf disease when pruned in winter, so they must wait until summer.
ii) Avoid Frost and Freezing Conditions
Never prune when frost is forecast or when the ground is frozen solid. Fresh cuts are vulnerable, and exposing them to freezing temperatures can cause die-back beyond your pruning point. I’ve made this mistake myself in my early gardening days, enthusiastically heading out on a crisp January morning without checking the forecast.
The roses I pruned suffered die-back on several stems, and I had to go back and prune them again once spring arrived. Lesson learned. If the forecast shows frost, put the kettle on and wait for milder weather.
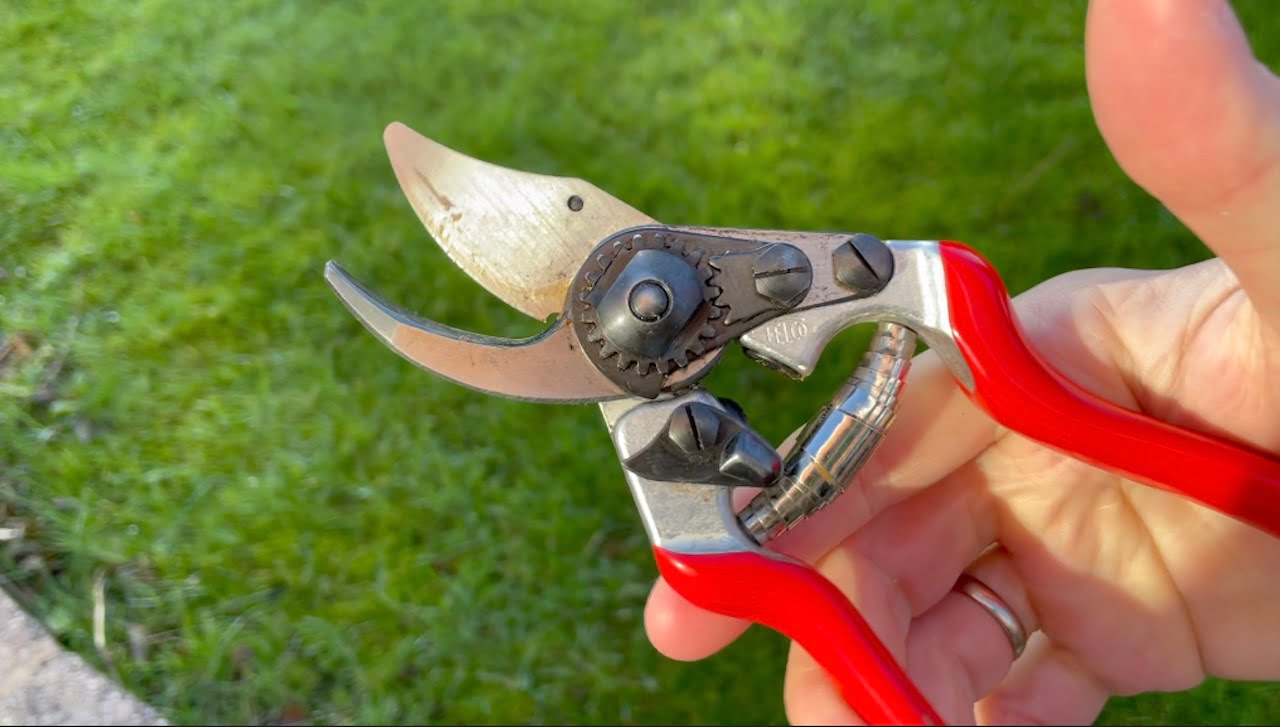
iii) Use Sharp, Clean Tools
Blunt secateurs tear plant tissue rather than cutting cleanly, which makes healing slower and creates entry points for disease. I clean my tools with a diluted bleach solution between plants, especially if I’ve been removing diseased wood.
It takes an extra minute but prevents spreading problems around the garden. Check out my guide on how to prune garden plants for detailed information on tool maintenance and sharpening.
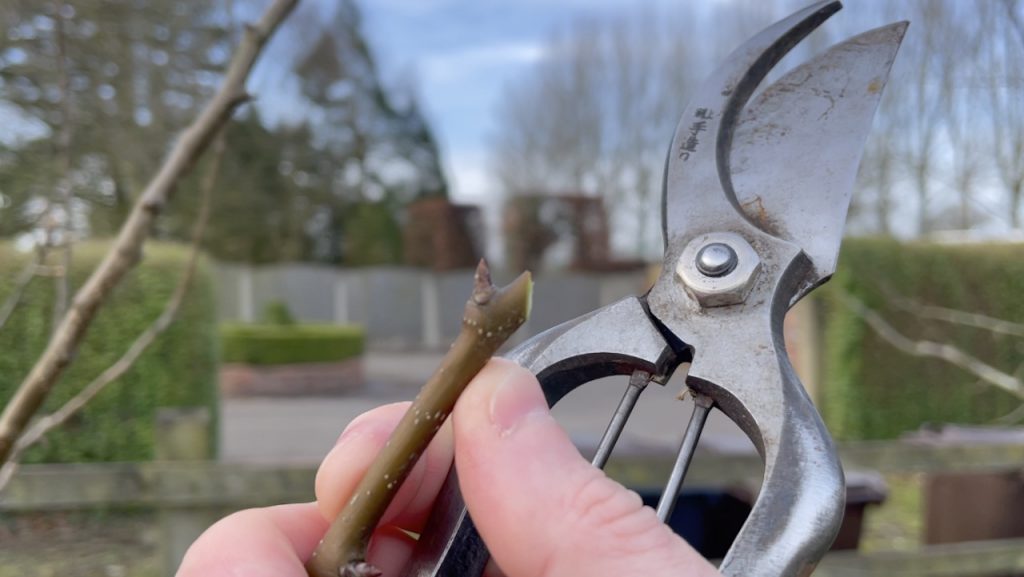
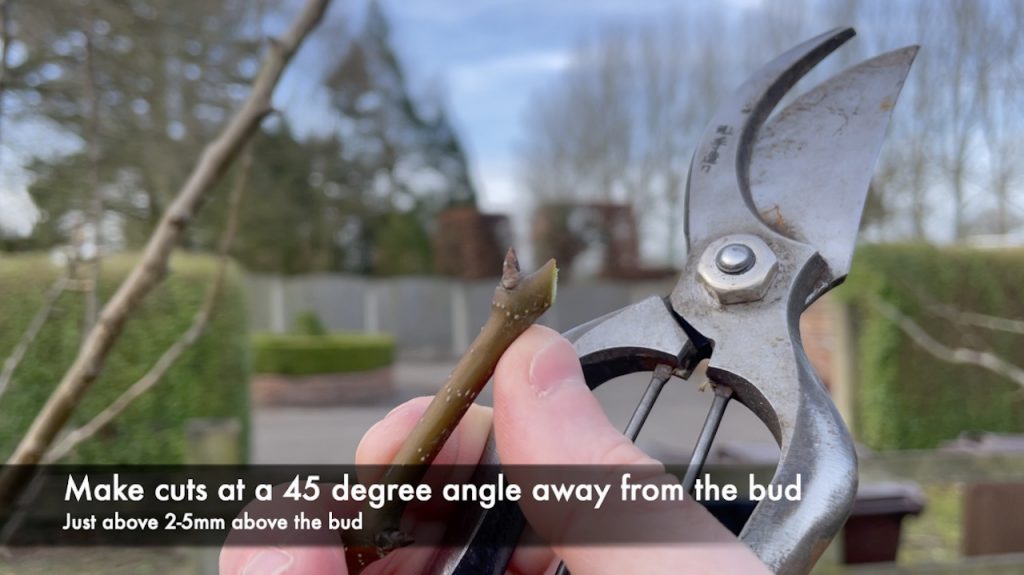
iv) Make Proper Cuts
Every cut should be made just above an outward-facing bud, angled slightly away from the bud so water runs off. The cut should be close enough that you’re not leaving a stub that will die back, but not so close that you damage the bud itself. Aim for about 5mm above the bud at a 45-degree angle.
Horizontal cuts collect water and invite rot, whilst ragged tears from blunt tools provide perfect entry points for fungal infections.
Winter Pruning Calendar: When to Prune What
Timing matters enormously in winter pruning. Whilst the overall window runs from November through March, different plants have optimal pruning periods within that timeframe.
Here’s your month-by-month guide to what needs attention when.
Month
Plants to Prune
Key Notes
November
Apple & pear trees, currants, gooseberries, deciduous trees that bleed (maples, birches, walnuts)
Best month for trees that bleed sap. Prune whilst fully dormant to prevent excessive bleeding.
December
Grape vines, apple & pear trees, soft fruit bushes
Grape vines must be pruned whilst deeply dormant to avoid bleeding.
January
Apple & pear trees, soft fruit, wisteria (second prune)
Peak pruning month. Weather usually mild enough for comfortable working.
February
Roses, apple & pear trees, wisteria, buddleia, deciduous shrubs
Best month for roses. Late enough to avoid worst weather, early enough for spring growth.
March
Roses, late clematis (Group 3), summer-flowering shrubs
Final pruning window. Watch for early bud break and prune before active growth.
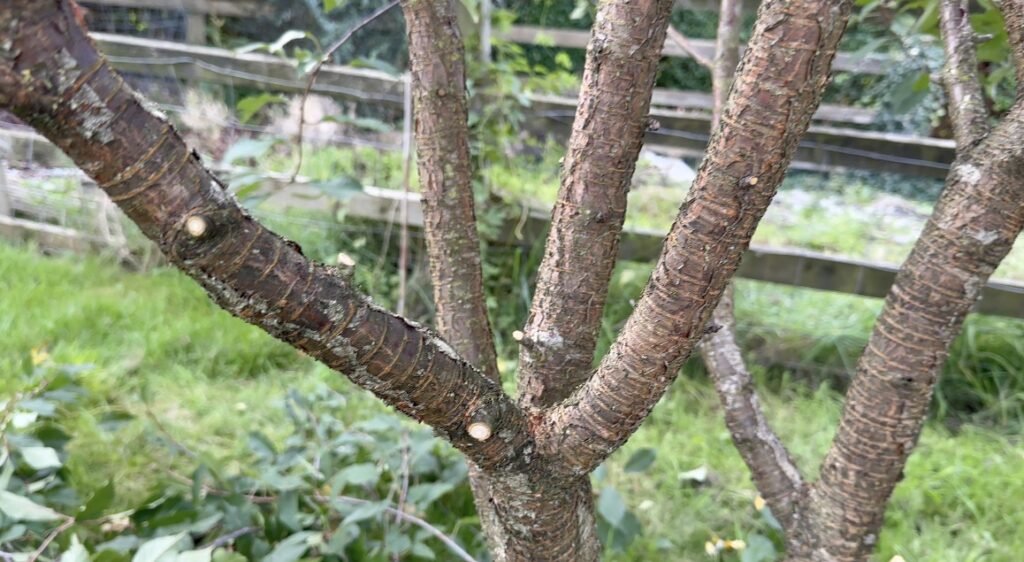
Fruit Trees: The Foundation of Winter Pruning
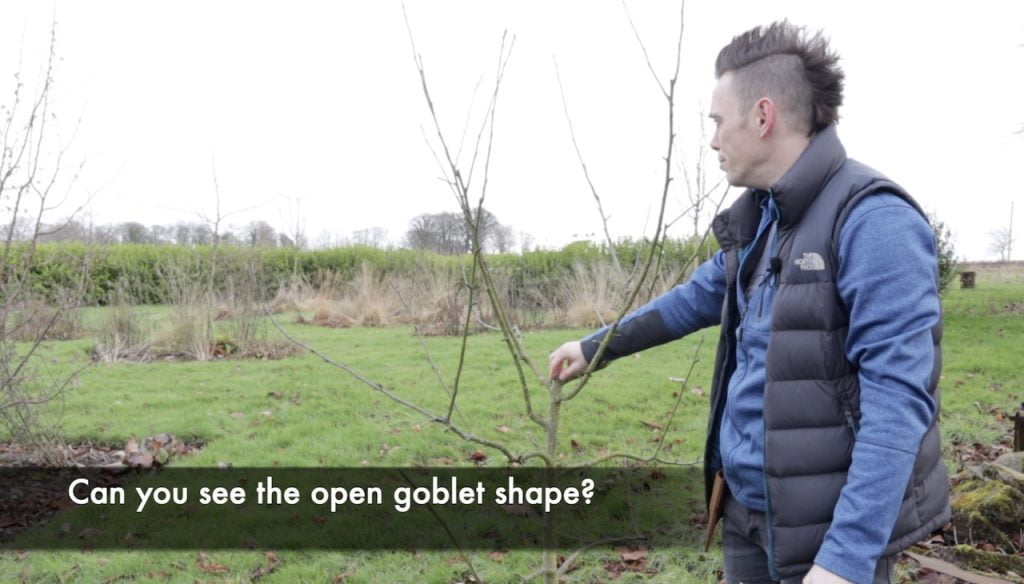
Fruit trees are the stars of winter pruning, and for good reason. They respond brilliantly to winter pruning, rewarding you with better structure, increased fruiting, and easier harvesting. The principle is the same whether you’re dealing with apples, pears, or any pip fruit: create an open goblet shape that allows air and light into the centre.
Apples and Pears
The goal with apple and pear pruning is creating that open goblet structure, like an upturned hand with fingers spread wide. This shape maximises light penetration and air circulation whilst providing a strong framework for fruit production. I explain this in detail in my apple tree pruning guide, but here’s the essential approach.
Start by removing the four Ds:
Dead
Diseased
Damaged
Disordered (crossing) branches.
This housekeeping step often removes 20-30% of the growth, immediately revealing the tree’s structure. Then remove any branches growing towards the centre, any water shoots (vigorous vertical growth), and any branches that are crossing or rubbing against each other.
The final step is shortening the remaining growth. For apples, remove about one-third of the previous year’s growth, cutting back to an outward-facing bud. Pears are slightly less vigorous, so pear tree pruning involves removing only one-quarter of the growth. Always cut to an outward-facing bud to encourage branches to grow away from the centre rather than into it.
Years ago, I inherited a garden with three ancient apple trees that hadn’t been pruned in at least a decade. The canopies were so dense you couldn’t see through them, and fruit production had declined dramatically. Over three winters, I carefully opened them up, never removing more than one-third of the growth in any single year. By the third year, fruit production had tripled, and the apples were noticeably larger and healthier. Patience in renovation pruning pays enormous dividends.
Critical Warning: Never prune stone fruits (cherries, plums, damsons) in winter. These trees are highly susceptible to silver leaf disease, a serious fungal infection that enters through pruning cuts in cold, damp weather. Always wait until mid-summer to prune stone fruits. See my cherry tree pruning guide for proper timing and techniques.
Soft Fruit Bushes
Soft fruit pruning in winter is about balancing productive wood with manageable plant size. Each type has slightly different requirements, but the underlying principle remains the same: remove old, unproductive wood to make space for vigorous new growth.
Blackcurrants fruit best on one and two-year-old wood. When pruning, remove about one-third of the oldest stems at ground level. This seems brutal when you’re doing it, but blackcurrants respond by sending up strong new shoots from the base. These will fruit in the following year, giving you a continuous cycle of productive wood.
Redcurrants, whitecurrants, and gooseberries are different beasts entirely. They fruit on short spurs along older wood, so the framework needs maintaining rather than constantly renewing. Remove any dead or diseased wood, cut out branches that are more than five years old, and shorten the side shoots to about two buds from the main framework. This concentrates energy into fruit production rather than excessive leaf growth.
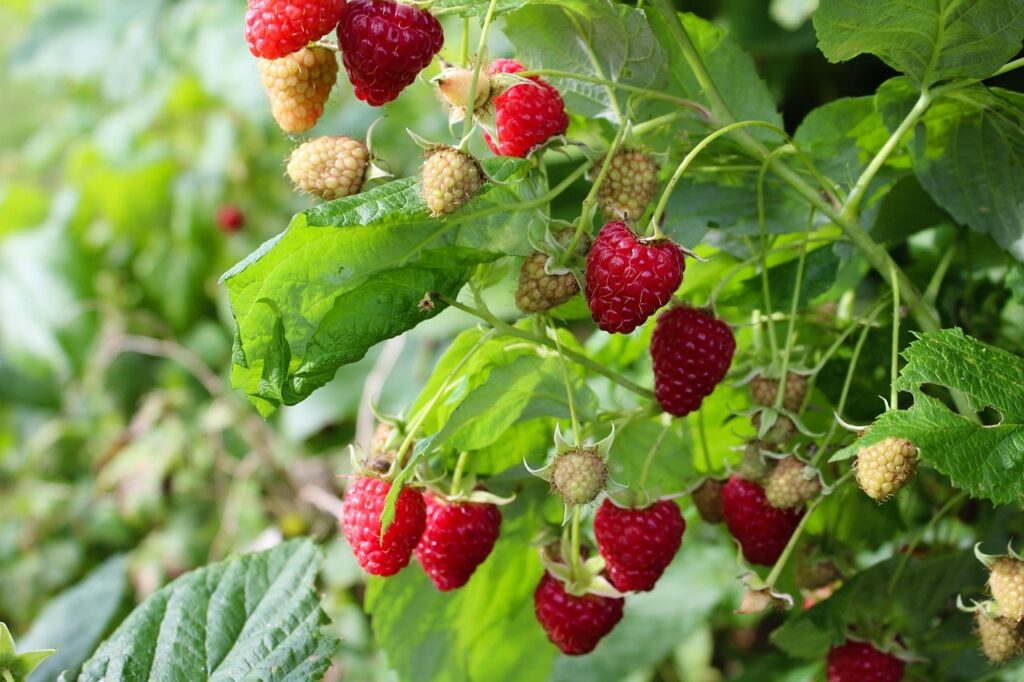
Autumn-fruiting raspberries are wonderfully simple. Cut all the canes down to within 5cm of the ground every winter. Done. They’ll send up fresh canes in spring that fruit in the following autumn. Summer-fruiting raspberries require a different approach: remove only the canes that fruited last summer, leaving the new green canes to fruit next year.
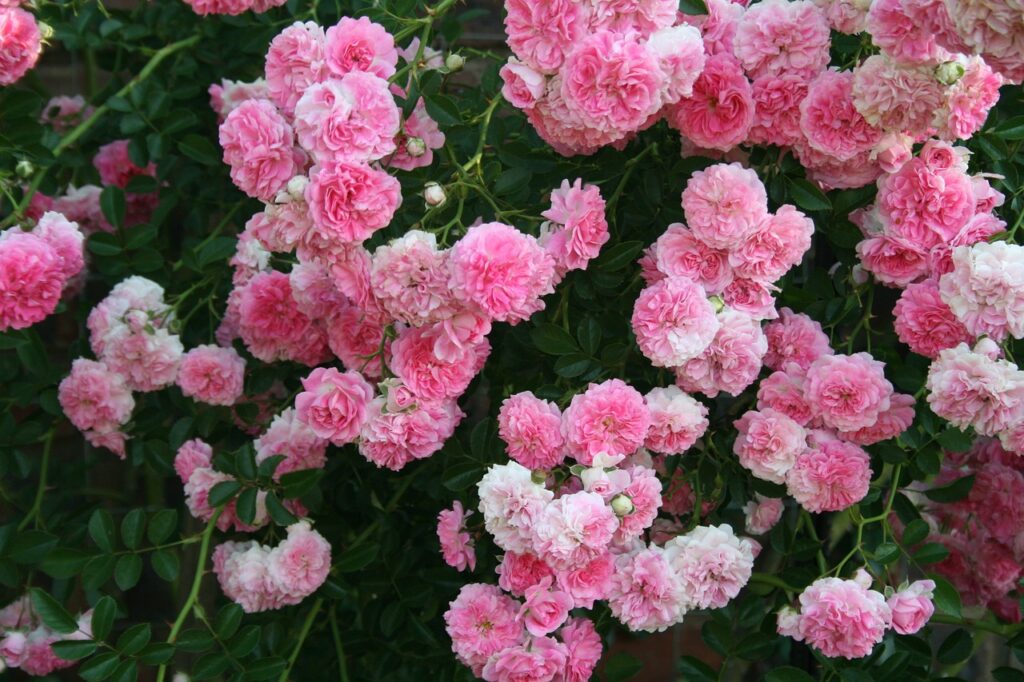
Roses: Britain’s Favourite Winter Prune
Roses and winter pruning are so intrinsically linked that many gardeners think rose pruning IS winter pruning. February is the traditional month for rose pruning in the UK, though you can start in late January if weather permits and continue into early March if needed.
The basic approach works for most bush and shrub roses: remove dead and diseased wood first, cut out crossing stems, then reduce the remaining healthy growth by about one-third. Always cut to an outward-facing bud to maintain that open goblet shape that roses love. I cover the complete technique in my rose pruning guide, including specific techniques for different rose types.
Climbing roses need a lighter touch than bush roses. The framework should remain largely intact, with only the side shoots shortened by about two-thirds. Remove any dead or weak growth, but preserve the main canes that form the structure.
Rambling roses are different again and shouldn’t be pruned in winter at all. They flower on the previous year’s growth, so winter pruning removes all the flowering wood. Wait until after flowering in summer to prune ramblers.
I’ve learned through experience that it’s almost impossible to kill an established rose through overzealous pruning. They’re incredibly resilient plants. One client had me tackle a Rosa ‘Gertrude Jekyll’ that had turned into an impenetrable thorny monster, about 2 metres tall and equally wide. We hard pruned it back to about 40cm in February, and she was convinced I’d killed it. Come June, it was flowering beautifully with healthy, manageable growth. Roses reward bold pruning far more than tentative nibbling.
Wisteria: The Twice-Yearly Prune
Wisteria confuses more gardeners than almost any other plant, probably because it needs pruning twice a year to flower reliably. Winter pruning is the second stage of wisteria management, building on the summer pruning carried out in July or August.
A) In summer, you cut back those long, whippy green shoots to about six buds from the main framework. This is maintenance pruning that keeps the wisteria tidy and directs energy towards flower bud formation.
B) In winter, usually in January or February, you shorten those same shoots again, this time to just two or three buds. These short spurs are where the magnificent flower racemes will emerge in spring.
The complete technique is detailed in my wisteria pruning guide, but the essential point is consistency. Wisterias that don’t flower usually haven’t been pruned properly, or haven’t been pruned at all. It’s not the plant being difficult; it’s just responding to the treatment it’s receiving. Regular, correct pruning transforms a leafy green monster into a spectacular flowering display.
What NOT to Prune in Winter
Knowing what to avoid is just as important as knowing what to prune. These common mistakes cause more garden disappointment than almost any other pruning error.
Spring-Flowering Shrubs
Any shrub that flowers between March and June should be left completely alone in winter. These plants set their flower buds during the previous growing season, usually in late summer. Winter pruning removes all those buds you’ve been waiting months to see open.
The list includes:
Forsythia
Lilac
Magnolia
Camellia
Rhododendron
Azalea
Weigela
Philadelphus
Ribes (Flowering currants)
All of these should be pruned immediately after flowering, giving them the rest of the growing season to form next year’s flower buds. I made this mistake early in my career, enthusiastically pruning a client’s forsythia in February. Come April, whilst every other forsythia in the neighbourhood was covered in golden flowers, hers remained stubbornly bare. The client was remarkably forgiving, but I never made that error again.
Evergreens
Evergreens don’t enter true dormancy. They’re still photosynthesising through winter, albeit more slowly, and they don’t store energy in their roots the way deciduous plants do. Winter pruning of evergreens removes their food-producing leaves and exposes fresh cuts to frost damage and winter diseases.
Wait until spring for evergreen pruning. Late April or May is ideal for most evergreen shrubs like box, holly, bay, choisya, and pittosporum. The exception is evergreen hedges, which can have a light trim in late summer if needed, but major reshaping should wait until spring.
Hydrangeas
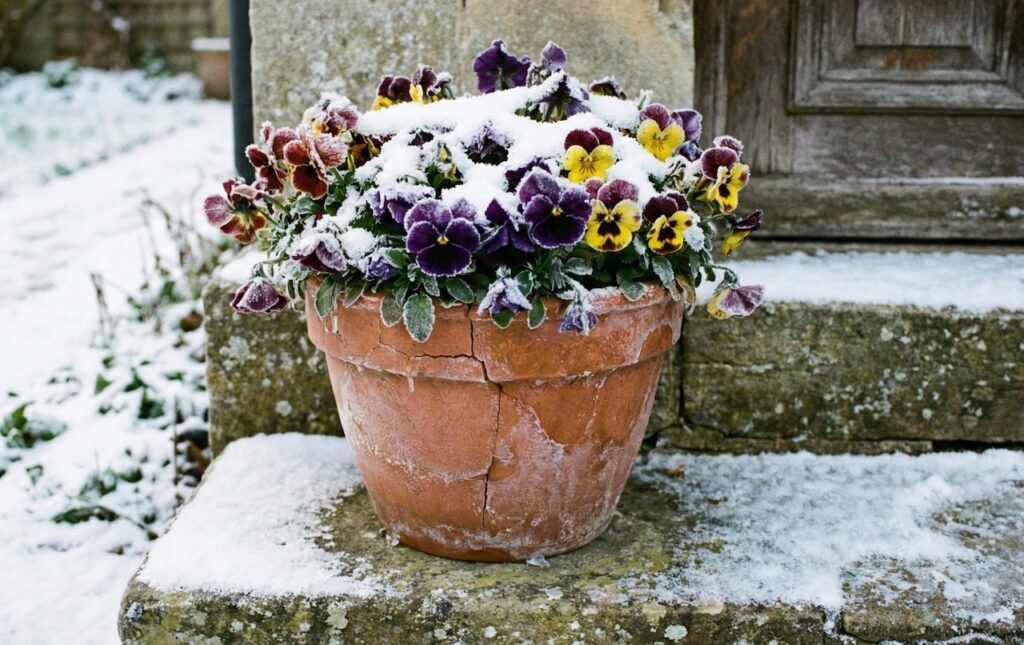
Leave hydrangea flower heads on the plant through winter. They provide frost protection for the emerging buds beneath them and look rather beautiful covered in frost. Wait until late February or March before deadheading, cutting back to the first strong buds. Don’t be tempted to tidy them up in autumn or early winter. Those dead-looking flower heads are doing important work.
Tender Plants
Hardy fuchsias, salvias, penstemons, and other borderline hardy plants benefit from keeping their top growth through winter. That dead-looking foliage provides protection for the crown and roots. Prune these back in spring once the risk of hard frost has passed and you can see new growth emerging from the base.
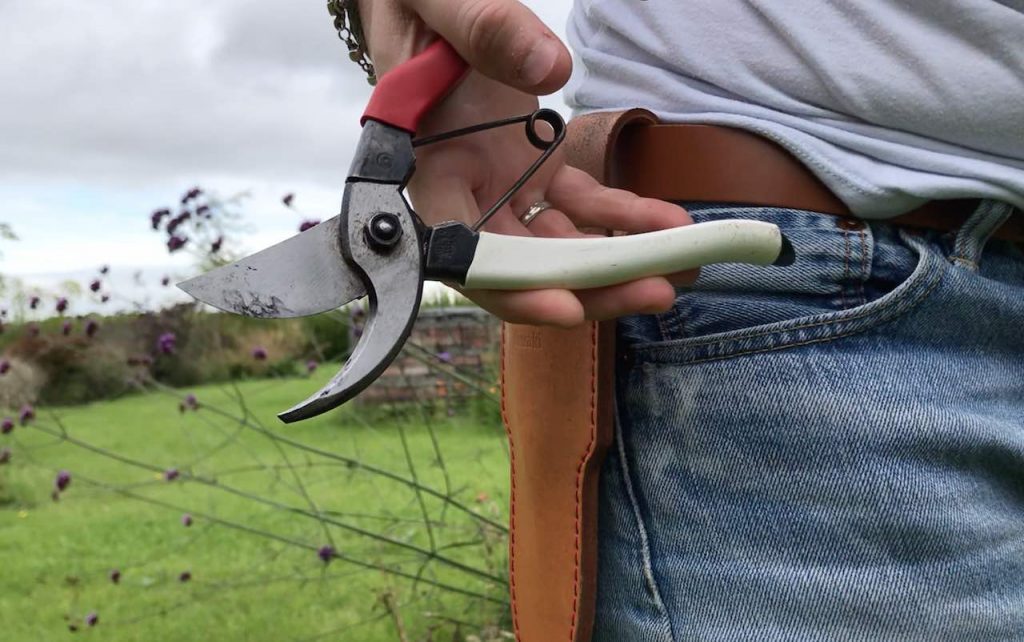
Essential Equipment for Winter Pruning
Having the proper tools makes winter pruning safer, easier, and more effective. You don’t need dozens of specialist tools, but the basics must be good quality, sharp, and appropriate for the job.
Loppers: For branches between 1-4cm in diameter. Long-handled loppers give you the leverage needed for thicker growth without straining. Make sure they’re bypass style, not anvil, for cleaner cuts.
Pruning saw: Essential for anything larger than 4cm in diameter. A curved pruning saw cuts on the pull stroke, making it easier to use in awkward positions. I particularly like folding saws for portability and safety.
Cleaning supplies: A diluted bleach solution (1 part bleach to 9 parts water) or methylated spirits for cleaning tools between plants, especially crucial if you’ve been removing diseased wood.
Tool Maintenance Tip: After every pruning session, clean your tools with soapy water, dry them thoroughly, and wipe the blades with an oily rag. Sharpen them at least twice per winter. Properly maintained tools will outlast you and make every cut cleaner and easier.
Winter Pruning Techniques
The fundamental techniques of winter pruning apply across different plant types. Master these, and you’ll be able to tackle almost any pruning challenge with confidence.
The Open Goblet Method
This is the gold standard for fruit trees and roses. The goal is to create a vase or goblet shape with an open centre. Think of an upturned hand with fingers spread wide – that’s the shape you’re aiming for. Remove anything growing towards the centre, keep the main branches evenly spaced, and ensure light and air can penetrate right through the plant.
The One-Third Rule
For most shrubs and roses, removing one-third of the previous year’s growth gives excellent results without shocking the plant. This isn’t a suggestion, it’s a principle backed by decades of practical experience. Taking off less means spindly, weak growth. Taking off more can trigger excessive vegetative growth at the expense of flowers and fruit.
The Three-Cut Method for Large Branches
Removing large branches requires care to prevent bark tearing. Make your first cut on the underside of the branch, about 30cm from where it joins the trunk or main stem, cutting about one-third of the way through. Make the second cut from above, slightly further from the trunk, cutting right through. The branch will drop cleanly without tearing.
Finally, remove the remaining stub with a clean cut just outside the branch collar (the slight swelling where the branch joins the trunk). You can watch me demonstrate this in my crown lifting guide, video below.
Thinning Versus Heading
Thinning cuts remove entire branches back to their point of origin, opening up the plant’s structure. Heading cuts shorten branches by cutting to a bud, encouraging multiple shoots below the cut. Thinning is generally preferable for mature plants, as it maintains natural growth habits. Heading is useful for young plants where you’re building the initial framework, but overuse on mature plants creates dense, congested growth.
Problem Solving: Common Winter Pruning Challenges
Every garden presents unique pruning challenges. Here are the situations I encounter most frequently and how to handle them effectively.
Inherited or Neglected Plants
If you’ve inherited a garden with overgrown, neglected plants, resist the urge to sort everything in one winter. Renovation pruning should be spread over three years, removing no more than one-third of the total growth each year. This prevents shock and gives the plant time to adjust and respond. I’ve renovated dozens of neglected gardens, and the patient approach always produces better results than aggressive one-time hard pruning.
Trees That Bleed Sap
Maples, birches, walnuts, and a few other trees weep copious amounts of sap if pruned too late in winter. This bleeding weakens the tree and looks alarming. The solution is timing: prune these species in November or December when they’re fully dormant. By January, sap is already starting to rise, and bleeding becomes a problem. If you’ve missed the window, wait until late summer when active growth has finished.
Frost Damage
If frost catches your freshly pruned plants, damaged shoots may die back beyond your pruning point, developing brown, withered tips. Don’t panic. Wait until spring when active growth resumes, then prune back to healthy wood. The plant will recover. I’ve seen roses bounce back from severe frost damage that looked terminal in February but grew perfectly well by June.
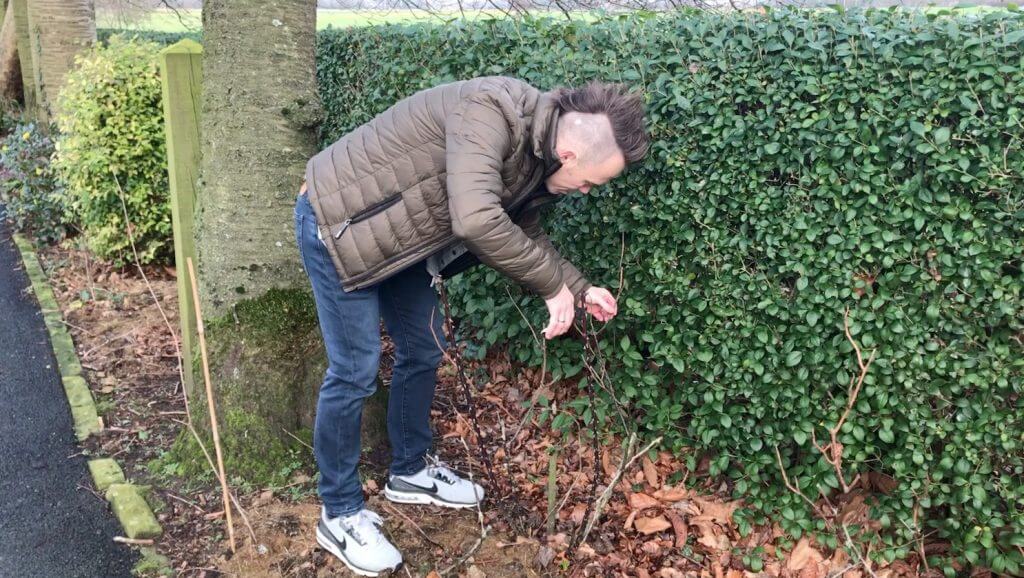
Dense, Tangled Growth
When faced with a congested mess of tangled branches, start from the inside and work outward. Remove everything dead first, then anything crossing or rubbing. Often, this alone reveals the plant’s structure and shows you what else needs removing. Work methodically rather than hacking randomly at the outside, or you’ll remove productive wood whilst leaving the congested centre untouched.
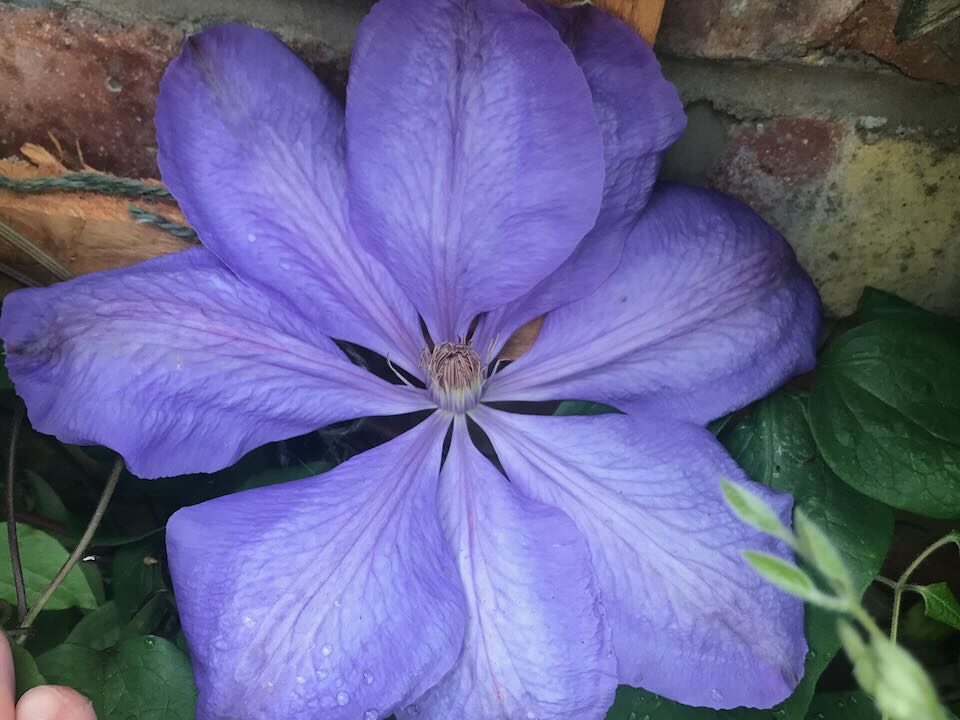
Winter Pruning Different Clematis Groups
Clematis pruning confuses gardeners endlessly because different groups need pruning at different times. For winter pruning, you only need to worry about Group 3 clematis, which are the late-flowering varieties blooming from July onwards.
Group 3 clematis should be pruned hard in late winter, cutting all stems back to about 30cm above ground level. Cut to a pair of strong buds, and don’t worry about being too precise. These clematis flower on current season’s growth, so hard pruning encourages strong new shoots that will be covered in flowers by summer. Varieties in this group include viticella types, texensis types, and late-flowering hybrids.
Groups 1 and 2 are different stories entirely. Group 1 (spring-flowering like Clematis montana) should be pruned after flowering in late spring. Group 2 (large-flowered hybrids blooming May-June) need only light tidying in late winter. For complete guidance on all three groups, check my clematis growing and pruning guide.
After Pruning: Essential Follow-Up Care
Your work doesn’t end when the secateurs go back in the shed. Proper aftercare ensures plants recover quickly and respond positively to pruning.
Mulching after winter pruning is absolutely essential. Apply a 5-7cm layer of well-rotted compost or manure around the base of pruned plants, keeping it clear of stems and trunks. This feeds the soil life that feeds your plants, retains moisture, and provides the nutrients needed for vigorous spring growth. I mulch everything I’ve pruned in winter, from roses to fruit trees, and the difference in subsequent growth is dramatic.
Clear away all prunings and dispose of them properly. Dead and diseased wood should be burned or binned, never composted, as diseases can survive in compost heaps. Healthy prunings can be composted or shredded for mulch, though rose and thorny material is best bagged for green waste collection unless you fancy wrestling with spiky compost.
Don’t be tempted to seal pruning cuts with wound paint or dressing. Research has shown these products don’t help healing and may actually trap moisture and disease against the wound. Plants have evolved to heal cuts naturally through compartmentalisation, and they do this perfectly well without our interference.
Regional Variations: Adjusting for Your Climate
The timing guidance in this article assumes you’re gardening somewhere in the south of England. If you’re further north or in exposed coastal areas, adjust accordingly. In Scotland and northern England, push everything back by 2-3 weeks. In mild southwestern areas, you might prune slightly earlier.
Watch your plants rather than slavishly following calendar dates. If buds are already swelling significantly in late February, you’ve missed the ideal pruning window for that plant. If the ground is frozen solid in early February, wait for milder weather even if the calendar says it’s time to prune. Local conditions trump rigid schedules every time.
Learning From Your Pruning
Every pruning session teaches you something about plant response and timing. I still learn new things after decades of pruning, and I encourage every gardener to observe how their plants respond to different treatments.
Take photos before and after pruning, then photograph the same plants in summer. You’ll quickly see which approaches produced good results and which didn’t. If a particular tree or shrub responded poorly to your pruning, adjust next year. Was the timing wrong? Too harsh? Too timid? Plants give honest feedback, and learning to read that feedback makes you a better gardener.
One of my favourite learning experiences came from pruning a pair of identical apple trees in a client’s garden. I pruned one in late November and the other in early March. The November-pruned tree produced noticeably more vigorous spring growth and heavier fruit set. That practical comparison taught me more about pruning timing than any book could have done.
Video Guides and Additional Resources
If you prefer visual learning, I’ve created comprehensive pruning demonstrations on my YouTube channel. These show the exact techniques described in this guide, filmed in real gardens with real plants. You can watch pruning in action, see common mistakes, and understand the decision-making process that goes into each cut.
Visit Garden Ninja’s YouTube channel for video guides covering everything from basic secateur technique to advanced fruit tree renovation. The visual format really helps demystify pruning, showing you exactly where to make cuts and how plants respond.
Quick Reference: Winter Pruning at a Glance
Plant Type
Prune In Winter?
Pruning Notes
Apple & pear trees
Yes (Nov-Mar)
Create open goblet shape. Remove 1/3 of growth (apples) or 1/4 (pears).
Stone fruits (cherry, plum)
No
Prune in mid-summer only. Susceptible to silver leaf disease in winter.
Bush & shrub roses
Yes (Feb-Mar)
Remove 1/3 of growth. Cut to outward-facing buds.
Wisteria
Yes (Jan-Feb)
Second prune. Shorten summer-pruned shoots to 2-3 buds.
Group 3 Clematis
Yes (Feb-Mar)
Hard prune to 30cm above ground.
Soft fruit bushes
Yes (Nov-Mar)
Remove old wood. Techniques vary by type.
Spring-flowering shrubs
No
Prune after flowering. Winter pruning removes flower buds.
Evergreens
No
Prune in spring (April-May) when active growth begins.
Hydrangeas
No
Leave flower heads for protection. Prune in late Feb/March.
Hardy fuchsias
No
Leave top growth for protection. Prune in spring.
29
Garden Design Examples for Small Gardens: 30 Design Templates & Planting Plans
Garden Design Examples for Small Gardens: 30 Design Templates & Planting Plans: In this online gardening course, I’ll walk you through 30 fantastic garden designs, explaining the logic behind the layout, the plant choices, and take-home tips for applying them in your own garden.
Weekend Garden Makeover: A Crash Course in Design for Beginners
Learn how to transform and design your own garden with Lee Burkhills crash course in garden design. Over 5 hours Lee will teach you how to design your own dream garden. Featuring practical design examples, planting ideas and video guides. Learn how to design your garden in one weekend!
Garden Design for Beginners: Create Your Dream Garden in Just 4 Weeks
Garden Design for Beginners Online Course: If you want to make the career jump to becoming a garden designer or to learn how to design your own garden, this is the beginner course for you. Join me, Lee Burkhill, an award-winning garden designer, as I train you in the art of beautiful garden design.
Winter pruning isn’t the dark art many gardeners believe it to be. It’s a systematic, logical process that makes perfect sense once you understand the principles behind it. Plants are remarkably resilient and forgiving of mistakes. Yes, you might remove too much in one year or prune slightly too early. The plant will recover. It’s rare to kill an established plant through pruning unless you completely ignore all guidance and remove everything down to ground level.
The best way to build confidence is to start small and work up to larger, more valuable plants. Practice on something relatively inexpensive before tackling that treasured antique rose or prize apple tree. Watch how plants respond to your pruning, learn from each season, and adjust your approach accordingly.
Over the years, I’ve realised that confident pruning comes from understanding why you’re making each cut rather than blindly following rules. When you grasp that winter pruning encourages vigorous growth, that outward-facing buds create open shapes, and that timing affects plant response, you stop worrying about every single cut and start seeing pruning as the powerful garden management tool it truly is.
Get out there this winter with your secateurs and have a go. Your plants will thank you for it with healthier growth, better flowers, and more abundant fruit. And if you make a mistake? You’ll learn something valuable for next year. That’s how we all became confident pruners, through practice and observation rather than perfect theory.
Lee Burkhill, known as the Garden Ninja, is an award-winning garden designer and horticulturist with over 30 years of gardening experience and 15 years as a professional garden designer. A qualified RHS (Royal Horticultural Society) professional, Lee specialises in sustainable garden design and practical horticultural advice. He designs and presents on BBC1’s Garden Rescue and in leading gardening publications. Lee combines three decades of hands-on gardening knowledge with professional design qualifications to help gardeners create beautiful, functional outdoor spaces.