-
How to Force Rhubarb: Your Complete Guide to Sweet, Tender Stems in Winter
 Lee Burkhill: Award Winning Designer & BBC 1's Garden Rescue Presenters Official Blog

December might seem like an odd time to be thinking about rhubarb, but trust me Ninjas, this is actually the perfect month to start forcing for those gorgeous, tender pink stems that’ll be ready to harvest in February and March. Whilst your neighbours are still staring at bare crowns in their vegetable patches, you’ll be pulling sweet, delicate rhubarb months before outdoor crops are ready!
Forcing rhubarb is one of those traditional gardening techniques that sounds complicated but is actually dead easy once you know how. It’s been used for centuries in Yorkshire’s famous rhubarb forcing triangle, where entire sheds full of rhubarb grow in complete darkness, and the stems grow so fast you can actually hear them creaking and popping! Whilst we might not have commercial forcing sheds at home, we can absolutely replicate the technique on a smaller scale.
I’m going to show you exactly how to force rhubarb using both outdoor and indoor methods, which varieties work best, and what to do with your harvest once you’ve got those beautiful pale pink stems. This is proper old school gardening knowledge that produces results you simply can’t buy in the shops.
So grab a brew, settle in, and let me walk you through everything you need to know about forcing rhubarb!
What is Forcing Rhubarb?
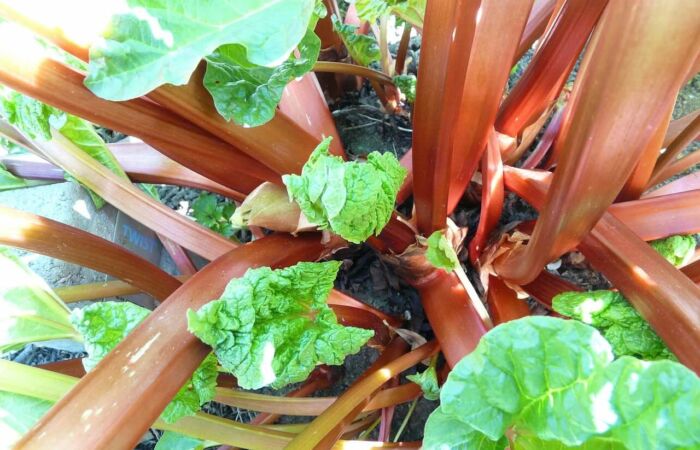
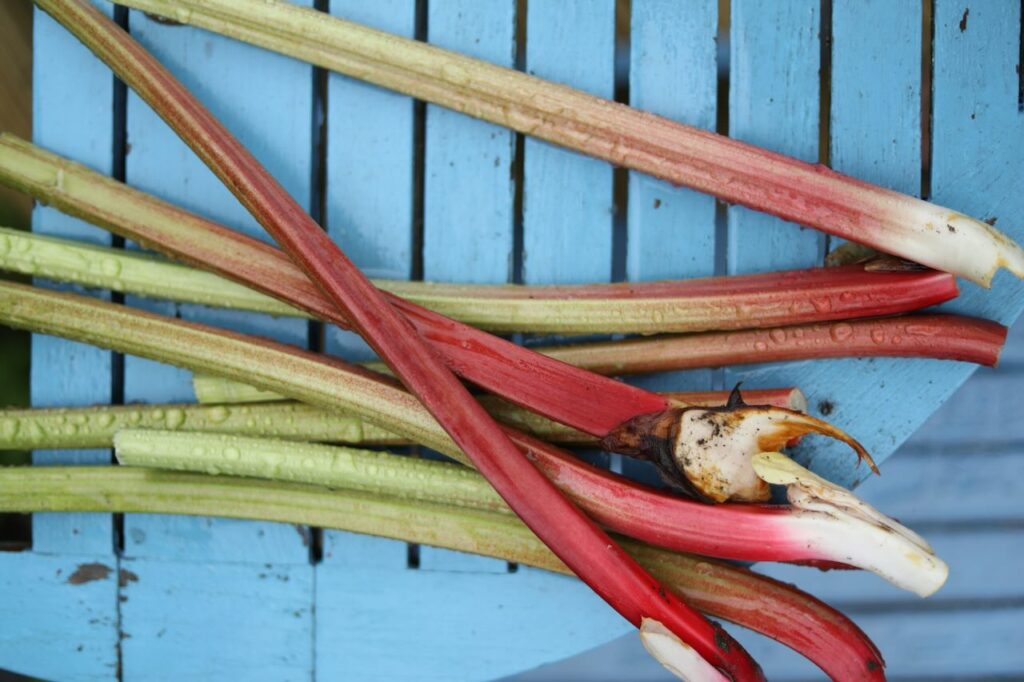
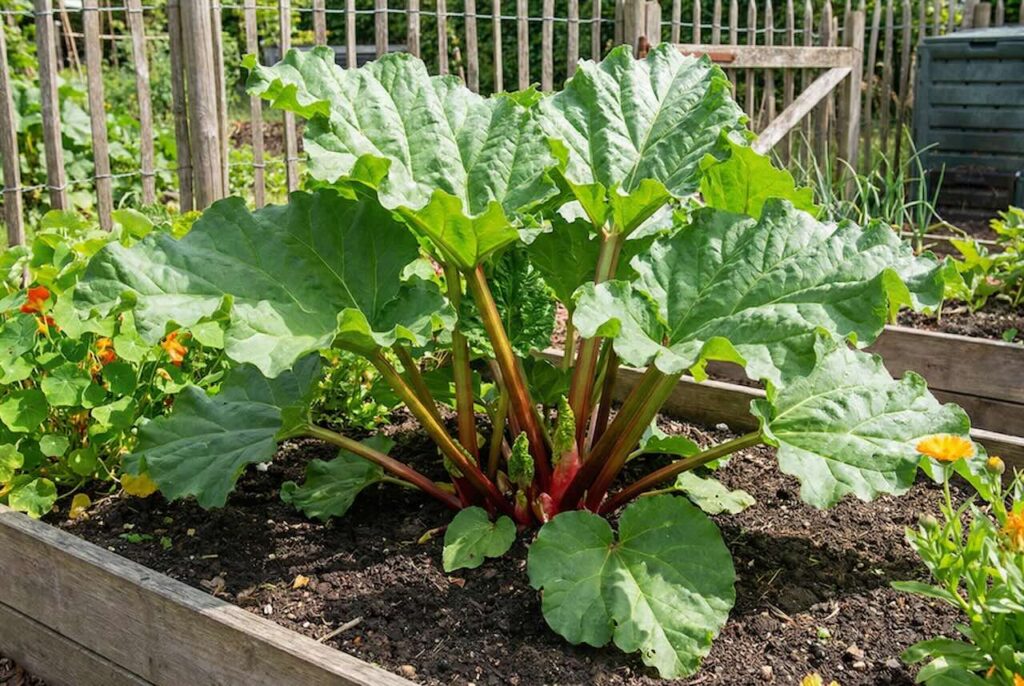
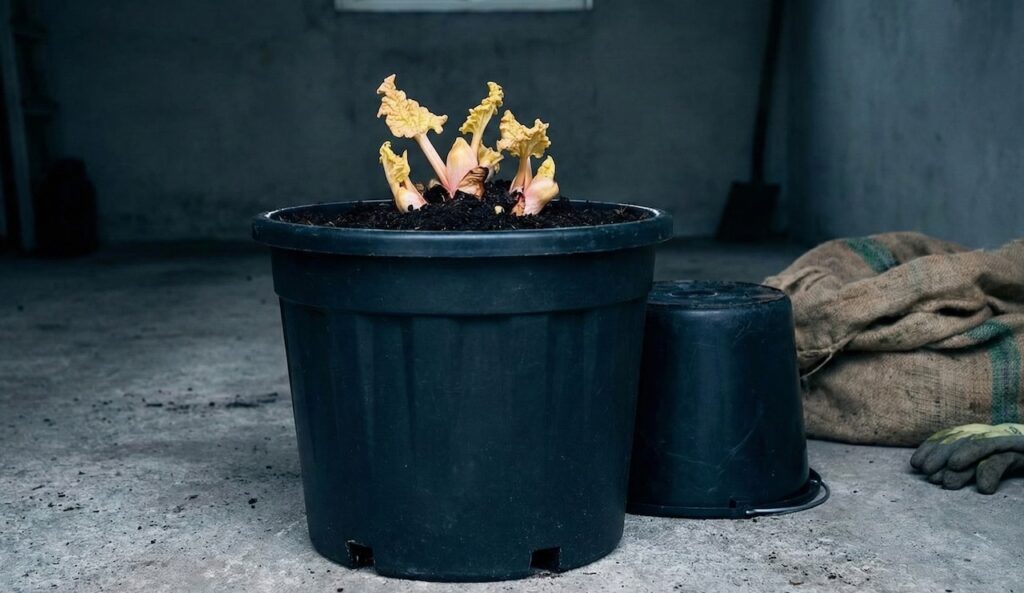
Forcing rhubarb means growing it in complete darkness with gentle warmth, producing stems that differ significantly from those grown outdoors. The lack of light prevents chlorophyll production, so instead of thick, dark red or green stems, you get pale pink to almost white stems with tiny yellow leaves.
More importantly, forcing produces stems that are far more tender, sweeter, and less acidic than outdoor rhubarb. The texture is delicate and melts in the mouth, whilst the flavour is refined rather than aggressively sour. It’s like comparing shop-bought tomatoes to home grown. They’re technically the same thing, but the quality is worlds apart!
Traditional forced rhubarb from Yorkshire’s forcing triangle is harvested by candlelight in pitch black sheds, with the stems growing so fast you can hear them. Whilst we can’t quite replicate commercial conditions at home, we can get pretty close, and the results are absolutely gorgeous.
Why Force Rhubarb? The Benefits Explained
i) Early Harvests When Fresh Fruit is Scarce
Forced rhubarb is ready 8 to 10 weeks before outdoor crops, giving you gorgeous stems in late winter when fresh fruit is scarce and eye-wateringly expensive in the shops. Imagine pulling your own tender rhubarb in February whilst your neighbours are still waiting for their crowns to wake up!
The timing is absolutely perfect too – forced rhubarb bridges that awkward gap between stored apples running out and early spring fruits appearing. You’re getting fresh, homegrown produce in the depths of winter, which is brilliant for morale as much as for eating.
ii) Superior Flavour and Texture
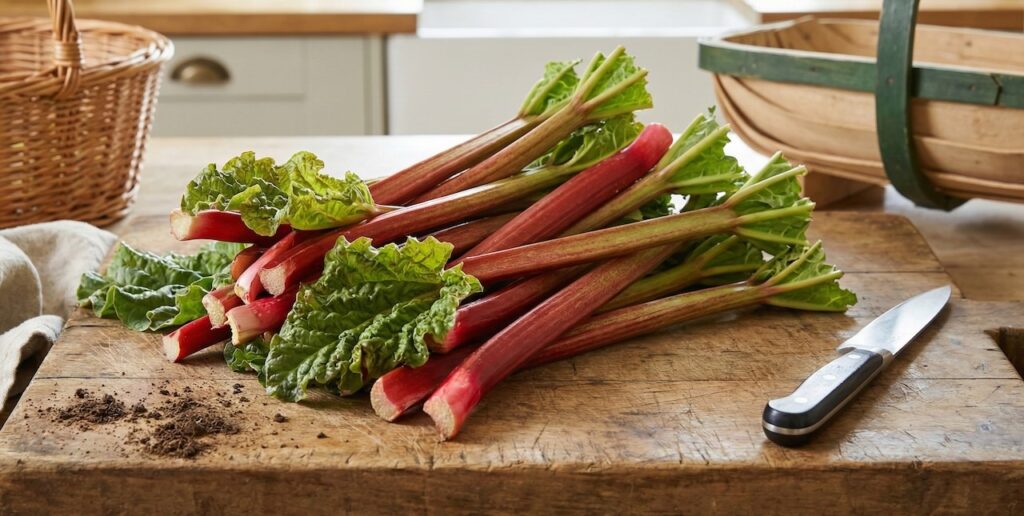
The lack of light and gentle warmth produces tender, sweet stems with far less oxalic acid (the stuff that makes rhubarb mouth puckeringly sour and makes your teeth feel fuzzy). Forced rhubarb rarely needs as much sugar as outdoor stems, meaning you can actually taste the rhubarb flavour rather than just sweetness.
The texture is also far more delicate. Outdoor rhubarb can be stringy and fibrous, especially later in the season, but forced rhubarb is tender throughout. It cooks in minutes rather than needing prolonged stewing, and the entire stem is usable with no tough, stringy bits to discard.
iii) Beautiful Appearance
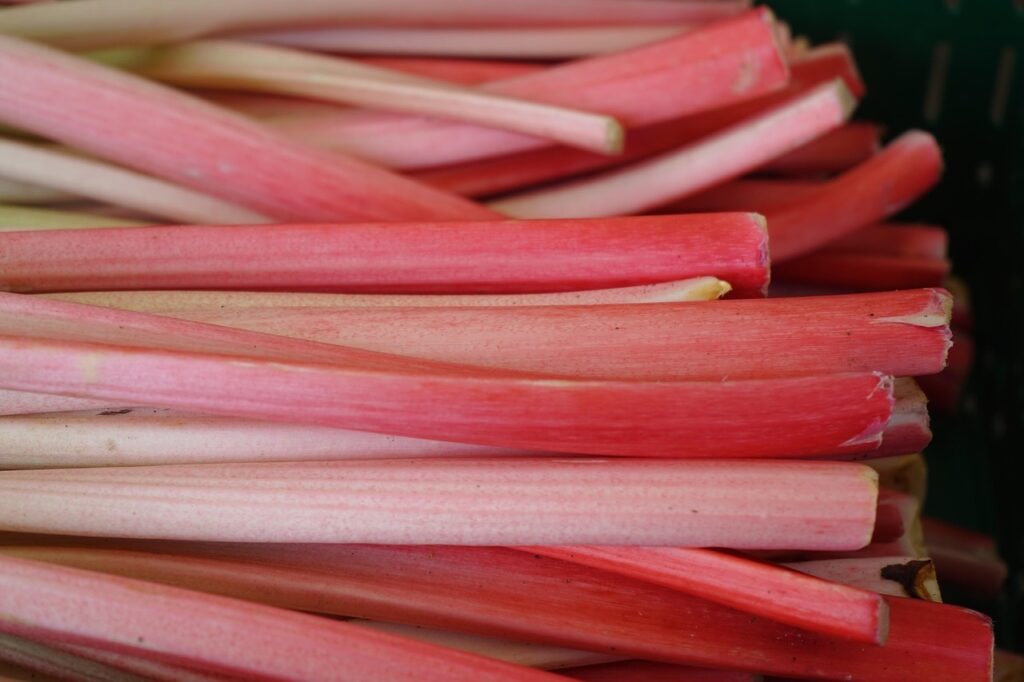
Forced stems are pale pink to almost white with small yellow leaves, creating a delicate appearance that looks absolutely stunning on the plate. They’re worlds apart from the thick, dark red outdoor stems, with a refined elegance that’s perfect for dinner parties or special desserts.
The pale colour also means forced rhubarb doesn’t stain everything pink the way outdoor rhubarb does. Your crumbles and fools will have delicate pink streaks rather than aggressive red splotches!
iv) Less Waste, More Usable Rhubarb
The entire stem of forced rhubarb is tender and usable from base to tip, whereas outdoor rhubarb often has tough, stringy sections that need cutting away. You get more edible rhubarb per stem when forcing, which makes up for the slightly smaller overall harvest compared to outdoor crops.
When to Start Forcing Rhubarb
December is the ideal month to start forcing rhubarb for February and March harvests. The crowns need to have experienced several hard frosts and be fully dormant before you start. If you try forcing too early (October or November), the crowns haven’t fully entered dormancy and won’t respond properly.
For outdoor forcing, you can start anytime from December through to late January. Starting in December gives you the earliest possible harvest (late January to early February), whilst January forcing produces stems in late February to March.
For indoor forcing, December is perfect because you can control the frost exposure precisely before bringing crowns inside.
Choosing the Right Rhubarb Crown
Not just any old rhubarb crown is suitable for forcing. You need well established crowns that are at least 3 years old, ideally 4 to 5 years. Young crowns simply don’t have the energy reserves to cope with forcing, and you risk killing them.
Look for crowns with multiple strong buds visible at the base – these will be the stems that grow during forcing. Crowns that have been producing well for several years are perfect. Don’t force crowns that look weak, diseased, or are already struggling.
It’s also crucial not to force the same crown year after year. Crowns need at least 2 years recovery time between forcing sessions, otherwise you’ll exhaust and kill them. If you want forced rhubarb every year, establish several crowns and rotate which ones you force.
Best Varieties for Forcing Rhubarb
Not all rhubarb varieties force well. Some are bred for outdoor growing and respond poorly to darkness and warmth. These three varieties are the absolute champions for forcing:
A) Timperley Early
The gold standard for forcing rhubarb. Timperley Early was specifically bred for forcing and produces reliable, tender stems even in less than ideal conditions. This variety is actually named after Timperley in Greater Manchester, not far from Garden Ninja HQ!
Timperley Early is incredibly vigorous and recovers well from forcing, making it more forgiving if you want to force the same crown again after a recovery period. If you only grow one forcing variety, make it this one. It’s bombproof, reliable, and produces excellent results for beginners.
B) Champagne
A modern forcing variety with beautiful, delicate pink stems and fantastic sweet flavour. The stems are slender and exceptionally tender, with that refined quality that makes forced rhubarb so special.
Champagne is slightly more demanding than Timperley Early and needs good growing conditions to build up the energy reserves for forcing. But the quality is sublime. Perfect for special occasion desserts where appearance matters as much as flavour.
C) Stockbridge Arrow
A traditional forcing variety that’s been grown commercially in Yorkshire’s forcing sheds for over a century. This is the variety you’re most likely eating if you buy forced rhubarb from shops.
Stockbridge Arrow produces long, straight stems with excellent colour and is bombproof reliable. It tolerates forcing year after year better than most varieties, though you should still give it recovery time between forcing sessions.
Other Varieties Worth Trying
‘Victoria’ forces reasonably well, though it’s better known as a general-purpose variety. ‘Hawke’s Champagne’ (different from plain ‘Champagne’) is also excellent for forcing.
Avoid forcing late-season varieties or very vigorous types – they’re bred for outdoor growing and don’t respond well to forcing conditions. Stick to varieties specifically mentioned as good for forcing.
How to Force Rhubarb Outdoors
Outdoor forcing is the traditional method and works brilliantly if you have established crowns in the garden. The advantage is you don’t need to lift crowns, so there’s no root disturbance and recovery is easier.
Step 1: Wait for Full Dormancy
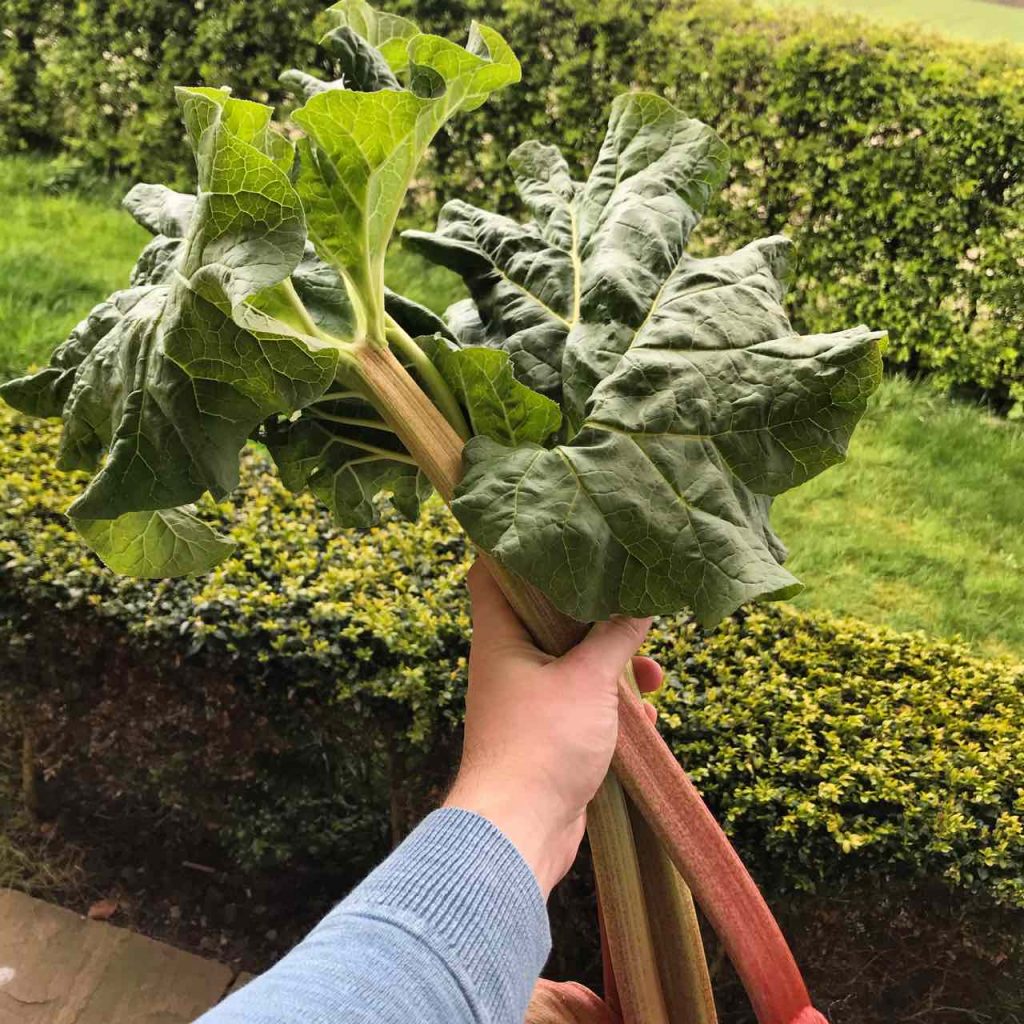
Don’t start forcing until the foliage has been completely blackened by frost and died back naturally. This usually happens by late November or early December. If you cut down foliage earlier or start forcing before the crown is fully dormant, you’ll get poor results.
The crown needs those weeks after foliage dies back to finish storing nutrients for winter. Rushing the process reduces your harvest quality and quantity.
Step 2: Clear Away Dead Foliage
Once frost has completely blackened the foliage, clear away all the slimy, dead leaves and any debris around the crown. This prevents disease problems that can develop in the dark, damp conditions under your forcing container.
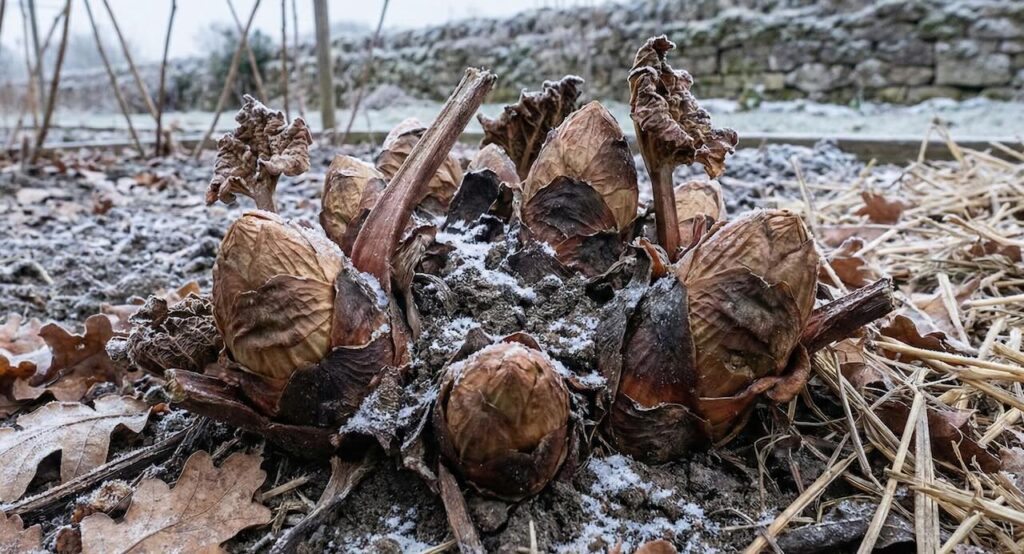
Check for any signs of disease or damage whilst you’re clearing up. Crowns with rot, fungal issues, or damage are best left unforced – they’re more likely to fail and potentially die during forcing.
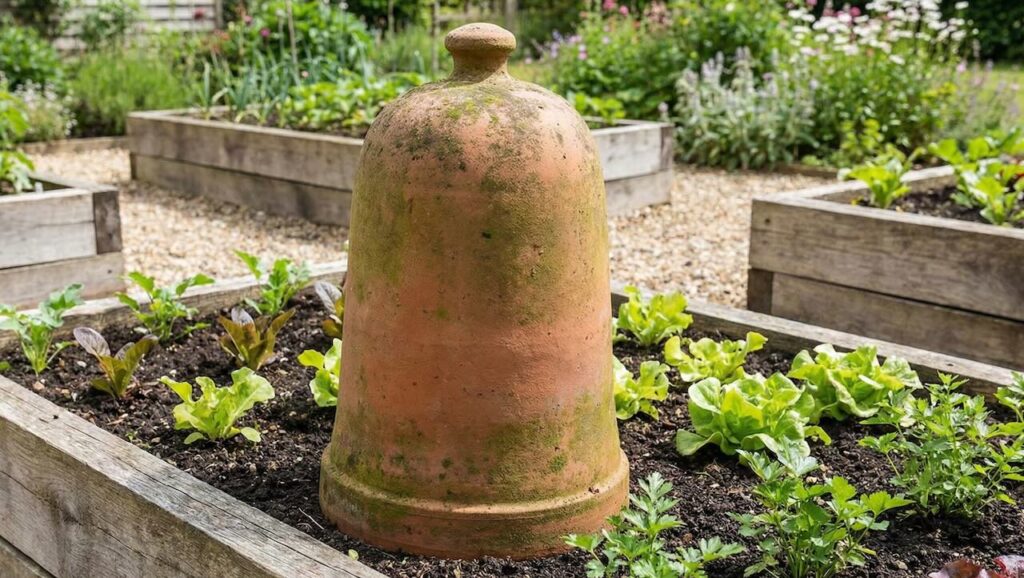
Step 3: Choose Your Forcing Container
You need something to cover the crown and exclude all light. Options include:
Traditional rhubarb forcers – These gorgeous terracotta pots with removable lids are absolutely beautiful and work brilliantly. They’re expensive (£40 to £100+) but last forever and look stunning in the garden. The removable lid lets you check progress without disturbing the crown.
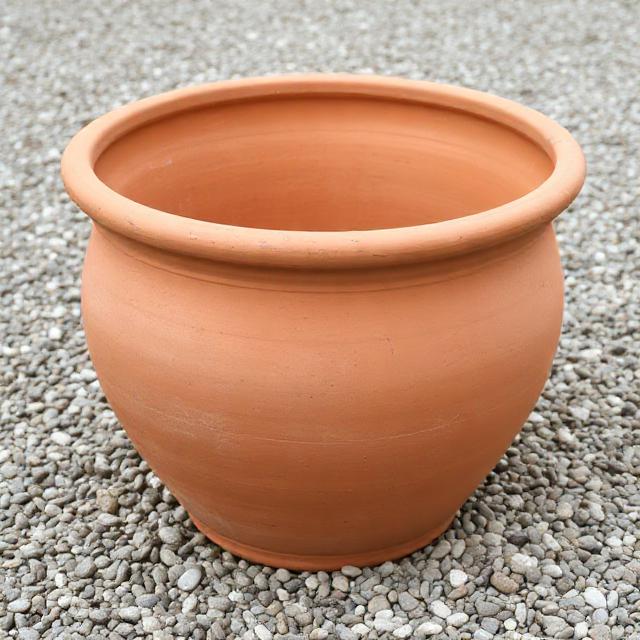
Large plastic pots – A cheap and effective alternative. Use pots at least 30cm diameter, ideally 40cm+. Block up any drainage holes with tape so light doesn’t get in. Black pots work better than coloured ones as they absorb more warmth from winter sun.
Buckets or bins – Old buckets, plastic storage bins, or even sturdy cardboard boxes wrapped in black plastic all work fine. The key is total darkness and some insulation. Whatever you use needs to be stable and secure against December gales.
Straw bales – Traditional Yorkshire method involves building a box of straw bales around the crown with boards on top to exclude light. This provides excellent insulation but uses a lot of straw!
Step 4: Cover the Crown
Place your chosen container over the cleared crown, ensuring it excludes all light. Weight it down or secure it so winter winds don’t blow it across the garden! Bricks on top of buckets work well, or stake traditional forcers into the ground.
If light gets in around the edges, pack straw, old compost bags, or bubble wrap around the base to seal gaps. Even small amounts of light will green up the stems and make them tough.
Step 5: Add Heat for Earlier Crops (Optional)
If you want stems even earlier (potentially by late January), heap fresh horse manure, grass clippings, or autumn leaves around the outside of your container in a 15 to 20cm thick layer.
The decomposition produces gentle warmth that encourages faster growth without cooking the crown. This technique can bring your harvest forward by 2 to 3 weeks. Don’t heap material directly on top of the container – you want warmth around the sides.
Step 6: Wait and Check Progress
Start checking after 6 weeks if you’ve added heat, or 8 to 10 weeks for unheated forcing. Traditional forcers with removable lids make checking easy – just lift the lid carefully and peek inside. With buckets or pots, you’ll need to lift the whole thing, trying not to let in too much light.
The excitement of checking progress is half the fun! You’re looking for stems that are 25 to 40cm long with small, yellow leaves. Don’t worry if the first check shows nothing – just re-cover and check again in a week or two.
Step 7: Harvesting Forced Rhubarb
When stems are 25 to 40cm long with small, yellow leaves, they’re ready to harvest. Pull stems gently but firmly at the base with a twisting motion rather than cutting them. Cutting can introduce disease, whilst pulling cleanly removes the entire stem.
You can take all stems at once for a big harvest, or pick the largest ones first and leave smaller stems to grow on for a second harvest a week or two later. Once stems become thin and weak, stop harvesting – the crown is exhausted and needs to recover.
Step 8: Crown Recovery
After forcing, remove the cover in April once you’ve finished harvesting and allow the plant to grow naturally for the rest of the year. Feed it well with a good barrowload of compost or well rotted manure in spring to help rebuild energy reserves.
Let the crown grow unchecked all summer and autumn. Don’t harvest any outdoor stems – the plant needs every bit of energy to recover. Don’t force the same crown two years running or you’ll exhaust and potentially kill it. The crown needs a full year, ideally two years, to rebuild before forcing again.
How to Force Rhubarb Indoors
Indoor forcing is prefered by some because you can control conditions precisely, protect crowns from harsh weather, and monitor progress easily. The results are often superior to outdoor forcing, with even more tender, sweeter stems but you do need to be far more organised and competent as a gardener, so you do’t accidentally kill off your rhubarb crowns by forgetting about them! So follow this guide with care!
Step 1: Lift Crowns After Frost
In late November or early December, lift entire crowns from the garden using a fork, working carefully around the roots to minimize damage. Start digging about 30cm away from the crown and work inwards. You want as much root as possible.
Don’t worry if some roots break – rhubarb is tough and will cope. Choose crowns that are at least 3 to 4 years old with multiple strong buds visible. Avoid lifting crowns in waterlogged conditions as the roots are more brittle when wet.
Step 2: The Crucial Frost Exposure
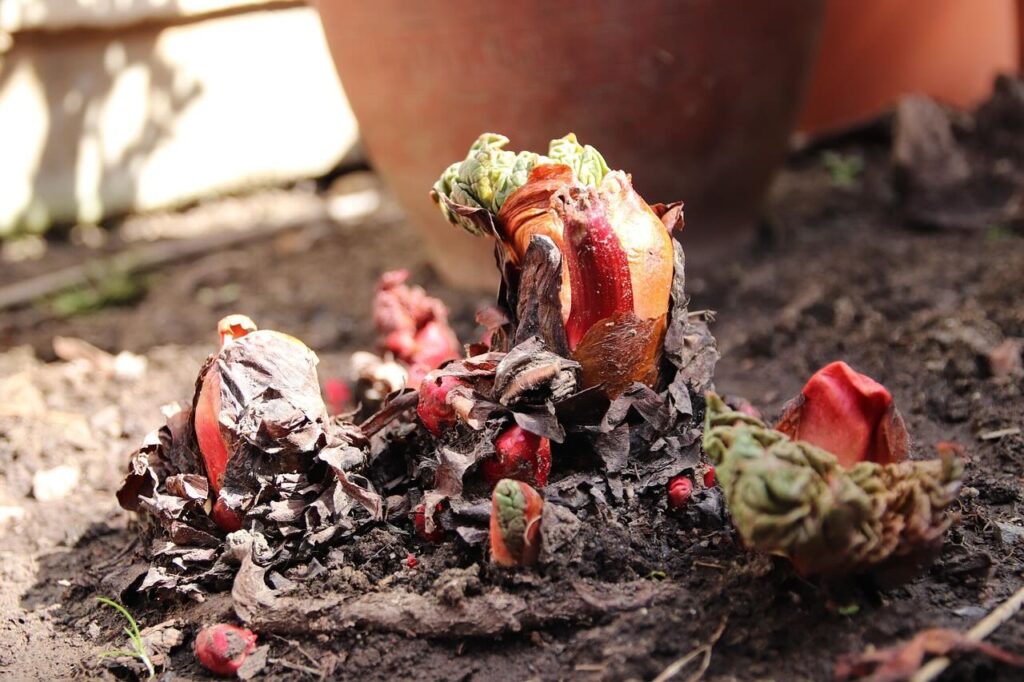
This is the secret to successful indoor forcing! Leave lifted crowns on the soil surface, completely exposed to frost and cold for at least one week, ideally two weeks. Don’t brush off soil or tidy them up just leave them lying there getting frosted.
This cold period (called vernalization) signals to crowns that winter has passed and spring is coming, triggering growth when you bring them into warmth. Without this cold treatment, crowns won’t force properly. They need temperatures below 5°C for at least a week, ideally with several frosty nights.
If we have a mild spell during December, you might need to leave crowns out longer to accumulate enough cold hours. Very cold weather (below minus 5°C) for extended periods can damage crowns, so if we get a really harsh cold snap, protect them with fleece temporarily.
Step 3: Pot Up Crowns
After adequate frost exposure, pot up crowns in large containers. Use pots at least 30cm in diameter; bigger is better. 40cm+ is ideal for large crowns. Plastic pots are fine and easier to move than heavy terracotta.
Use multipurpose compost, a mix of garden soil and compost, or even just good garden soil. Rhubarb isn’t fussy about compost quality – it’s vigorous enough to grow in almost anything. Plant crowns with the buds just at or slightly above the compost surface. Too deep and growth is delayed; too shallow and roots dry out.
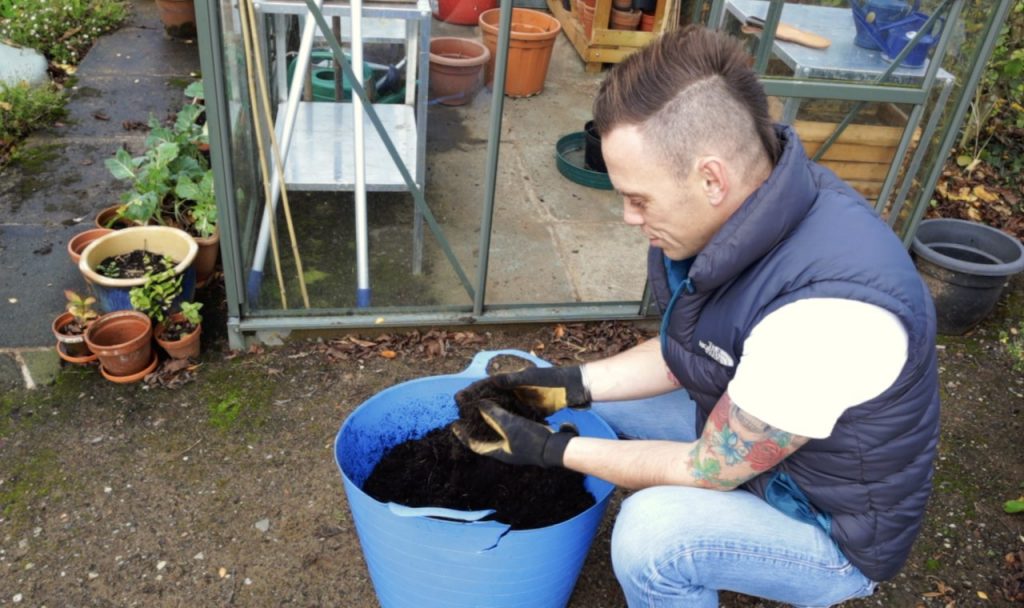
Water them in thoroughly so compost is evenly moist throughout the pot. You want it like a wrung out sponge – moist but not waterlogged. Good drainage is important as waterlogged crowns can rot.
Step 4: Find the Perfect Forcing Location
Place potted crowns somewhere dark and frost-free with temperatures between 10 and 15 15°C. The ideal temperature is around 13°C – this produces the best quality stems at a good pace.
Perfect forcing locations include:
Underneath greenhouse staging – The dark area beneath slatted benches is ideal. It’s frost free, naturally around 10 to 15°C in winter, and completely dark.
Dark garage or shed – Even unheated garages usually stay frost free in winter. If you have a garage with windows, block them with black plastic or cardboard. Sheds need to be insulated enough to stay frost free.
Under the stairs – If you have an understairs cupboard with access, this can work brilliantly. The ambient house temperature is perfect and it’s naturally dark.
Blacked out room – Spare room, utility room, or even a bathroom you don’t use much. Tape black plastic over windows to exclude all light.
Cellar – If you’re lucky enough to have a cellar, it’s perfect for forcing. Cool, dark, and stable temperatures.
Avoid heated houses – Normal living spaces are too warm (typically 18 to 22°C) and stems will be weak, spindly, and pale. You want cool, not warm.
Step 5: Maintain Perfect Conditions
Keep compost moist but not soggy throughout the forcing period. Check every week or so – stick your finger into the compost to feel if it’s drying out. Water sparingly if needed. Waterlogged compost causes rot, but bone dry compost stresses the crown and reduces harvest.
Total darkness is crucial for producing those gorgeous pale pink stems. Even small amounts of light will green up the stems and make them tough. Minimize inspections – resist the temptation to keep checking progress as every time you open the door or lift covers, light gets in.
If you must check progress, use a torch with red or green light (like head torches have), as rhubarb doesn’t respond to these wavelengths the way it does to white light. Or check in dim light for just a few seconds.
Temperature is critical for good results:
- Too cold (below 10°C) and growth is painfully slow, taking 12+ weeks
- Just right (10 to 15°C) and growth is steady, taking 6 to 8 weeks
- Too warm (above 15°C) and stems are weak, spindly, and pale, often collapsing
Step 6: Check Progress and Harvest
After 6 to 8 weeks, check progress carefully. You’re looking for stems that are 30 to 40cm long, crowded together, and looking substantial. The leaves will be small and yellow. If stems are still short (under 20cm), re-cover and check again in a week.
Pull stems gently at the base with a twisting motion. Don’t cut them. You can take all stems at once for convenience, or harvest the largest ones first and leave smaller stems to grow on for another week or two.
Once you’ve taken 2 or 3 harvests or stems are becoming thin and weak, the crown is exhausted. Stop harvesting and deal with the spent crown.
Step 7: What to Do With Exhausted Crowns
After forcing is finished, you have two options:
Plant back in the garden – Cut off any remaining stems and leaves cleanly. Plant the crown back in the garden or give it to a friend who can pamper it. Feed it well with compost and let it recover naturally. Don’t harvest from it for at least 2 years – it needs this recovery time to rebuild energy reserves.
Compost it – Many gardeners just compost exhausted crowns and start fresh with new ones next year. The recovery time is so long that it’s often easier to establish new crowns than nurse exhausted ones back to health.
The beauty of indoor forcing is you can force multiple crowns in succession, potting up a new one every 2 to 3 weeks for continuous supplies from January through March!
Troubleshooting Forced Rhubarb
Stems Are Green Not Pink
Light is getting in. Check your covering for gaps or cracks letting in light. Even small amounts will cause greening. Make sure your forcing location is completely dark – even LED standby lights or light under doors can affect results.
Stems Are Thin and Weak
Temperature is too high. Forced rhubarb growing above 15°C produces spindly, weak stems that often collapse. Move to a cooler location if possible. Alternatively, the crown wasn’t established enough before forcing.
Nothing is Growing After 8 Weeks
Insufficient cold period. The crown didn’t get enough frost exposure before forcing started. It needs at least a week below 5°C, ideally with frosty nights. Try moving outdoor, giving it more cold, then trying again.
Alternatively, the crown is too young or weak. Crowns under 3 years old or those that have been recently forced don’t have the energy reserves to produce stems.
Stems Are Rotting
Too much moisture. Reduce watering and ensure compost isn’t waterlogged. Good drainage is essential. Check your forcing container isn’t sitting in water or has blocked drainage.
Very Slow Growth
Temperature too low. Below 10°C, growth is very slow. Find a slightly warmer location or add insulation around containers. Alternatively, the crown is exhausted or too small.
Summary
Forcing rhubarb is one of those brilliant traditional techniques that produces results you can’t buy in shops. Those gorgeous, tender pink stems in February are worth every bit of effort, and once you’ve tasted properly forced rhubarb, outdoor stems will seem coarse by comparison!
Whether you choose outdoor forcing with a bucket and some manure, or indoor forcing in pots under the greenhouse staging, the technique is surprisingly straightforward. The key points are: established crowns (3+ years old), adequate frost exposure, total darkness, and gentle warmth (10 to 15°C).
Remember to let forced crowns recover for at least 2 years before forcing again, or establish multiple crowns and rotate which ones you force. This way, you can have forced rhubarb every winter without exhausting your plants.
Get out there and give forcing a go this December, Ninjas. Your February self will thank you when you’re pulling sweet, tender rhubarb whilst everyone else is still waiting for spring!
Happy forcing!


Lee Burkhill
Lee Burkhill, known as the Garden Ninja, is an award-winning garden designer and horticulturist with over 30 years of gardening experience and 15 years as a professional garden designer. A qualified RHS (Royal Horticultural Society) professional, Lee specialises in sustainable garden design and practical horticultural advice. He designs and presents on BBC1’s Garden Rescue and in leading gardening publications. Lee combines three decades of hands-on gardening knowledge with professional design qualifications to help gardeners create beautiful, functional outdoor spaces.
View all posts by Lee Burkhill


Categories
Other posts
-

Start here: to begin your gardening journey! Read more
-
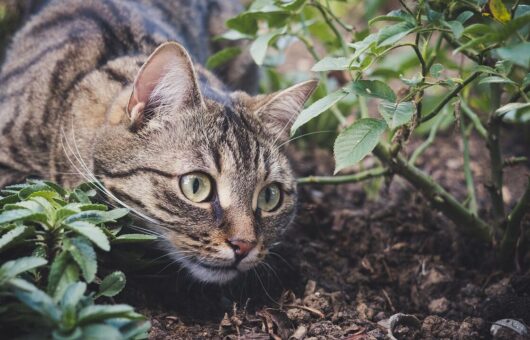
How to keep cats out of your garden: expert gardener shares tips Read more
-
How to cut, prune & trim hedges: the ultimate beginner guide Read more
-
Edimentals: Beautiful Plants You Can Actually Eat Read more
-
How to get rid of fungus gnats & sciarid flies from house plants Read more
-
What Are Poinsettias and How to Care for Them: The Complete Guide Read more